HP Designjet 4500 HP Designjet 4500 Printer Series - Setup Poster - Page 12
connection to computers. - printhead
 |
View all HP Designjet 4500 manuals
Add to My Manuals
Save this manual to your list of manuals |
Page 12 highlights
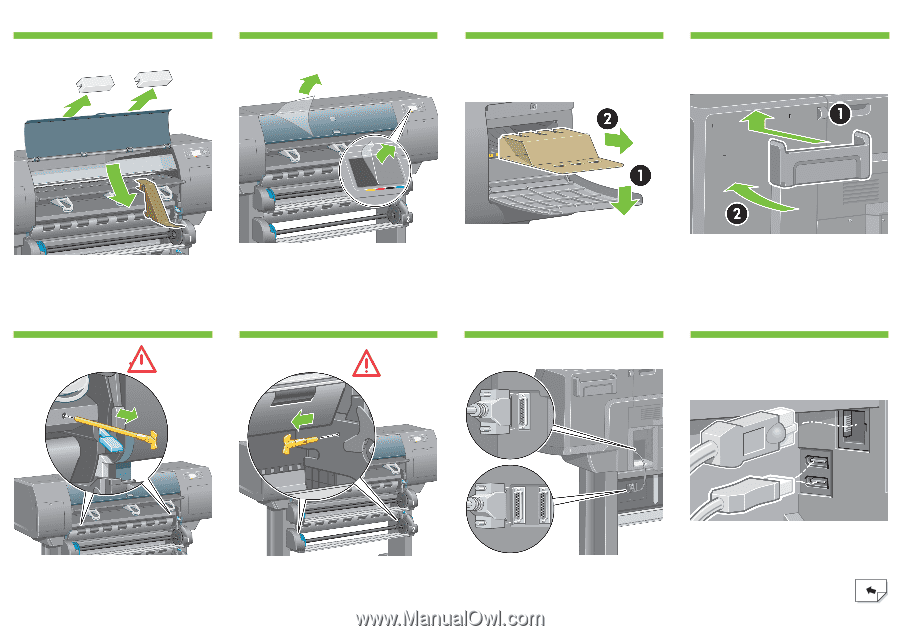
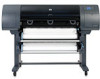
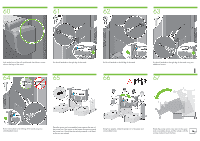
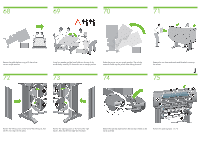
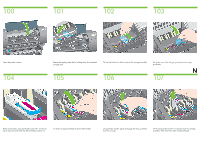
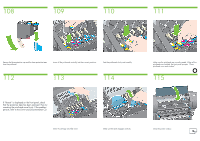
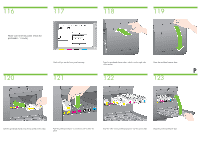
76 77 78 79 Open the printer window. Then remove the two window inserts and the ink tube packing material. 80 Beware, you must remove this plastic screw. Remove the protective covering from the printer window and the front panel screen. Open the printhead cleaner door and remove the carriage packing material. Then close the cleaner door. 81 Beware, you must remove this plastic screw. 82 Install the Quick Reference Guide holder. Angle the holder at the top (1), then position the two hooks and clip the lower part (2) to the rear of the printer. K 83 Remove the two yellow plastic screws from the right and left side of the paper feed. Remove the two yellow plastic screws from the left and right side of Drawer 2. Using the cable supplied, connect the roll module to the printer. A Fast Ethernet socket is provided for connection to a network. Two FireWire sockets are provided for direct connection to computers.
-
 1
1 -
2
-
3
-
4
-
5
-
6
-
 7
7 -
 8
8 -
 9
9 -
 10
10 -
 11
11 -
 12
12 -
 13
13 -
 14
14 -
 15
15 -
 16
16 -
 17
17 -
18
-
19
-
20
-
21
-
22
-
23
-
24
-
25
-
26
-
27
 |
 |