HP Designjet 4500 HP Designjet 4500 Printer Series - Setup Poster - Page 7
You now need to identify the left and right of the printer.
 |
View all HP Designjet 4500 manuals
Add to My Manuals
Save this manual to your list of manuals |
Page 7 highlights
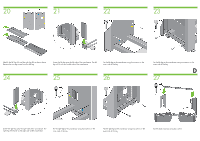
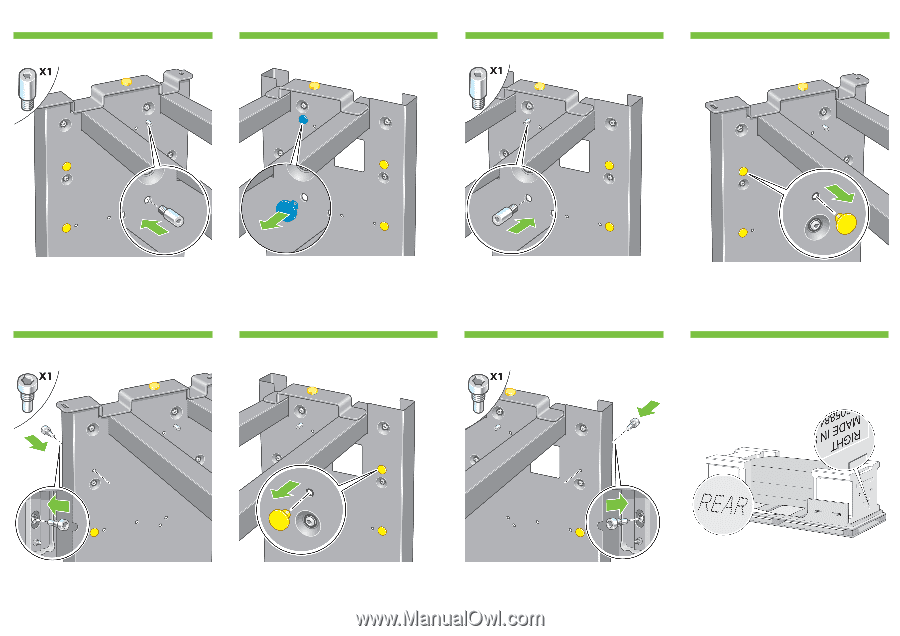
36 37 38 39 Locate the pin into the left leg. 40 Remove the blue plug on the right leg. 41 Locate the pin into the right leg. 42 Remove the top yellow plug on the left leg. F 43 Locate the pin into the interior of the left leg. Remove the top yellow plug on the right leg. Locate the pin into the interior of the right leg. You now need to identify the left and right of the printer. This information is shown on the foam end packs. Also identify the rear of the printer.
-
 1
1 -
 2
2 -
 3
3 -
 4
4 -
 5
5 -
 6
6 -
 7
7 -
 8
8 -
 9
9 -
 10
10 -
 11
11 -
 12
12 -
13
-
14
-
15
-
16
-
17
-
18
-
19
-
20
-
21
-
22
-
23
-
24
-
25
-
26
-
27
 |
 |
F
Remove the blue plug on the right leg.
Locate the pin into the right leg.
Remove the top yellow plug on the left leg.
Locate the pin into the interior of the left leg.
Remove the top yellow plug on the right leg.
Locate the pin into the interior of the right leg.
You now need to identify the left and right of the printer. This
information is shown on the foam end packs. Also identify
the rear of the printer.
Locate the pin into the left leg.
37
36
38
39
41
40
42
43