HP DeskJet Ink Advantage 2600 User Guide - Page 85
Clear a print carriage jam, Read general instructions in the Help for clearing a print carriage jams
 |
View all HP DeskJet Ink Advantage 2600 manuals
Add to My Manuals
Save this manual to your list of manuals |
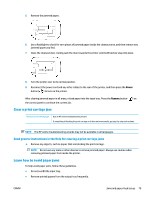
Page 85 highlights
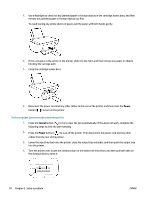
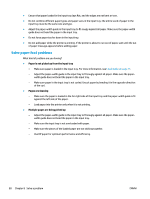
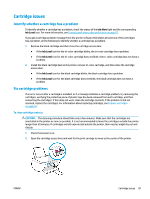
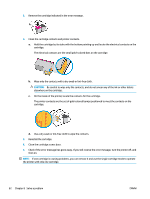
5. Remove the jammed paper. 6. Use a flashlight to check for torn pieces of jammed paper inside the cleanout area, and then remove any jammed paper you find. 7. Close the cleanout door. Gently push the door towards the printer until both latches snap into place. 8. Turn the printer over to its normal position. 9. Reconnect the power cord and any other cables to the rear of the printer, and then press the Power button ( ) to turn on the printer. After clearing jammed paper in all areas, reload paper into the input tray. Press the Resume button ( ) on the control panel to continue the current job. Clear a print carriage jam Resolve a print carriage jam. Use an HP online troubleshooting wizard. If something is blocking the print carriage or it does not move easily, get step-by-step instructions. NOTE: The HP online troubleshooting wizards may not be available in all languages. Read general instructions in the Help for clearing a print carriage jams ▲ Remove any objects, such as paper, that are blocking the print carriage. NOTE: Do not use any tools or other devices to remove jammed paper. Always use caution when removing jammed paper from inside the printer. Learn how to avoid paper jams To help avoid paper jams, follow these guidelines. ● Do not overfill the input tray. ● Remove printed papers from the output tray frequently. ENWW Jams and paper-feed issues 79
-
 1
1 -
2
-
3
-
4
-
5
-
6
-
7
-
8
-
9
-
10
-
11
-
12
-
13
-
14
-
15
-
16
-
17
-
18
-
19
-
20
-
21
-
22
-
23
-
24
-
25
-
26
-
27
-
28
-
29
-
30
-
31
-
32
-
33
-
34
-
35
-
36
-
37
-
38
-
39
-
40
-
41
-
42
-
43
-
44
-
45
-
46
-
47
-
48
-
49
-
50
-
51
-
52
-
53
-
54
-
55
-
56
-
57
-
58
-
59
-
60
-
61
-
62
-
63
-
64
-
65
-
66
-
67
-
68
-
69
-
70
-
71
-
72
-
73
-
74
-
75
-
76
-
77
-
78
-
79
-
 80
80 -
 81
81 -
 82
82 -
 83
83 -
 84
84 -
 85
85 -
 86
86 -
 87
87 -
 88
88 -
 89
89 -
 90
90 -
91
-
92
-
93
-
94
-
95
-
96
-
97
-
98
-
99
-
100
-
101
-
102
-
103
-
104
-
105
-
106
-
107
-
108
-
109
-
110
-
111
-
112
-
113
-
114
-
115
-
116
-
117
-
118
-
119
-
120
-
121
-
122
-
123
-
124
-
125
-
126
-
127
-
128
 |
 |
