HP Deskjet 320 User Guide - Page 17
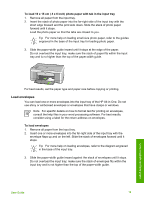
Load 10 x 15 cm (4 x 6 inch) photo paper, or HP Premium Photo Paper with tab.
 |
View all HP Deskjet 320 manuals
Add to My Manuals
Save this manual to your list of manuals |
Page 17 highlights
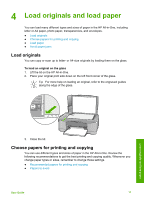
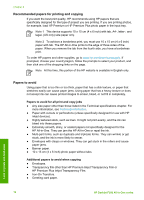
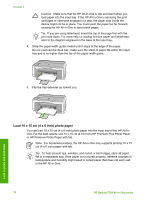
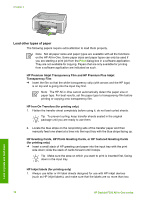
Chapter 4 Caution Make sure that the HP All-in-One is idle and silent when you load paper into the input tray. If the HP All-in-One is servicing the print cartridges or otherwise engaged in a task, the paper stop inside the device might not be in place. You could push the paper too far forward, causing the HP All-in-One to eject blank pages. Tip If you are using letterhead, insert the top of the page first with the print side down. For more help on loading full-size paper and letterhead, refer to the diagram engraved in the base of the input tray. 4. Slide the paper-width guide inward until it stops at the edge of the paper. Do not overload the input tray; make sure the stack of paper fits within the input tray and is no higher than the top of the paper-width guide. 5. Flip the tray extender up toward you. Load originals and load paper Load 10 x 15 cm (4 x 6 inch) photo paper You can load 10 x 15 cm (4 x 6 inch) photo paper into the input tray of the HP All-inOne. For the best results, use 10 x 15 cm (4 x 6 inch) HP Premium Plus Photo Paper or HP Premium Photo Paper with tab. Note For borderless printing, the HP All-in-One only supports printing 10 x 15 cm (4 x 6 inch) paper with tab. Tip To help prevent rips, wrinkles, and curled or bent edges, store all paper flat in a resealable bag. If the paper is not stored properly, extreme changes in temperature and humidity might result in curled paper that does not work well in the HP All-in-One. 14 HP Deskjet F300 All-in-One series
-
 1
1 -
2
-
3
-
4
-
5
-
6
-
7
-
8
-
9
-
10
-
11
-
 12
12 -
 13
13 -
 14
14 -
 15
15 -
 16
16 -
 17
17 -
 18
18 -
 19
19 -
 20
20 -
 21
21 -
 22
22 -
23
-
24
-
25
-
26
-
27
-
28
-
29
-
30
-
31
-
32
-
33
-
34
-
35
-
36
-
37
-
38
-
39
-
40
-
41
-
42
-
43
-
44
-
45
-
46
-
47
-
48
-
49
-
50
-
51
-
52
-
53
-
54
-
55
-
56
-
57
-
58
-
59
-
60
-
61
-
62
-
63
-
64
-
65
-
66
-
67
-
68
-
69
 |
 |