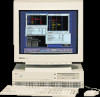
HP Model 715/100 hp 9000 series 700 model 715 workstations service handbook (a - Page 49
Configuring the CRX Graphics Options
 |
View all HP Model 715/100 manuals
Add to My Manuals
Save this manual to your list of manuals |
Page 49 highlights
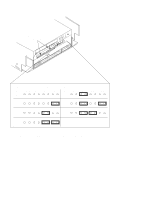
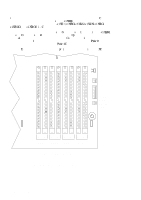
Configuring the CRX Graphics Options This section describes how to configure the system to use the CRX graphics options (if installed). For information about HCRX graphics, refer to the HP A4070A/A4071A/A4072A CE Handbook (A4070-90099). If you update or reinstall HP-UX, and after a few minutes, there is no output on the monitor, use the following procedures to configure the workstation: 1. Power off the workstation. 2. Connect the monitor to the built-in graphics connector as shown in Chapter 1 of this manual. 3. For Model 715/C, 715/33, 715/50, and 715/75 workstations, check the workstation's graphics configuration switches, as shown earlier in this chapter, to make sure the graphics switches are set correctly for the monitor. 4. Power on the monitor and the workstation. 5. Immediately after you power on the workstation, press the TOC switch on the right side of the system unit. (See Chapter 1 of this manual for the TOC switch location.) 6. If you are setting up a single monitor system, follow the steps in the next subsection. If you are setting up a dual monitor system, go to the subsection "Setting Up a Dual Monitor System" for further configuration instructions. Setting Up a Single Monitor System This subsection describes how to set up the workstation to use only the CRX graphics. NOTICES: Only the 20-inch color monitors are supported on the CRX graphics adapters. The built-in graphics adapter can use any of the supported monitors. 1. Log in as root. 2. Enter the following command line to create a device file to support the CRX graphics: /etc/mknod /dev/crt24 c 12 0x100000 Return 3-18 Configuration
-
 1
1 -
2
-
3
-
4
-
5
-
6
-
7
-
8
-
9
-
10
-
11
-
12
-
13
-
14
-
15
-
16
-
17
-
18
-
19
-
20
-
21
-
22
-
23
-
24
-
25
-
26
-
27
-
28
-
29
-
30
-
31
-
32
-
33
-
34
-
35
-
36
-
37
-
38
-
39
-
40
-
41
-
42
-
43
-
 44
44 -
 45
45 -
 46
46 -
 47
47 -
 48
48 -
 49
49 -
 50
50 -
 51
51 -
 52
52 -
 53
53 -
 54
54 -
55
-
56
-
57
-
58
-
59
-
60
-
61
-
62
-
63
-
64
-
65
-
66
-
67
-
68
-
69
-
70
-
71
-
72
-
73
-
74
-
75
-
76
-
77
-
78
-
79
-
80
-
81
-
82
-
83
-
84
-
85
-
86
-
87
-
88
-
89
-
90
-
91
-
92
-
93
-
94
-
95
-
96
-
97
-
98
-
99
-
100
-
101
-
102
-
103
-
104
-
105
-
106
-
107
-
108
-
109
-
110
-
111
-
112
-
113
-
114
-
115
-
116
-
117
-
118
-
119
-
120
-
121
-
122
-
123
-
124
-
125
-
126
-
127
-
128
-
129
-
130
-
131
-
132
-
133
-
134
-
135
-
136
-
137
-
138
-
139
-
140
-
141
-
142
-
143
-
144
-
145
-
146
-
147
-
148
-
149
-
150
 |
 |
