HP Model 715/100 hp 9000 series 700 model 715 workstations service handbook (a - Page 54
connector on the rear of the workstation, as shown in For Model
 |
View all HP Model 715/100 manuals
Add to My Manuals
Save this manual to your list of manuals |
Page 54 highlights
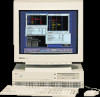
The workstation is now searching for devices that may hold file systems from which it can boot HP-UX. As they are found, they appear in a list similar to the following example: Device Selection Device Path Device Type P0 scsi.6.0 QUANTUM LPS525s P1 scsi.5.0 QUANTUM LPS525s P2 scsi.2.0 TOSHIBA CD-ROM DRIVE:XM 14. The following list of actions appears: b) Boot from specified device s) Search for bootable devices a) Enter boot administration mode x) Exit and continue boot sequence ?) Help Select from menu: Press a Return The following prompt appears: BOOT_ADMIN> 15. Set the default console to the CRX graphics option by entering the following command line: BOOT_ADMIN> path console graphics_2 Return 16. Enter the following command: BOOT_ADMIN> exit Return 17. Power off the workstation and the monitor. 18. Connect the color monitor to the CRX graphics connector as shown in Chapter 1 of this manual. Connect the second monitor to the built-in graphics connector on the rear of the workstation, as shown in Chapter 1. For Model 715/C, 715/33, 715/50, and 715/75 workstations, check the workstation's graphics configuration switches, as shown in earlier in this chapter, to make sure the graphics switches are set correctly for the second monitor. 19. Power on the monitors and the workstation. Configuration 3-23
-
 1
1 -
2
-
3
-
4
-
5
-
6
-
7
-
8
-
9
-
10
-
11
-
12
-
13
-
14
-
15
-
16
-
17
-
18
-
19
-
20
-
21
-
22
-
23
-
24
-
25
-
26
-
27
-
28
-
29
-
30
-
31
-
32
-
33
-
34
-
35
-
36
-
37
-
38
-
39
-
40
-
41
-
42
-
43
-
44
-
45
-
46
-
47
-
48
-
 49
49 -
 50
50 -
 51
51 -
 52
52 -
 53
53 -
 54
54 -
 55
55 -
 56
56 -
 57
57 -
 58
58 -
 59
59 -
60
-
61
-
62
-
63
-
64
-
65
-
66
-
67
-
68
-
69
-
70
-
71
-
72
-
73
-
74
-
75
-
76
-
77
-
78
-
79
-
80
-
81
-
82
-
83
-
84
-
85
-
86
-
87
-
88
-
89
-
90
-
91
-
92
-
93
-
94
-
95
-
96
-
97
-
98
-
99
-
100
-
101
-
102
-
103
-
104
-
105
-
106
-
107
-
108
-
109
-
110
-
111
-
112
-
113
-
114
-
115
-
116
-
117
-
118
-
119
-
120
-
121
-
122
-
123
-
124
-
125
-
126
-
127
-
128
-
129
-
130
-
131
-
132
-
133
-
134
-
135
-
136
-
137
-
138
-
139
-
140
-
141
-
142
-
143
-
144
-
145
-
146
-
147
-
148
-
149
-
150
 |
 |
