HP p650 HP p650 Digital Camera - User Manual - Page 87
Time Stamping Snapshots Date Stamp, Setting the Camera's Clock Adjust
 |
View all HP p650 manuals
Add to My Manuals
Save this manual to your list of manuals |
Page 87 highlights
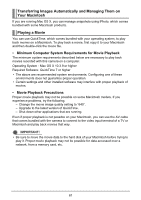
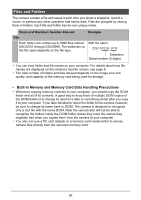
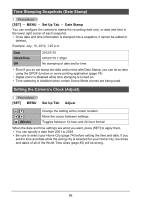
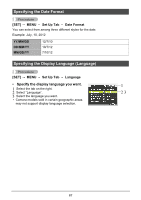
Time Stamping Snapshots (Date Stamp) Procedure [SET] MENU Set Up Tab Date Stamp You can configure the camera to stamp the recording date only, or date and time in the lower right corner of each snapshot. • Once date and time information is stamped into a snapshot, it cannot be edited or deleted. Example: July, 10, 2012, 1:25 p.m. Date Date&Time Off 2012/7/10 2012/7/10 1:25pm No stamping of date and/or time • Even if you do not stamp the date and/or time with Date Stamp, you can do so later using the DPOF function or some printing application (page 74). • Digital zoom is disabled while time stamping is turned on. • Time stamping is disabled when certain Scene Mode scenes are being used. Setting the Camera's Clock (Adjust) Procedure [SET] MENU Set Up Tab Adjust Movie) Change the setting at the cursor location Move the cursor between settings Toggles between 12-hour and 24-hour format When the date and time settings are what you want, press [SET] to apply them. • You can specify a date from 2001 to 2049. • Be sure to select your Home City (page 74) before setting the time and date. If you set the time and date while the wrong city is selected for your Home City, the times and dates of all of the World Time cities (page 85) will be wrong. 86
-
 1
1 -
2
-
3
-
4
-
5
-
6
-
7
-
8
-
9
-
10
-
11
-
12
-
13
-
14
-
15
-
16
-
17
-
18
-
19
-
20
-
21
-
22
-
23
-
24
-
25
-
26
-
27
-
28
-
29
-
30
-
31
-
32
-
33
-
34
-
35
-
36
-
37
-
38
-
39
-
40
-
41
-
42
-
43
-
44
-
45
-
46
-
47
-
48
-
49
-
50
-
51
-
52
-
53
-
54
-
55
-
56
-
57
-
58
-
59
-
60
-
61
-
62
-
63
-
64
-
65
-
66
-
67
-
68
-
69
-
70
-
71
-
72
-
73
-
74
-
75
-
76
-
77
-
78
-
79
-
80
-
81
-
 82
82 -
 83
83 -
 84
84 -
 85
85 -
 86
86 -
 87
87 -
 88
88 -
 89
89 -
 90
90 -
 91
91 -
 92
92 -
93
-
94
-
95
-
96
-
97
-
98
-
99
-
100
-
101
-
102
-
103
-
104
-
105
-
106
-
107
-
108
-
109
-
110
-
111
-
112
-
113
 |
 |