Hitachi DZ-BD70AF Owners Guide - Page 70
Adjusting the Color, White Balance
 |
UPC - 050585224094
View all Hitachi DZ-BD70AF manuals
Add to My Manuals
Save this manual to your list of manuals |
Page 70 highlights
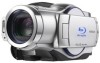
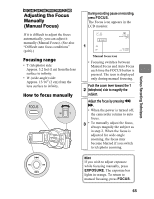
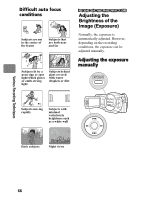
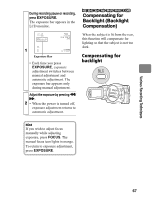
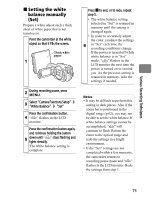
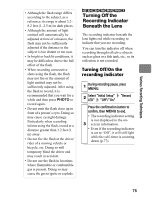
Various Recording Techniques HDD BD-RE BD-R RAM -RW (VR) -RW (VF) R CARD Adjusting the Color (White Balance) Light is required when recording subjects. While the naked eye perceives colors as they are, images recorded by a camera may appear redder or bluer than they actually are. To record white colored subjects as white images, adjust the white balance. The camcorder normally adjusts the color automatically (during Auto). Change the white balance setting according to the recording conditions. White balance mode Auto (No icon appears.) Set When recording sunsets and sunrises, recording in shade, and recording a stage lit with a spot light, you can manually adjust white balance to match the light source or situation. Outdoors To record in fine weather. Indoor 1 To record under incandescent light, halogen light or soft fluorescent light. Indoor 2 To record under bright fluorescent light Selecting a white balance mode 1 During recording pause, press MENU. Select "Camera Functions Setup" 2 "White Balance" a white balance mode Press the confirmation button to confirm, then MENU to end. The selected white balance mode 3 (other than Auto) will appear on the screen (p.42). • The white balance mode is retained in memory even when the power is turned off. Note Do not block the infrared sensor with your hand or other things to obtain a good cast for your recording. Infrared sensor 70
-
 1
1 -
2
-
3
-
4
-
5
-
6
-
7
-
8
-
9
-
10
-
11
-
12
-
13
-
14
-
15
-
16
-
17
-
18
-
19
-
20
-
21
-
22
-
23
-
24
-
25
-
26
-
27
-
28
-
29
-
30
-
31
-
32
-
33
-
34
-
35
-
36
-
37
-
38
-
39
-
40
-
41
-
42
-
43
-
44
-
45
-
46
-
47
-
48
-
49
-
50
-
51
-
52
-
53
-
54
-
55
-
56
-
57
-
58
-
59
-
60
-
61
-
62
-
63
-
64
-
 65
65 -
 66
66 -
 67
67 -
 68
68 -
 69
69 -
 70
70 -
 71
71 -
 72
72 -
 73
73 -
 74
74 -
 75
75 -
76
-
77
-
78
-
79
-
80
-
81
-
82
-
83
-
84
-
85
-
86
-
87
-
88
-
89
-
90
-
91
-
92
-
93
-
94
-
95
-
96
-
97
-
98
-
99
-
100
-
101
-
102
-
103
-
104
-
105
-
106
-
107
-
108
-
109
-
110
-
111
-
112
-
113
-
114
-
115
-
116
-
117
-
118
-
119
-
120
-
121
-
122
-
123
-
124
-
125
-
126
-
127
-
128
-
129
-
130
-
131
-
132
-
133
-
134
-
135
-
136
-
137
-
138
-
139
-
140
-
141
-
142
-
143
-
144
-
145
-
146
-
147
-
148
-
149
-
150
-
151
-
152
-
153
-
154
-
155
-
156
-
157
-
158
-
159
-
160
-
161
-
162
-
163
-
164
-
165
-
166
-
167
-
168
-
169
-
170
-
171
-
172
-
173
-
174
-
175
-
176
-
177
-
178
-
179
-
180
-
181
-
182
-
183
 |
 |
