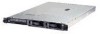
IBM 326m Hardware Maintenance Manual - Page 35
Recovering, POST/BIOS, update, failure - boot from usb
 |
UPC - 000435835093
View all IBM 326m manuals
Add to My Manuals
Save this manual to your list of manuals |
Page 35 highlights
Recovering from a POST/BIOS update failure If power to the server is interrupted while POST/BIOS code is being updated (flash update), the server might not restart (reboot) correctly or might not display video (no video). If this happens, you will need an IBM 326m System BIOS Crisis Recovery Diskette. You can download a file to create this diskette from http://www.ibm.com/support/. You will need an external diskette drive to create the diskette. When you have created the diskette, use the following recovery procedure using an external USB diskette drive: 1. Read "Safety information" on page 107, "Handling static-sensitive devices" on page 30, and "Installation guidelines" on page 29. 2. Turn off the server and all attached devices. 3. Unplug the power cord; then, disconnect all external cables. 4. Remove the cover (see "Removing the cover and bezel" on page 32. Boot block recovery jumper (JBBF1) Clear CMOS jumper (JBAT1) 5. Locate the boot block recovery jumper (JBBF1) on the system board. 6. Remove the boot block recovery jumper from pins 1 and 2; then, place the boot block recovery jumper onto pins 2 and 3. 7. Insert the IBM System BIOS Crisis Recovery Diskette for your server into the external USB floppy diskette drive A. 8. Replace the cover (see "Removing the cover and bezel" on page 32). 9. Connect the server to a power source, keyboard, monitor, and mouse. 10. The system will boot into a special recovery mode. Note: There may be several minutes of apparent inactivity during this process. 11. After the recovery completes, turn off the server, monitor, and peripheral devices. 12. Disconnect all power cords and external cables; then, remove the cover. 13. Return the boot block recovery jumper to pins 1 and 2. Chapter 3. Diagnostics 25
-
 1
1 -
2
-
3
-
4
-
5
-
6
-
7
-
8
-
9
-
10
-
11
-
12
-
13
-
14
-
15
-
16
-
17
-
18
-
19
-
20
-
21
-
22
-
23
-
24
-
25
-
26
-
27
-
28
-
29
-
 30
30 -
 31
31 -
 32
32 -
 33
33 -
 34
34 -
 35
35 -
 36
36 -
 37
37 -
 38
38 -
 39
39 -
 40
40 -
41
-
42
-
43
-
44
-
45
-
46
-
47
-
48
-
49
-
50
-
51
-
52
-
53
-
54
-
55
-
56
-
57
-
58
-
59
-
60
-
61
-
62
-
63
-
64
-
65
-
66
-
67
-
68
-
69
-
70
-
71
-
72
-
73
-
74
-
75
-
76
-
77
-
78
-
79
-
80
-
81
-
82
-
83
-
84
-
85
-
86
-
87
-
88
-
89
-
90
-
91
-
92
-
93
-
94
-
95
-
96
-
97
-
98
-
99
-
100
-
101
-
102
-
103
-
104
-
105
-
106
-
107
-
108
-
109
-
110
-
111
-
112
-
113
-
114
-
115
-
116
-
117
-
118
-
119
-
120
-
121
-
122
-
123
-
124
-
125
-
126
-
127
-
128
-
129
-
130
-
131
-
132
-
133
-
134
-
135
-
136
-
137
-
138
-
139
-
140
-
141
-
142
-
143
-
144
-
145
-
146
-
147
-
148
-
149
-
150
-
151
-
152
-
153
-
154
-
155
-
156
-
157
-
158
-
159
-
160
-
161
-
162
-
163
-
164
-
165
-
166
-
167
-
168
-
169
-
170
-
171
-
172
 |
 |
