JVC BR-DV6000U User Manual - Page 102
Hexagonal screws
 |
UPC - 046838325557
View all JVC BR-DV6000U manuals
Add to My Manuals
Save this manual to your list of manuals |
Page 102 highlights
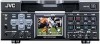
OTHERS - Installing SA-K46U RS-232C interface board - The RS-422A REMOTE 1 terminal of BR-DV6000 can be replaced with SA-K46U RS-232C interface board. Use the plate for the RS-422A REMOTE 1 terminal for installing SA-K46U RS-232C interface board. The replacement procedure is described below. However, to prevent electrical shock or injury, the work should be performed only by a qualified personnel or a JVC authorized service agent. A AUDIO CH 1/3 CH 2/4 IN OUT PLAY MONITOR OUT REMOTE 1 A REMO Caution To prevent electrical shock, remove the AC adaptor before installing SA-K46U. 1. Remove the RS-422A REMOTE 1 terminal. 1 Remove the two screws Å and pull out the RS-422A REMOTE 1 terminal. 2 Remove the connector cable connected to the connector of the RS-422A REMOTE board. ❈Remove the cable carefully not to damage it. RS-422A REMOTE Plate Hexagon screw Socket wrench SA-K46U Plate 2. Remove the plate of RS-422A REMOTE 1 terminal. • For removing the plate, remove the two hexagonal screws first with a tool such as a socket wrench. 3. Remove the SA-K46U plate in the same procedure above. 4. Fix the plate of RS-422A REMOTE 1 terminal, removed in 2 above, to SA-K46U. Hexagonal screws The screw holes for the hexagonal screws are of the inch system. Plate Hexagon screw Screw hole Wire (Red) REMO 5. Install the SA-K46U. 1 Connect the connector cable with red wires to the connector of the SA-K46U board. Memo BR-DV6000 connector cable colors RS-232C: Red RS-422A: Yellow 2 Fix SA-K46U to BR-DV6000 with the two screws Å, removed in 1 - 1. 102
-
 1
1 -
2
-
3
-
4
-
5
-
6
-
7
-
8
-
9
-
10
-
11
-
12
-
13
-
14
-
15
-
16
-
17
-
18
-
19
-
20
-
21
-
22
-
23
-
24
-
25
-
26
-
27
-
28
-
29
-
30
-
31
-
32
-
33
-
34
-
35
-
36
-
37
-
38
-
39
-
40
-
41
-
42
-
43
-
44
-
45
-
46
-
47
-
48
-
49
-
50
-
51
-
52
-
53
-
54
-
55
-
56
-
57
-
58
-
59
-
60
-
61
-
62
-
63
-
64
-
65
-
66
-
67
-
68
-
69
-
70
-
71
-
72
-
73
-
74
-
75
-
76
-
77
-
78
-
79
-
80
-
81
-
82
-
83
-
84
-
85
-
86
-
87
-
88
-
89
-
90
-
91
-
92
-
93
-
94
-
95
-
96
-
 97
97 -
 98
98 -
 99
99 -
 100
100 -
 101
101 -
 102
102 -
 103
103 -
 104
104 -
 105
105 -
 106
106
 |
 |
