JVC BR-DV6000U User Manual - Page 42
Recording
 |
UPC - 046838325557
View all JVC BR-DV6000U manuals
Add to My Manuals
Save this manual to your list of manuals |
Page 42 highlights
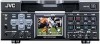
RECORDING Mini MENU DISP RESET SEARCH- SET SEARCH+ MIC HOLD BLANK CUE UP PHONES REC LEVEL CH-1/3 CH-2/4 PROFESSIONAL BR-DV6000 OPERATE A.DUB REC PLAY PAUSE EJECT REW STOP FF AUDIO INPUT COUNTER MONITOR OUTPUT SELECT CTL L CH-1/2 DV TC MIX MIX LINE UB R CH-3/4 Y/C (CPN) REMOTE LOCAL INPUT SELECT switch Ⅵ Selecting input signal Select the signal with the INPUT SELECT switch located on the front panel. DV : For inputting DV signals (video and audio) LINE : For inputting composite video and analog sound signals Y/C (CPN) : For inputting Y/C separate signals or component signals for video. The type of signal to input can be selected with VIDEO INPUT SEL of the VIDEO Menu. For sound, analog signals are in- put. Memo ● For analog audio signals, if the AUDIO IN terminal and MIC terminal are used at the same time, the MIC terminal precedes. ● Audio signals are recorded on CH1 and CH2. ● Analog signals cannot be recorded when PB/ DV IN is set to PAL. In such a case, recording is not possible. ● For DV signal input, the AUDIO MODE setting cannot be performed. It will be the same mode as that of the input signal (48 K or 32 K). Ⅵ Settings the VIDEO Menu (☞ Page 79) ● SET UP (only for NTSC) Set here according to the existence of the setup of analog video signals (composite, YC separate and component). If it exists, set here to ON. If it does not, OFF. ● BLACK BURST Set BLACK BURST to ON to record the black burst signals (black screen) of the built-in signal generator. (When analog input is selected) - Setting - Ⅵ Settings of the AUDIO menu (☞ Page 78) ● AUDIO MODE This is for selecting the audio sampling frequency for recording. 32 K: Recording in the 32 kHz mode. Select 32 K when performing audio dubbing on CH3 and CH4. 48 K: Recording in the 48 kHz mode. Audio dubbing is not available. ● AUDIO INPUT SEL (Displayed only when an optional board is installed) This setting is required with XLR IN board SAX61U (sold separately) installed. Set this item to XLR for selecting the audio input terminal of the XLR IN board. Ⅵ Setting the SYSTEM Menu (☞ Page 73) ● LONG PAUSE TIME This is for setting the time for BR-DV6000 to enter the tape protection mode if there is a long recording pause. ● INDEX WRITE: SYSTEM (2/2) Menu This is for selecting whether to record index signals automatically when recording starts. ● PB/DV IN: SYSTEM (2/2) Menu For recording NTSC signals, set this item to NTSC. For recording PAL signals from the DV terminal, set this item to PAL. Ⅵ Setting the time code recording for DV signal input Select data from the built-in time code generator or from the DV terminal with TC DUPLICATE in the TC/UB/CLOCK (1/2) Menu screen. (☞ Page 80) Ⅵ Setting date/time recording Perform setting for the following items. • Set DATE REC in the TC/UB/CLOCK (2/2) Menu screen to ON. • Set DISPLAY in the DISPLAY (1/2) Menu screen to ON. • Set TIME/DATE in the DISPLAY (2/2) Menu screen to any setting item except OFF. The same data as on the date/time on-screen display are added to the image and recorded. Memo With DV signal input, data of the built-in clock are not recorded. If video signals are input from the DV terminal, the date/time data from this terminal are recorded regardless of the menu settings. 42
-
 1
1 -
2
-
3
-
4
-
5
-
6
-
7
-
8
-
9
-
10
-
11
-
12
-
13
-
14
-
15
-
16
-
17
-
18
-
19
-
20
-
21
-
22
-
23
-
24
-
25
-
26
-
27
-
28
-
29
-
30
-
31
-
32
-
33
-
34
-
35
-
36
-
 37
37 -
 38
38 -
 39
39 -
 40
40 -
 41
41 -
 42
42 -
 43
43 -
 44
44 -
 45
45 -
 46
46 -
 47
47 -
48
-
49
-
50
-
51
-
52
-
53
-
54
-
55
-
56
-
57
-
58
-
59
-
60
-
61
-
62
-
63
-
64
-
65
-
66
-
67
-
68
-
69
-
70
-
71
-
72
-
73
-
74
-
75
-
76
-
77
-
78
-
79
-
80
-
81
-
82
-
83
-
84
-
85
-
86
-
87
-
88
-
89
-
90
-
91
-
92
-
93
-
94
-
95
-
96
-
97
-
98
-
99
-
100
-
101
-
102
-
103
-
104
-
105
-
106
 |
 |
