JVC BR-DV6000U User Manual - Page 59
Set Tcg Source To Internal., Set Tcg Select To Preset., Tcg Mode, Ndf/df Ntsc
 |
UPC - 046838325557
View all JVC BR-DV6000U manuals
Add to My Manuals
Save this manual to your list of manuals |
Page 59 highlights
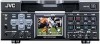
TIME CODE - Presetting the time code - Variable values can be set for the time code and the user's bit for efficient material management and editing. SET button DISP/8 button RESET button ; button Mini MENU DISP RESET SEARCH- SET SEARCH+ MIC HOLD BLANK CUE UP PHONES REC LEVEL CH-1/3 CH-2/4 PROFESSIONAL BR-DV6000 OPERATE A.DUB REC PLAY PAUSE EJECT REW STOP FF AUDIO INPUT COUNTER MONITOR OUTPUT SELECT CTL L CH-1/2 DV TC MIX MIX LINE UB R CH-3/4 Y/C (CPN) REMOTE LOCAL HOLD button 9 button : button COUNTER switch TC/UB/CLOCK(1/2) Menu screen :Setting: ...TC/UB/CLOCK(1/2) Menu screen - - - T C / U B / C L O C K ( 1 / 2 )- - - TCG SOURCE TCG SELECT TCG MODE NDF / DF ( NTSC ) DF B I T ( PAL ) TC DUPL I CATE TC OFFSET NEXT PAGE PAGE BACK I NTERNAL PRESET REC - RUN --- ON OFF OFF Ⅵ Set TCG SOURCE to "INTERNAL". Ⅵ Set TCG SELECT to "PRESET". Ⅵ TCG MODE: REC-RUN : The time code runs only during recording. FREE-RUN : The time code runs from the point when the preset is completed. ❈ In the case of the user's bit, setting is not required. Ⅵ NDF/DF (NTSC): LCD display NON DROP : Non-drop frame mode. Use this setting if the number of frame is more important. DROP : Drop frame mode. Use this setting if the recording time is more important. CH1/3 48k L CH2/4 40 30 20 10 OVER 0 dB OVER 00 00 00 00 NDF RRUN TC H M S F STOP SP222min e 01/02/03 Y/C SYNC CF AM 01:23:45 r Memo ● To stop the setting, press the HOLD button to return to the normal screen. ● To preset all digits to 0, press the RESET button when any of the digits is blinking. ● When the hour digit is blinking, the frame digit starts blinking when the ; button is pressed. ● If a user's bit is input with its all digits set as "F", BR-DV6000 converts FFFFFFFF to FFFFFFFE before recording. :Operation: ... Perform setting while checking the LCD display. This section describes the setting of the time code. The setting of the user's bit is the same. Values that can be used to configure the user's bit are hexadecimal numeral from 0 - F. 1. Set the counter switch to TC. (For user's bit, set the switch to UB.) 2. Press the DISP button to change the LCD to its enlarged dis- play mode. 3. In the STOP mode, press the HOLD button. ¥ The hour digit of the counter starts blinking. 4. Press the 8 or 9 button to change the value. 5. Press the : or ; button to move blinking to the next digit. 6. Press the 8 or 9 button to change the value of the blinking digit. 7. Repeat steps 5 and 6 to perform the necessary settings. 8. Press the SET button to confirm the setting value and blink- ing of the counter stops. 59
-
 1
1 -
2
-
3
-
4
-
5
-
6
-
7
-
8
-
9
-
10
-
11
-
12
-
13
-
14
-
15
-
16
-
17
-
18
-
19
-
20
-
21
-
22
-
23
-
24
-
25
-
26
-
27
-
28
-
29
-
30
-
31
-
32
-
33
-
34
-
35
-
36
-
37
-
38
-
39
-
40
-
41
-
42
-
43
-
44
-
45
-
46
-
47
-
48
-
49
-
50
-
51
-
52
-
53
-
 54
54 -
 55
55 -
 56
56 -
 57
57 -
 58
58 -
 59
59 -
 60
60 -
 61
61 -
 62
62 -
 63
63 -
 64
64 -
65
-
66
-
67
-
68
-
69
-
70
-
71
-
72
-
73
-
74
-
75
-
76
-
77
-
78
-
79
-
80
-
81
-
82
-
83
-
84
-
85
-
86
-
87
-
88
-
89
-
90
-
91
-
92
-
93
-
94
-
95
-
96
-
97
-
98
-
99
-
100
-
101
-
102
-
103
-
104
-
105
-
106
 |
 |
