JVC GY-DV300REM Instruction Manual - Page 24
Charging the Built- in Battery, How to charge, Displaying the Time and Date on the Screen
 |
View all JVC GY-DV300REM manuals
Add to My Manuals
Save this manual to your list of manuals |
Page 24 highlights
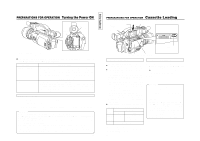
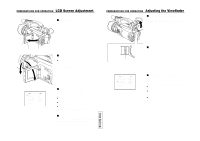
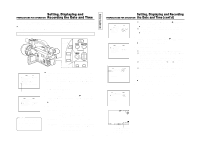
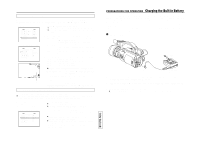
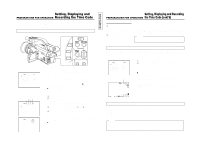
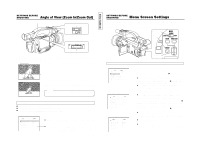
Displaying the Time and Date on the Screen Whether or not the time and date should be displayed on the screen is set with the TIME/DATE item on the DISPLAY [2/2] menu screen. The display style is selected by setting the DISP STYLE item. DISPLAY [1/2] menu screen D I SPLAY [ 1 / 2 ] Z E BRA OFF L CD BR I GHT NE S S NORMAL LCD CO LOR NORMA L LCD PEAK I NG NORMA L V F BR I GHT NESS NORMAL VF COLOR NORMA L V F PEAK I NG NORMA L NEXT P AGE P AGE B ACK DISPLAY [2/2] menu screen D I SPLAY [ 2 / 2 ] TAPE REMA I N ON T I ME CODE ON T I ME/ DATE D I SP LAY DI S P STYLE DATE + T I ME AUD I O LE V EL ON C EN TER MARK OF F OUT PU T CHAR. MIX PAGE BACK 1. Display the DISPLAY [2/2] menu screen. 1 Select the DISPLAY SET item on the TOP MENU screen. 2 Select the NEXT PAGE item on the DISPLAY [1/2] menu screen. 2. Set the TIME/DATE item on the DISPLAY [2/2] menu screen. DISPLAY : The date and time are displayed on the LCD screen or the viewfinder screen. The indications are not recorded on the tape. DISP+REC :The date and time are displayed on the LCD screen or the viewfinder screen and are recorded on the tape. OFF : The date and time are not displayed and are not recorded on the tape. 3. The display style is selected by setting the DISP STYLE item on the DISPLAY [2/2] menu screen. DATE+TIME : Both date and time are displayed. DATE : Date only is displayed. TIME : Time only is displayed Ⅲ Display of date and time in the various operation modes. Date A In shooting mode : The date and time of the internal clock are displayed. In VTR playback mode : The date and time recorded on the tape are displayed. Time In VTR stop mode : The date and time of the internal clock are displayed. During DV signal input: The date and time from the DV (U MODEL) connector are displayed. Recording the Date and Time Data To record the date and time during shooting, set the following menu items. ● Recording of the date and time data may be interrupted momentarily if the LCD screen is turned to faced toward the lens (reversed display) during recording of the date and time data. When the ASPECT ratio is set to LETTER, the date and time indication is not recorded. 1. DISPLAY [2/2] menu screen ● Set the TIME/DATE item to DISP+REC. ● Select the display style with the DISP STYLE item. SYSTEM [2/2] menu screen SY STEM[ 2 / 2 ] FADER OFF TALLY ON HANDL E ZO OM MED I UM DATE R EC BAR S ASPE C T 4:3 N E T R E MOTE ON SET UP OFF PAGE BACK 2. Use the DATE REC item on the SYSTEM [2/2] menu screen to select the mode in which the date and time data should be recorded. ● BARS+CAM: Date and time data are recorded when color bars and camera image are output. ● BARS: Date and time data are recorded only when color bars are output. When the MODE switch is set to the VTR side, the DATE REC item is not displayed. 43 TENTATIVE PREPARATIONS FOR OPERATION Charging the Built-in Battery The built-in, rechargeable backup battery retains the date and time and the time code data. The built-in battery is constantly being charge whenever the GY-DV300 is connected to a power supply, but it gradually discharges while the GY-DV300 is disconnected from a power supply. The battery will be fully discharged when the GY-DV300 is not used for about three months, in which case the set date and time and time code data are reset. In this case, recharge the built-in battery and then set the date and time and time code data again. However, it is possible to use the GY-DV300 even if the built-in battery is discharged but the date and time and time code data cannot be recorded. Ⅵ How to charge AC outlet DC IN AC adapter AA-P30 1. Connect the provided (U MODEL)/optional (E MODEL) AC adapter AA-P30 to the GY-DV300 and an AC outlet or mount a charged battery on the GY-DV300. 2. Set the POWER switch on the GY-DV300 to "OFF" or "ON" (charging takes places with the POWER switch set to either of the positions.) 3. Leave the equipment in this condition for about 4 hours. ● The built-in battery will remain charged for about 3 months after being charged for about 4 hours. 44
-
 1
1 -
2
-
3
-
4
-
5
-
6
-
7
-
8
-
9
-
10
-
11
-
12
-
13
-
14
-
15
-
16
-
17
-
18
-
 19
19 -
 20
20 -
 21
21 -
 22
22 -
 23
23 -
 24
24 -
 25
25 -
 26
26 -
 27
27 -
 28
28 -
 29
29 -
30
-
31
-
32
-
33
-
34
-
35
-
36
-
37
-
38
-
39
-
40
-
41
-
42
-
43
-
44
-
45
-
46
-
47
-
48
-
49
-
50
-
51
-
52
-
53
-
54
-
55
-
56
-
57
 |
 |
