JVC GY-DV300REM Instruction Manual - Page 42
Adjusting the Quality of Camera Image, PLAYBACK, Playback of Tape
 |
View all JVC GY-DV300REM manuals
Add to My Manuals
Save this manual to your list of manuals |
Page 42 highlights
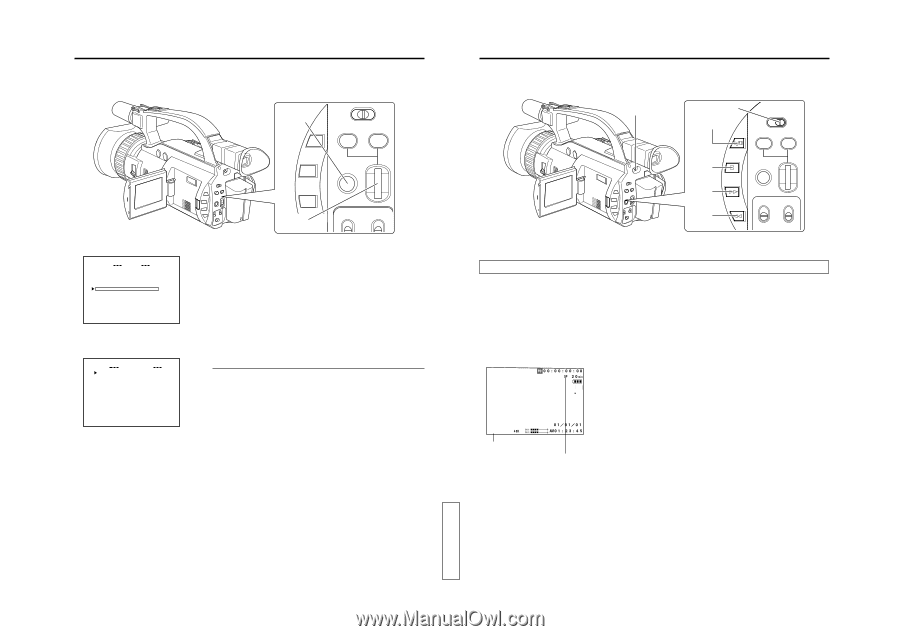
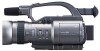
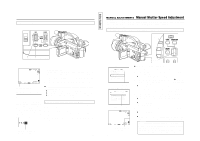
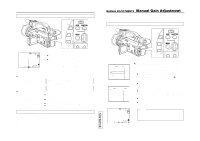
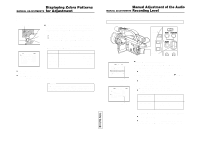
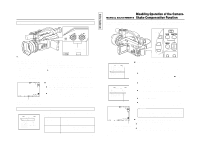
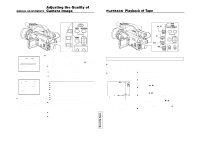
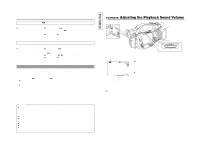
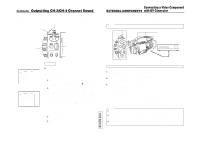
Adjusting the Quality of MANUAL ADJUSTMENTS Camera Image The GY-DV300 allows manual adjustment of the image quality of the camera image. By setting the various items on the CAMERA menu screen, you can make adjustments to obtain an image quality suiting your preference. MENU button GAIN SHUTTER MENU SELECT dial TOP MENU screen MENU MO D E MANU AL E A R PHON E LEV EL 1 0 S YS T EM S E T . . D I S PLAY SE T . . CAME RA S E T [ C AM - A ] . . OPER AT I ON [ CAM- A ] . . C LOC K / TC . . MENU A L L R ESE T CANCE L EX I T CAMERA menu screen C AMERA [ A ] MAS T ER BL ACK NORMA L DETA I L NORMA L DT L . VH B AL ANCE NORMA L V . R ESO LU T I ON NORMA L AU TO K NEE ON BL ACK NORMA L COL OR MAT R I X ON GAMMA NORMA L PAGE B ACK ● The set values are retained in the memory even if the power is turned OFF. (Settings are saved separately for "CAM-A" and "CAM-B".) Ⅲ Engage the recording-standby mode. 1. Press the MENU button to display the TOP MENU screen. 2. Rotate the SELECT dial to align the cursor (f) with the CAMERA SET item, and then press the SELECT dial. ● The CAMERA menu screen is displayed. 3. Make the various settings on the CAMERA menu screen. 1 Rotate the SELECT dial to select an item, make the setting and then press the SELECT dial to confirm and enter the setting. 2 Rotate the SELECT dial to change the setting of an item, and then press the SELECT dial to confirm and enter the setting. Items for setting ● MASTER BLACK: Adjusts the pedestal level (master black) ● DETAIL: Adjusts the detail enhancement level. ● DTL. VH BALANCE: Selects the detail enhancement. ● V RESOLUTION: Selects the increase of the vertical resolution. ● AUTO KNEE: Selects the auto knee function. ● BLACK: Selects the gain for black areas. ● COLOR MATRIX: Selects the color matrix function. ● GAMMA: Selects the gamma curve. Ⅲ For details on the items, see "CAMERA Menu Screen" on page 96. 4. To return to the normal screen after completing the settings, use either of the following methods. ● Press the MENU button or ● Return to the TOP MENU screen and then select the EXIT item from the TOP MENU screen before pressing the SELECT dial. 79 TENTATIVE PLAYBACK Playback of Tape The recorded picture can be viewed on the LCD screen or in the viewfinder. The playback sound is not output from the monitoring speaker of the GY-DV300. POWER switch MODE switch BAR (f/ w) button MODE CAM-B CAM-A VTR BAR AW (a) button AW FWD (g) button FWD REV (h) button REV Playback Procedure ● In the VTR playback mode, no camera image is displayed on the LCD screen or the viewfinder. ● The operation mode during VTR playback is indicated on the LCD screen and the viewfinder screen. 1. Set the POWER switch to "ON". 2. Set the MODE switch to "VTR". ● The GY-DV300 enters the VTR playback mode. 3. Insert the recorded videocassette. ● The cassette tape is loaded, and the STOP mode is engaged. 4. Press the BAR (f/ w) button. ● Playback starts. 5. Press the BAR (f/ w) button again to stop playback temporarily. P L AY ● The unit enters the still mode (still picture shown). VTR operation mode indicator Indicator showing the recording speed mode at the time of recording. (SP/LP) 6. To re-start playback, press the BAR (f/ w) button. 7. To stop playback or still mode, press the AW (a) button. ● The unit enters the STOP mode. 80
-
 1
1 -
2
-
3
-
4
-
5
-
6
-
7
-
8
-
9
-
10
-
11
-
12
-
13
-
14
-
15
-
16
-
17
-
18
-
19
-
20
-
21
-
22
-
23
-
24
-
25
-
26
-
27
-
28
-
29
-
30
-
31
-
32
-
33
-
34
-
35
-
36
-
 37
37 -
 38
38 -
 39
39 -
 40
40 -
 41
41 -
 42
42 -
 43
43 -
 44
44 -
 45
45 -
 46
46 -
 47
47 -
48
-
49
-
50
-
51
-
52
-
53
-
54
-
55
-
56
-
57
 |
 |