JVC GY-DV300REM Instruction Manual - Page 50
CAMERA Menu Screen
 |
View all JVC GY-DV300REM manuals
Add to My Manuals
Save this manual to your list of manuals |
Page 50 highlights
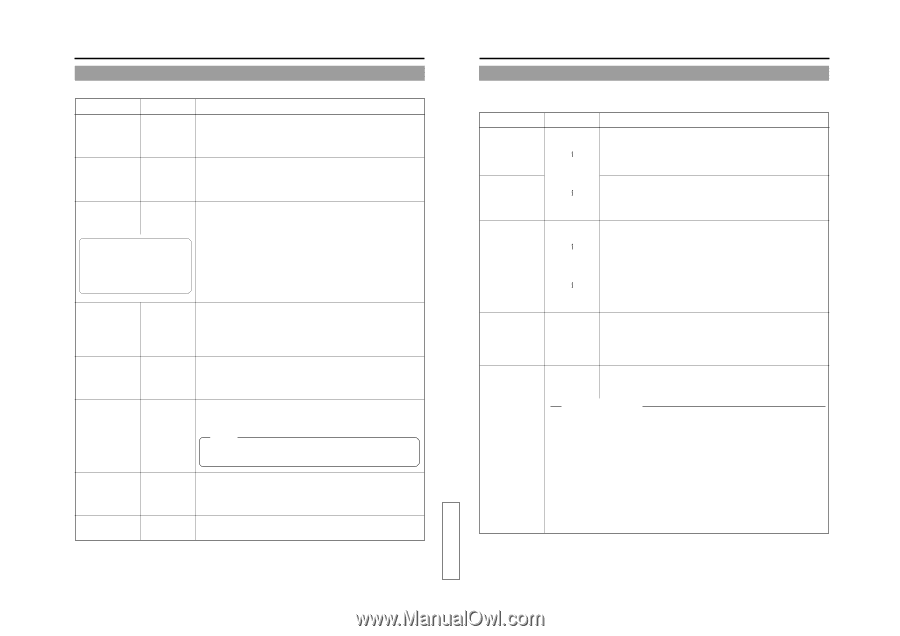
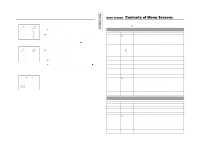
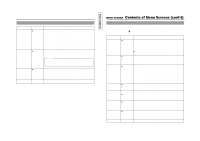
DISPLAY Menu Screen (cont'd) Ⅲ DISPLAY [2/2] Menu Screen Item Set Value Contents TAPE REMAIN ● ON OFF TIME CODE ● ON OFF Selects whether the remaining tape time indication should be shown on the LCD screen and the viewfinder screen. ON : Displayed OFF : Not displayed Selects whether the time code should be shown on the LCD screen and the viewfinder screen. ON : Displayed OFF : Not displayed TIME/DATE DISP+REC ● DISPLAY OFF When the mode switch is set to VTR, DISP + REC changes into OFF (D+R). In this case, TIME/DATE is neither displayed nor recorded. Selects whether the date and time should be shown on the LCD screen or the viewfinder screen, and whether the indications should be recorded on the tape. DISP+REC : Displayed on the LCD screen or the viewfinder screen and recorded on the tape. DISPLAY : Only displayed on the LCD screen or the viewfinder screen. OFF : Neither displayed nor recorded. The conditions for recording the date and time are selected with the DATE REC item on the SYSTEM [2/2] menu screen. DISP STYLE ● DATE+TIME TIME DATE Selects the style of the date and time indication and whether this should be shown on the LCD screen and the viewfinder screen. DATE+TIME : Date and time are shown. TIME : Time is shown. DATE : Date is shown. AUDIO LEVEL ● ON OFF Selects whether the audio level meters should be shown on the LCD screen and the viewfinder screen. ON : Displayed OFF : Not displayed CENTER MARK ● OFF ON Sets whether or not a centre mark is displayed. ON : Displayed OFF : Not displayed Memo: When the MODE switch is set to VTR (VTR playback /DV input mode), this item is not displayed. OUTPUT CHAR. OFF ● MIX PAGE BACK Selects whether on-screen-indications are displayed on a monitor connected to the VIDEO OUT or Y/C OUT connector. OFF : On-screen-indications are not displayed MIX : On-screen-indications are displayed The DISPLAY [1/2] menu screen returns when the SELECT dial is pressed. 95 TENTATIVE MENU SCREEN Contents of Menu Screens (cont'd) CAMERA Menu Screen The CAMERA menu screen can only be set in the shooting mode. The position ("CAM A" or "CAM B") of the MODE switch is indicated after the menu title name. Item MASTER BLACK DETAIL DTL. VH FREQUENCY Set Value Contents MAX 9 1 ● NORMAL -1 -9 MIN Adjusts the pedestal level (master black) which is the reference of black. To increase the pedestal level... Make value higher To decrease the pedestal level... Make value lower Adjusts the contour (detail) enhancement level. To sharpen contours .......... Make value higher To soften contours Make value lower MAX 4 1 ● NORMAL -1 Sets the direction, horizontal (H) or vertical (V), in which detail enhancement is applied more strongly. To apply stronger enhancement in H direction: Make value higher To apply stronger enhancement in V direction: Make value smaller -4 MIN V. RESOLUTION ● NORMAL V.MAX Selects the increase of the vertical resolution. NORMAL: Standard vertical resolution (380 lines). V.MAX: Increased vertical resolution (420 lines) However, the sensitivity is degraded and the bright sections may be colored depending on the subject. AUTO KNEE OFF ● ON To select whether the auto knee function should operate. OFF: Does not operate. ON: Operates. AUTO KNEE function When shooting a foreground subject, such as a human being, etc., with a highbrightness background, if the brightness level is set for the foreground subject, the background image will be blurred with white. In such a case, a clearer background is obtained when the auto knee function is used. This function is effective especially in the following cases: ● When shooting a human being indoors with a view to the landscape out through a window. ● When shooting a human being in the shade on a fine day. ● When shooting a high-contrast scene. * If a fast-moving high-brightness section like a car in sunlight is shot, the auto knee function may change the brightness of the entire image along with the motion of the object. In this case, set the auto knee function to OFF. 96
-
 1
1 -
2
-
3
-
4
-
5
-
6
-
7
-
8
-
9
-
10
-
11
-
12
-
13
-
14
-
15
-
16
-
17
-
18
-
19
-
20
-
21
-
22
-
23
-
24
-
25
-
26
-
27
-
28
-
29
-
30
-
31
-
32
-
33
-
34
-
35
-
36
-
37
-
38
-
39
-
40
-
41
-
42
-
43
-
44
-
 45
45 -
 46
46 -
 47
47 -
 48
48 -
 49
49 -
 50
50 -
 51
51 -
 52
52 -
 53
53 -
 54
54 -
 55
55 -
56
-
57
 |
 |