JVC GZ-VX700BUS User Manual - English - Page 35
Setting Self Recording on this Camera (DETECT/MAIL SETTING)
 |
View all JVC GZ-VX700BUS manuals
Add to My Manuals
Save this manual to your list of manuals |
Page 35 highlights
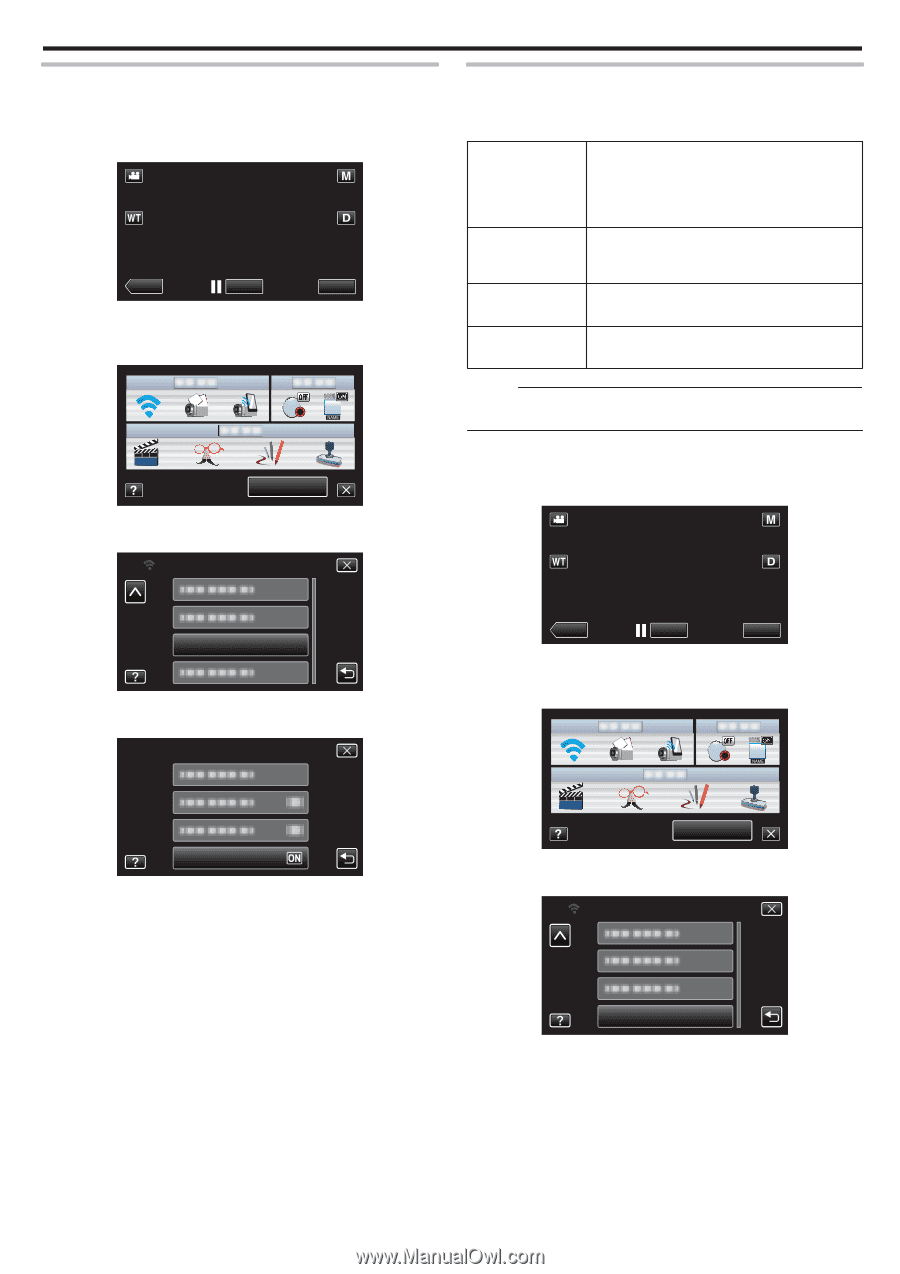
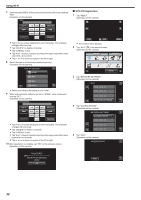
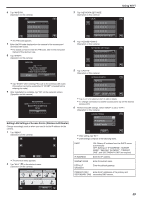
Setting Self Recording on this Camera (DETECT/MAIL SETTING) Sets whether to record videos on this camera during detection. 1 Tap "MENU". (Operation on this camera) ˻PLAY REC . 0 The shortcut menu appears. 2 Tap "Wi-Fi" (Q) in the shortcut menu. (Operation on this camera) MENU . 3 Tap "DETECT/MAIL SETTING". (Operation on this camera) Wi-Fi MENU DETECT/MAIL SETTING . 4 Tap "SELF RECORDING". (Operation on this camera) DETECT/MAIL SETTING SELF RECORDING . 0 Tap "ON" or "OFF". 0 Select "ON" to record videos on this camera. 0 Select "OFF" not to record videos on this camera. Using Wi-Fi Registering the Access Points to Connect ("ACCESS POINTS") There are 4 ways to register the access points (wireless LAN router) for connection. Wi-Fi Protected Setup (WPS) Registration Search and Register Manual Registration WPS PIN Registration This is the easiest way of registration. Authentication method and wireless LAN setup are performed automatically in WPS, allowing easy registration of connection settings between devices. A search is conducted to locate access points. Select and register an access point from the list of search results. Enter the name and authentication method manually to register an access point. Enter the WPS PIN code of the camera to the access point to register. Memo : 0 By registering multiple access points, you can change connection to another access point by tapping on the desired one from the list. o Wi-Fi Protected Setup (WPS) Registration 1 Tap "MENU". (Operation on this camera) ˻PLAY REC . 0 The shortcut menu appears. 2 Tap "Wi-Fi" (Q) in the shortcut menu. (Operation on this camera) MENU . 3 Tap "NETWORK SETTINGS". (Operation on this camera) Wi-Fi MENU NETWORK SETTINGS . 35
-
 1
1 -
2
-
3
-
4
-
5
-
6
-
7
-
8
-
9
-
10
-
11
-
12
-
13
-
14
-
15
-
16
-
17
-
18
-
19
-
20
-
21
-
22
-
23
-
24
-
25
-
26
-
27
-
28
-
29
-
 30
30 -
 31
31 -
 32
32 -
 33
33 -
 34
34 -
 35
35 -
 36
36 -
 37
37 -
 38
38 -
 39
39 -
 40
40 -
41
-
42
-
43
-
44
-
45
-
46
-
47
-
48
-
49
-
50
-
51
-
52
-
53
-
54
-
55
-
56
-
57
-
58
-
59
-
60
-
61
-
62
-
63
-
64
-
65
-
66
-
67
-
68
-
69
-
70
-
71
-
72
-
73
-
74
-
75
-
76
-
77
-
78
-
79
-
80
-
81
-
82
-
83
-
84
-
85
-
86
-
87
-
88
-
89
-
90
-
91
-
92
-
93
-
94
-
95
-
96
-
97
-
98
-
99
-
100
-
101
-
102
-
103
-
104
-
105
-
106
-
107
-
108
-
109
-
110
-
111
-
112
-
113
-
114
-
115
-
116
-
117
-
118
-
119
-
120
-
121
-
122
-
123
-
124
-
125
-
126
-
127
-
128
-
129
-
130
-
131
-
132
-
133
-
134
-
135
-
136
-
137
-
138
-
139
-
140
-
141
-
142
-
143
-
144
-
145
-
146
-
147
-
148
-
149
-
150
-
151
-
152
-
153
-
154
-
155
-
156
-
157
-
158
-
159
-
160
-
161
-
162
-
163
-
164
-
165
-
166
-
167
-
168
-
169
-
170
-
171
-
172
-
173
-
174
-
175
-
176
-
177
-
178
-
179
-
180
-
181
-
182
-
183
-
184
-
185
-
186
-
187
-
188
-
189
-
190
-
191
-
192
-
193
-
194
-
195
-
196
-
197
-
198
-
199
-
200
-
201
-
202
-
203
-
204
-
205
-
206
-
207
-
208
-
209
 |
 |