Kodak ESP 5250 User Manual - Page 23
Printing pictures using non-default photo options, Start, View and Print Photos - not printing
 |
View all Kodak ESP 5250 manuals
Add to My Manuals
Save this manual to your list of manuals |
Page 23 highlights
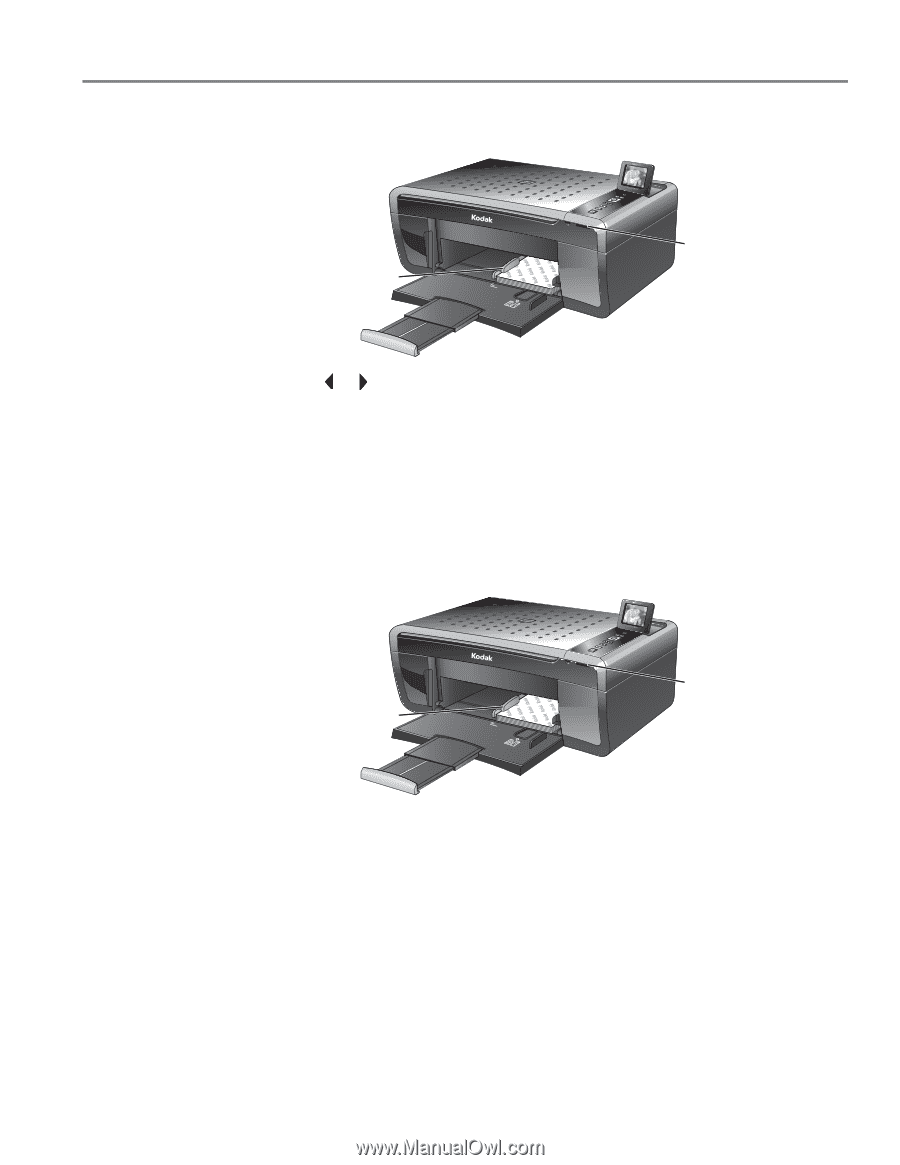
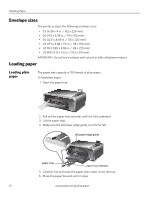
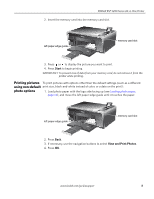
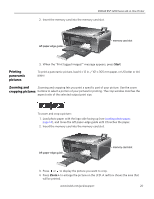
KODAK ESP 5200 Series All-in-One Printer 2. Insert the memory card into the memory card slot. left paper-edge guide Rotate Back Home MS SD/HC MMC memory card slot 3. Press or to display the picture you want to print. 4. Press Start to begin printing. IMPORTANT: To prevent loss of data from your memory card, do not remove it from the printer while printing. Printing pictures To print pictures with options other than the default settings (such as a different using non-default print size, black-and-white instead of color, or a date on the print): photo options 1. Load photo paper with the logo side facing up (see Loading photo paper, page 14), and move the left paper-edge guide until it touches the paper. left paper-edge guide Rotate Back Home MS SD/HC MMC memory card slot 2. Press Back. 3. If necessary, use the navigation buttons to select View and Print Photos. 4. Press OK. www.kodak.com/go/aiosupport 18
-
 1
1 -
2
-
3
-
4
-
5
-
6
-
7
-
8
-
9
-
10
-
11
-
12
-
13
-
14
-
15
-
16
-
17
-
 18
18 -
 19
19 -
 20
20 -
 21
21 -
 22
22 -
 23
23 -
 24
24 -
 25
25 -
 26
26 -
 27
27 -
 28
28 -
29
-
30
-
31
-
32
-
33
-
34
-
35
-
36
-
37
-
38
-
39
-
40
-
41
-
42
-
43
-
44
-
45
-
46
-
47
-
48
-
49
-
50
-
51
-
52
-
53
-
54
-
55
-
56
-
57
-
58
-
59
-
60
-
61
-
62
 |
 |