Kodak ESP 5250 User Manual - Page 24
Printing tagged pictures, View Photos, Start - set up steps
 |
View all Kodak ESP 5250 manuals
Add to My Manuals
Save this manual to your list of manuals |
Page 24 highlights
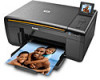
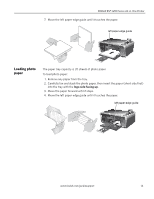
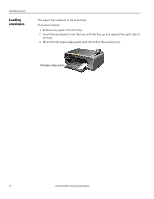
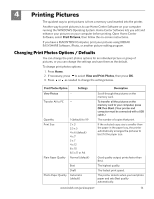
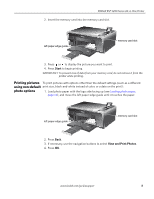
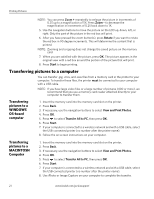
Printing Pictures 5. Press to select the option you want to change (for example, Quantity, Print Size, Color, Scene Balance, or Add Date to Print). Printing tagged pictures 6. Press to change the selection. 7. Repeat steps 5 and 6 for each option you want to change. 8. When you are done changing options, press to select View Photos, then press OK. 9. Insert the memory card into the memory card slot. 10. Press or to select the picture you want to print, then press OK. A check mark on the LCD indicates the picture is selected. NOTE: To deselect the picture, press OK again. 11. To select additional pictures, press or until the picture is displayed, then press OK. 12. When you are done selecting pictures, press Start to begin printing. IMPORTANT: To prevent loss of data from your memory card, do not remove it from the printer while printing. Some digital cameras let you tag (or "mark") pictures on the memory card for printing. This creates a tag that is recognized by the printer. If you choose to print tagged pictures, they will be printed according to the default settings on your printer (unless otherwise specified by the tag from the camera). NOTE: Refer to your camera user guide to determine whether your camera supports tagged (also "marked" or "DPOF") functionality. To print tagged pictures: 1. Load photo paper with the logo side facing up (see Loading photo paper, page 14), and move the left paper-edge guide until it touches the paper. 19 www.kodak.com/go/aiosupport
-
 1
1 -
2
-
3
-
4
-
5
-
6
-
7
-
8
-
9
-
10
-
11
-
12
-
13
-
14
-
15
-
16
-
17
-
18
-
 19
19 -
 20
20 -
 21
21 -
 22
22 -
 23
23 -
 24
24 -
 25
25 -
 26
26 -
 27
27 -
 28
28 -
 29
29 -
30
-
31
-
32
-
33
-
34
-
35
-
36
-
37
-
38
-
39
-
40
-
41
-
42
-
43
-
44
-
45
-
46
-
47
-
48
-
49
-
50
-
51
-
52
-
53
-
54
-
55
-
56
-
57
-
58
-
59
-
60
-
61
-
62
 |
 |