Kodak ESP 5250 User Manual - Page 32
Scanning, Before you begin scanning, Simple scanning - printer software
 |
View all Kodak ESP 5250 manuals
Add to My Manuals
Save this manual to your list of manuals |
Page 32 highlights
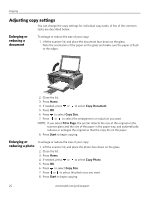
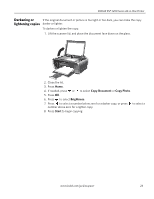
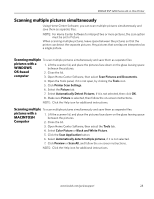
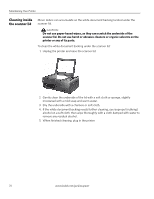
6 Scanning Scanning converts the text and images from the documents and pictures that you place on the scanner glass into electronic data, and then sends the data to your computer. To scan with your all-in-one printer, it must be connected to a computer with a USB cable or a wireless network. You save the scanned file(s) to your computer; you cannot save to a memory card in the printer. Before you begin scanning Change the default scan settings in the Home Center Software. (Click the Tool icon, then select Printer Scan Settings.)You can adjust the following settings for scanned pictures and documents: • Color / black-and-white / gray scale • Resolution (dpi) • File format (.pdf, .rtf, .tif, .jpg for documents; .jpg, .bmp, .tif for pictures) • Base name (by default, scanned files are named "scan1", "scan2", etc) • Location (folder) where the scanned files will be saved Before saving a scanned file, you can preview it in Home Center Software, and crop the output as desired. See the Home Center Software Help (? icon) for instructions. Simple scanning To scan a single document or picture: 1. Lift the scanner lid, and place the document or picture face down on the glass. Rotate Back Home MS SD/HC MMC 2. Close the lid. 3. Open Home Center Software, then: • On a WINDOWS OS-based computer, select Scan Pictures and Documents, then follow the on-screen instructions. • On a MACINTOSH Computer, select Tools > Scan Application, then follow the on-screen instructions. 27 www.kodak.com/go/aiosupport
-
 1
1 -
2
-
3
-
4
-
5
-
6
-
7
-
8
-
9
-
10
-
11
-
12
-
13
-
14
-
15
-
16
-
17
-
18
-
19
-
20
-
21
-
22
-
23
-
24
-
25
-
26
-
 27
27 -
 28
28 -
 29
29 -
 30
30 -
 31
31 -
 32
32 -
 33
33 -
 34
34 -
 35
35 -
 36
36 -
 37
37 -
38
-
39
-
40
-
41
-
42
-
43
-
44
-
45
-
46
-
47
-
48
-
49
-
50
-
51
-
52
-
53
-
54
-
55
-
56
-
57
-
58
-
59
-
60
-
61
-
62
 |
 |
