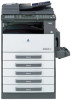
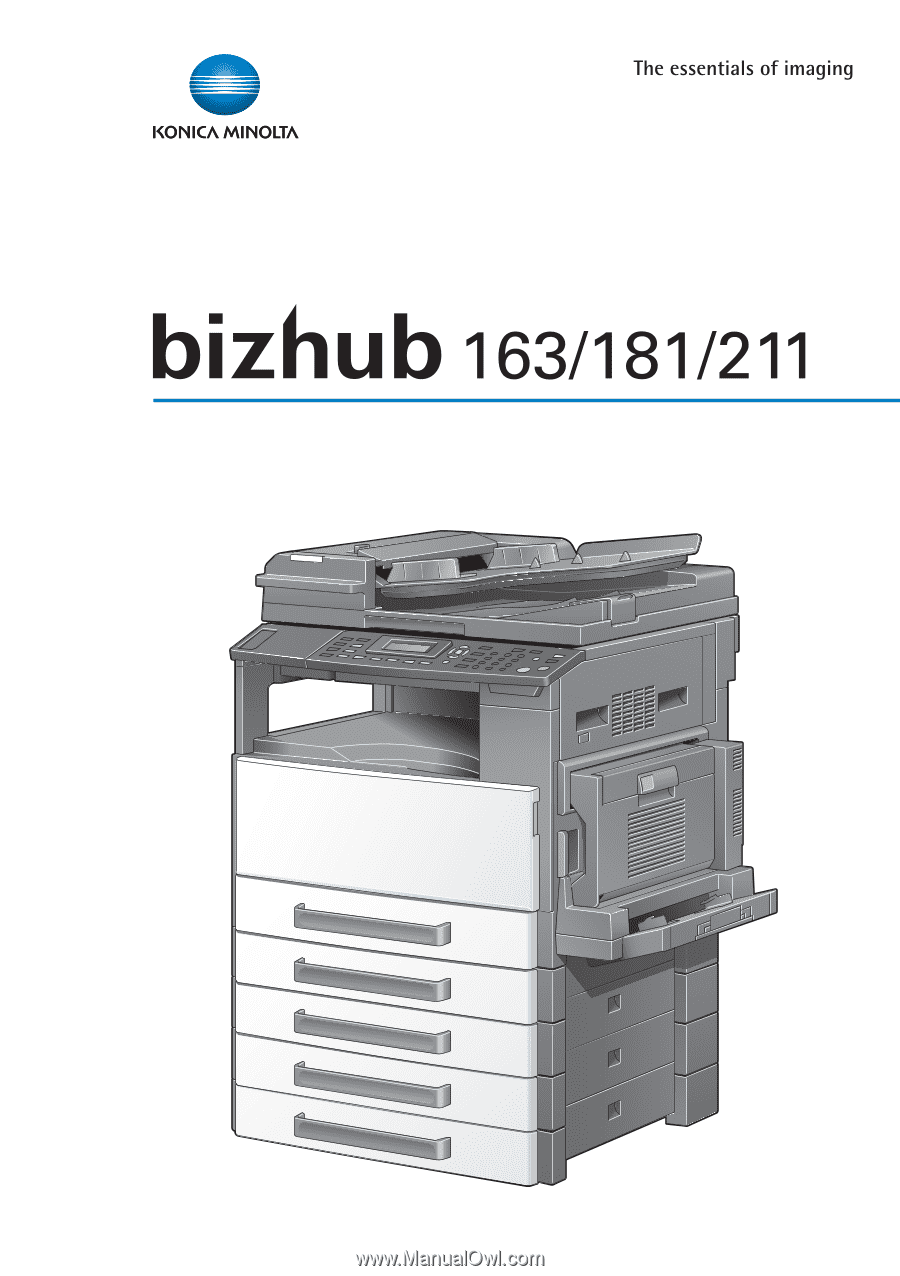
Konica Minolta bizhub 181 bizhub 181 GDI Print Controler User Manual
Konica Minolta bizhub 181 Manual
 |
View all Konica Minolta bizhub 181 manuals
Add to My Manuals
Save this manual to your list of manuals |
Konica Minolta bizhub 181 manual content summary:
- Konica Minolta bizhub 181 | bizhub 181 GDI Print Controler User Manual - Page 1
User's Guide [GDI Printer Controller] - Konica Minolta bizhub 181 | bizhub 181 GDI Print Controler User Manual - Page 2
User's Guide provided with the machine. Store the CD-ROM and User's Guides provided with the machine in a safe place. bizhub 163/211 is not sold in the USA market. Trademarks and copyright - KONICA MINOLTA, the KONICA MINOLTA trademark of Xerox Corporation. - PCL is a registered trademark of Hewlett - Konica Minolta bizhub 181 | bizhub 181 GDI Print Controler User Manual - Page 3
will not be held liable for any incidents caused by using this printing system or User's Guide. - Information included in this User's Guide is subject to change without no- tice. - Konica Minolta Business Technologies, Inc. maintains the copyright of the printer drivers. x-2 GDI Printer Controller - Konica Minolta bizhub 181 | bizhub 181 GDI Print Controler User Manual - Page 4
DO NOT AGREE TO THEM, DO NOT DOWNLOAD, INSTALL, USE THE SOFTWARE, NOR OPEN THE PACKAGE. 1. COPYRIGHT AND INTELLECTUAL PROPERTY RIGHTS This is a license agreement and not an agreement for sale. Konica Minolta Business Technologies, Inc.("Konica Minolta") owns, or has been licensed from other owners - Konica Minolta bizhub 181 | bizhub 181 GDI Print Controler User Manual - Page 5
Software; or (iii) sublicense, rent, lease or distribute the Software Software. (2) You agree that you will not export the Software KONICA MINOLTA, ITS AFFILIATE COMPANIES AND KONICA MINOLTA LICENSOR DISCLAIM ALL WARRANTIES WITH REGARD TO THE SOFTWARE time by destroying the Software and all your copies - Konica Minolta bizhub 181 | bizhub 181 GDI Print Controler User Manual - Page 6
END USERS The Software is a "commercial item," "commercial computer software" and "commercial computer software documentation," as all U.S. Government End Users shall acquire the Software with only those rights DOWNLOADING, INSTALLING OR USING THE SOFTWARE YOU AGREE TO ACCEPT THE - Konica Minolta bizhub 181 | bizhub 181 GDI Print Controler User Manual - Page 7
Contents Introduction Copyright x-2 Software End User License Agreement x-3 Contents x-6 Explanation of manual conventions x-9 1 Getting ready 1.1 Operating environment 1-1 System requirements 1-1 Recommended operating environment 1-1 2 Installing the printer driver 2.1 Making connections and - Konica Minolta bizhub 181 | bizhub 181 GDI Print Controler User Manual - Page 8
Size 3-15 Zoom 3-16 Copy 3-16 Collate 3-17 Paper Source 3-18 Paper Type 3-18 Output Method 3-19 Using secure printing 3-19 Specifying secure printing from the printer driver 3-20 Printing from the machine 3-20 3.5 Layout tab 3-23 Combination 3-24 Combination Details 3-25 Double-sided - Konica Minolta bizhub 181 | bizhub 181 GDI Print Controler User Manual - Page 9
a print job 4-4 Using the manual bypass tray 4-7 Power Save mode 4-8 5 Troubleshooting 5.1 Checking error messages 5-1 5.2 Main error messages 5-3 5.3 Print data when an error occurs 5-4 With a "MACHINE TROUBLE" error 5-4 Temporary errors 5-4 6 Specifications x-8 GDI Printer Controller - Konica Minolta bizhub 181 | bizhub 181 GDI Print Controler User Manual - Page 10
Explanation of manual conventions GDI Printer Controller x-9 - Konica Minolta bizhub 181 | bizhub 181 GDI Print Controler User Manual - Page 11
x-10 GDI Printer Controller - Konica Minolta bizhub 181 | bizhub 181 GDI Print Controler User Manual - Page 12
so that the printer driver can be used. - Intel Pentium 200 MHz - Windows Vista, Windows Server 2003, Windows XP (Service Pack 2 or later), Windows 2000 (Service Pack 4 or later), Windows Me, or Windows 98 SE, Windows Vista x64 Edition, Windows Server 2003 x64 Edition, Windows XP Professional x64 - Konica Minolta bizhub 181 | bizhub 181 GDI Print Controler User Manual - Page 13
1 Getting ready 1-2 GDI Printer Controller - Konica Minolta bizhub 181 | bizhub 181 GDI Print Controler User Manual - Page 14
of the TWAIN and printer drivers begins. For the procedure on installing the TWAIN and printer drivers when this machine is connected by USB, refer to "Installing the printer driver by using Plug and Play" on page 2-6. 2 Note This machine cannot be connected to a computer running Windows 98 SE using - Konica Minolta bizhub 181 | bizhub 181 GDI Print Controler User Manual - Page 15
details on the image controller IC-206, refer to the User's Guide for the image controller. When the machine is connected to a network, use the Add Printer Wizard to install the printer driver. For the procedure on installing the printer driver when this machine is connected to a network, refer to - Konica Minolta bizhub 181 | bizhub 181 GDI Print Controler User Manual - Page 16
Connection method USB port connection Network connection Supported operating systems Windows XP/Windows Server 2003/Windows Vista/Windows 2000/ Windows Me Windows XP/Windows Server 2003/Windows Vista/Windows 2000/ Windows Me/Windows 98 SE Printer driver installation method Install using Plug and - Konica Minolta bizhub 181 | bizhub 181 GDI Print Controler User Manual - Page 17
the driver by using Plug and Play, the installation procedure differs depending on the operating system. With Windows Me With Windows XP, Windows Server 2003, Windows Vista and Windows 2000 Install the TWAIN driver. Install the USB printing support driver. Install the printer driver. 2-4 GDI - Konica Minolta bizhub 181 | bizhub 181 GDI Print Controler User Manual - Page 18
Printer Wizard When installing the printer driver by using the Add Printer Wizard, the installation procedure is the same for all operating systems. With Windows 98 SE With Windows Me With Windows XP, Windows Server 2003, Windows Vista and Windows 2000 Install the printer driver. GDI Printer - Konica Minolta bizhub 181 | bizhub 181 GDI Print Controler User Manual - Page 19
- For Windows 2000: "Installing using Plug and Play on Windows 2000" on page 2-10 - For Windows Me: "Installing using Plug and Play on Windows Me" on page 2-11 2 Note With Windows XP, Server 2003, Vista and 2000, log on as a user with Administrator privileges to install the printer driver. 2-6 GDI - Konica Minolta bizhub 181 | bizhub 181 GDI Print Controler User Manual - Page 20
in this manual is for the installation of the TWAIN driver, then the printer driver. For details on the TWAIN driver, refer to the User's Guide for the TWAIN driver. 2 Note When using Windows XP (Service Pack 2), a dialog box may appear, requesting confirmation to connect to Windows Update. At - Konica Minolta bizhub 181 | bizhub 181 GDI Print Controler User Manual - Page 21
, and then installation of the printer driver begins. The procedure described in this manual is for the installation of the TWAIN driver, then the printer driver. For details on the TWAIN driver, refer to the User's Guide for the TWAIN driver. Follow the instructions that appear in the Found New - Konica Minolta bizhub 181 | bizhub 181 GDI Print Controler User Manual - Page 22
Installing the printer driver 2 1 In the Found New Hardware wizard, select "Locate and install driver software (recommended)". - If the User Account Control dialog box appears, click the [Continue] button. - If a message appears, requesting confirmation to search online, click the [Don't search - Konica Minolta bizhub 181 | bizhub 181 GDI Print Controler User Manual - Page 23
, and then installation of the printer driver begins. The procedure described in this manual is for the installation of the TWAIN driver, then the printer driver. For details on the TWAIN driver, refer to the User's Guide for the TWAIN driver. Follow the instructions that appear in the Found New - Konica Minolta bizhub 181 | bizhub 181 GDI Print Controler User Manual - Page 24
of the printer driver begins. The procedure described in this manual is for the installation of the TWAIN driver, the USB printing support driver, then the printer driver. For details on the TWAIN driver, refer to the User's Guide for the TWAIN driver. Follow the instructions that appear - Konica Minolta bizhub 181 | bizhub 181 GDI Print Controler User Manual - Page 25
of the USB printing support driver begins. 6 Repeat steps 1 through 5 to install the USB printing support driver. This completes the installation of the USB printing support driver. The Add New Hardware Wizard appears again, and the installation of the printer driver begins. 7 Repeat steps - Konica Minolta bizhub 181 | bizhub 181 GDI Print Controler User Manual - Page 26
Wizard on Windows 2000" on page 2-21 - For Windows Me/98 SE: "Installing using the Add Printer Wizard on Win- dows Me/98 SE" on page 2-24 2 Note With Windows XP, Server 2003, Vista and 2000, log on as a user with Administrator privileges to install the printer driver. GDI Printer Controller 2-13 - Konica Minolta bizhub 181 | bizhub 181 GDI Print Controler User Manual - Page 27
New Hardware Wizard to appear. 1 After Windows has started, insert the printer driver CD-ROM into the CD-ROM drive of the computer. 2 Click the Windows [Start] button, and then click "Printers and Faxes". - The Printers and Faxes window appears. - If "Printers and Faxes" does not appear in the Start - Konica Minolta bizhub 181 | bizhub 181 GDI Print Controler User Manual - Page 28
to print on a network, the connection port must be set up as a network port. Since the port settings can be specified after installation, this procedure describes how to install the printer driver for a local connection. For details on specifying the port settings, refer to the User's Guide for - Konica Minolta bizhub 181 | bizhub 181 GDI Print Controler User Manual - Page 29
2 Installing the printer driver - With 64-bit operating systems, select "Driver\WinXP64\English". 9 Click the [Open] button again. 10 Check the path in the "Copy manufacturer's files from" box, and then click the [OK] button. 11 Select the printer to be installed, and then click the [Next] button - Konica Minolta bizhub 181 | bizhub 181 GDI Print Controler User Manual - Page 30
is complete, check that the icon for the installed print- er appears in the Printers and Faxes window, and then remove the CDROM from the CD-ROM drive. This completes the installation of the printer driver. Installing using the Add Printer wizard on Windows Vista 2 Note When using a USB cable to - Konica Minolta bizhub 181 | bizhub 181 GDI Print Controler User Manual - Page 31
to print on a network, the connection port must be set up as a network port. Since the port settings can be specified after installation, this procedure describes how to install the printer driver for a local connection. For details on specifying the port settings, refer to the User's Guide for - Konica Minolta bizhub 181 | bizhub 181 GDI Print Controler User Manual - Page 32
Installing the printer driver 2 - With 64-bit operating systems, select "\Driver\WinVista64\English". 9 Click the [Open] button again. 10 Check the path in the "Copy manufacturer's files from" box, and then click the [OK] button. 11 Select the printer to be installed, and then click the [Next] - Konica Minolta bizhub 181 | bizhub 181 GDI Print Controler User Manual - Page 33
, select "Install this driver software anyway". 13 Click the [Finish] button. - For a network connection, perform a test print after specifying the network settings. 14 After installation is complete, check that the icon for the installed print- er appears in the Printers window, and then remove the - Konica Minolta bizhub 181 | bizhub 181 GDI Print Controler User Manual - Page 34
to print on a network, the connection port must be set up as a network port. Since the port settings can be specified after installation, this procedure describes how to install the printer driver for a local connection. For details on specifying the port settings, refer to the User's Guide for - Konica Minolta bizhub 181 | bizhub 181 GDI Print Controler User Manual - Page 35
2 Installing the printer driver 6 Select "LPT1:" beside "Use the following port", and then click the [Next] button. 7 Click the [Have Disk] button. 8 Click the [Browse] button, select "Driver\WIN2K_XP\English" on the CD-ROM, and then click the [Open] button. 9 Click the [Open] button again. 10 - Konica Minolta bizhub 181 | bizhub 181 GDI Print Controler User Manual - Page 36
[Finish] button. - If the digital signature warning message appears, click the [Yes] button. 14 After installation is complete, check that the icon for the installed print- er appears in the Printers window, and then remove the CD-ROM from the CD-ROM drive. This completes the installation of the - Konica Minolta bizhub 181 | bizhub 181 GDI Print Controler User Manual - Page 37
to print on a network, the connection port must be set up as a network port. Since the port settings can be specified after installation, this procedure describes how to install the printer driver for a local connection. For details on specifying the port settings, refer to the User's Guide for - Konica Minolta bizhub 181 | bizhub 181 GDI Print Controler User Manual - Page 38
button. 7 Click the [Browse] button, select "Driver\Win98_ME\English" on the CD-ROM, and then click the [OK] button. 8 Click the [OK] button again. 9 Check the path in the "Copy manufacturer's files from" box, and then click the [OK] button. 10 Select the printer to be installed, and then click the - Konica Minolta bizhub 181 | bizhub 181 GDI Print Controler User Manual - Page 39
the printer driver for a local connection. For details on specifying the port settings, refer to the User's Guide for the network interface card. 12 Click the [Finish] button. 13 After installation is complete, check that the icon for the installed print- er appears in the Printers window, and - Konica Minolta bizhub 181 | bizhub 181 GDI Print Controler User Manual - Page 40
privileges to delete the printer driver. For details on deleting the TWAIN driver, refer to the User's Guide for the TWAIN driver. Delete the printer 1 Open the Printers and Faxes window. (With Windows Vista/2000/Me/ 98 SE, open the Printers window.) - For Windows XP/Server 2003, click the - Konica Minolta bizhub 181 | bizhub 181 GDI Print Controler User Manual - Page 41
requesting confirmation to continue deleting, click the [Delete] button. 8 Close the open windows. 9 Restart the computer. Deleting related files Even after the printer driver is deleted from the Printers and Faxes window, device information files remain on the computer. When using Windows XP/Server - Konica Minolta bizhub 181 | bizhub 181 GDI Print Controler User Manual - Page 42
Installing the printer driver 2 4 Delete "oem*.inf" and "oem*.PNF", which contain information on this machine. - "*" indicates a number in the file names for "oem*. for the corresponding model. The PNF file has the same number as the INF file. 5 Restart the computer. GDI Printer Controller 2-29 - Konica Minolta bizhub 181 | bizhub 181 GDI Print Controler User Manual - Page 43
2 Installing the printer driver 2-30 GDI Printer Controller - Konica Minolta bizhub 181 | bizhub 181 GDI Print Controler User Manual - Page 44
the Printers and Faxes window (or the Printers window), select the printer icon for this machine. 3 Select the command for displaying the printer driver settings dialog box. - With Windows XP/Server 2003/Vista/2000, right-click the icon for the installed printer, and then click "Printing Preferences - Konica Minolta bizhub 181 | bizhub 181 GDI Print Controler User Manual - Page 45
function. For details on the Easy Set function, refer to "Easy Set" on page 3-9. To display the Device Options tab in Windows XP/Server 2003/Vista/ 2000, right-click the icon for the installed printer in the Printers and Faxes window (or the Printers window), and then click "Properties". 3-2 GDI - Konica Minolta bizhub 181 | bizhub 181 GDI Print Controler User Manual - Page 46
dialog box Printing settings can be specified from the printer driver settings dialog box. 2 Note To display the Printing Preferences dialog box in Windows XP/Server 2003/Vista/2000, right-click the icon for the installed printer in the Printers and Faxes window (or the Printers window), and then - Konica Minolta bizhub 181 | bizhub 181 GDI Print Controler User Manual - Page 47
is printed overlapping a watermark (text stamp). Select if the watermark is printed only on the first page. Create new watermarks. Change the watermarks. Delete a watermark. Specify the print resolution. Specify the brightness and contrast. Shows the software version information. 3-4 GDI Printer - Konica Minolta bizhub 181 | bizhub 181 GDI Print Controler User Manual - Page 48
cannot be used from the printer driver. Be sure to specify the corresponding settings when options are installed. 2 Note To display the Device Options tab, right-click the icon for the installed printer in the Printers and Faxes window (or the Printers window), and then click "Properties". Tab - Konica Minolta bizhub 181 | bizhub 181 GDI Print Controler User Manual - Page 49
the option cannot be used from the printer driver. Be sure to specify the corresponding settings when options are installed. 2 Note To display the Device Options tab, right-click the icon for the installed printer in the Printers and Faxes window (or the Printers window), and then click "Properties - Konica Minolta bizhub 181 | bizhub 181 GDI Print Controler User Manual - Page 50
Specifying printer driver settings 3 Device Options Specify the settings for the installed paper drawers. From the "Device Options" list, double-click the names memory. Click [,] on the right side of the "Memory" box, and then select the size of the installed memory. GDI Printer Controller 3-7 - Konica Minolta bizhub 181 | bizhub 181 GDI Print Controler User Manual - Page 51
3 Specifying printer driver settings 3.3 Common operations This section contains descriptions of settings is displayed so that an image of the print result can be checked. When the [Printer View] preview is selected, an image of the printer configuration, including the options, such as the paper - Konica Minolta bizhub 181 | bizhub 181 GDI Print Controler User Manual - Page 52
printer driver settings 3 Button Easy Set Description The currently specified settings can be registered as a program to be recalled later. Easy Set The currently specified settings can be registered as a program to be recalled later when you wish to use those settings again. 1 Change the driver - Konica Minolta bizhub 181 | bizhub 181 GDI Print Controler User Manual - Page 53
3 Specifying printer driver settings 2 Note To recall a registered program, select it from To delete the program name, click the [Delete] button. If "Factory Default" is selected from the list, all settings return to their defaults. A maximum of 20 characters can be entered for the registered name - Konica Minolta bizhub 181 | bizhub 181 GDI Print Controler User Manual - Page 54
Specifying printer driver settings 3 3.4 Setup tab From the Setup tab, settings can be specified for the document and paper to be printed on. The number of copies to be printed and the orientation of the printed image can also be specified. Orientation Select whether to print the document in the - Konica Minolta bizhub 181 | bizhub 181 GDI Print Controler User Manual - Page 55
3 Specifying printer driver settings Original Size From the drop-down list, click the paper size for the document to select it. The following standard is set to "Auto", "Tray 1" or "Bypass". When "Paper Type" is set to "OHP", only "Letter" and "A4" are available. 3-12 GDI Printer Controller - Konica Minolta bizhub 181 | bizhub 181 GDI Print Controler User Manual - Page 56
Specifying printer driver settings 3 Edit Custom A paper size that does not appear in the list can be registered as a custom size. 1 Click the [Edit enlarges to display settings for specifying the paper size. 3 In the "Name" box, type the name of the paper size. GDI Printer Controller 3-13 - Konica Minolta bizhub 181 | bizhub 181 GDI Print Controler User Manual - Page 57
3 Specifying printer driver settings 4 In the "Dimensions" group box, specify the width and length of the pa- per. - To change the units for the [Delete] button. A maximum of 20 characters can be entered for the registered name. A maximum of 32 sizes can be registered. 3-14 GDI Printer Controller - Konica Minolta bizhub 181 | bizhub 181 GDI Print Controler User Manual - Page 58
Specifying printer driver settings 3 Output Size Select the size of paper that is to be used for printing. The available paper size. The enlargement/reduction ratio to be used for printing can be checked in the Paper preview. 2 Note If "Manual" is selected in the "Zoom" group box, a setting - Konica Minolta bizhub 181 | bizhub 181 GDI Print Controler User Manual - Page 59
3 Specifying printer driver settings Zoom Specify the enlargement or reduction ratio to be used for printing. Select "Manual", and then type in a number between 25% and 400%, or click the arrows to specify a setting. Original Reduced Enlarged 2 Note If any setting other than " - Konica Minolta bizhub 181 | bizhub 181 GDI Print Controler User Manual - Page 60
the second page is printed five times. Printing continues until the last page is printed five times. Check box selected Check box cleared 2 Note Depending on the application being used, the Collate setting may not be applied. If Collate is specified from the printer driver, Collate cannot be used - Konica Minolta bizhub 181 | bizhub 181 GDI Print Controler User Manual - Page 61
3 Specifying printer driver settings Paper Source Select the paper drawer loaded Paper Type" is set to "OHP", "Thick Paper" or "Envelope". Paper Type Select the type of paper to be printed on. Settings: Plain Paper, OHP, Thick Paper, Envelope 2 Note A setting can be selected only when "Paper Source - Konica Minolta bizhub 181 | bizhub 181 GDI Print Controler User Manual - Page 62
Specifying printer driver settings 3 Output Method Select the printing method. Not only can data be printed directly, but "Secure Print" is also available, which requires a password for printing from this machine. Settings: Print, Secure Print 2 Note "Secure Print" is available only if the - Konica Minolta bizhub 181 | bizhub 181 GDI Print Controler User Manual - Page 63
must be entered from the control panel of the machine in order to print a document with a password specified when "Secure Print" is selected in the printer driver. 1 Check that the "Printer" indicator is flashing or is lit, and then press the [Printer] key. The Print mode screen appears. 3-20 GDI - Konica Minolta bizhub 181 | bizhub 181 GDI Print Controler User Manual - Page 64
upper-right corner of the screen. - The key icon appears if the memory contains a secure print document. 3 Press the [Access] key. 4 When "PASSWORD: - - - -" appears, type in the password. - Type in the same numbers specified as the password from the printer driver. GDI Printer Controller 3-21 - Konica Minolta bizhub 181 | bizhub 181 GDI Print Controler User Manual - Page 65
3 Specifying printer driver settings 5 Check that the document can be printed. If the password is correct, the following screen appears, and the job is printed. 2 Note If there are multiple secure print jobs with the same password, all of those secure print jobs are printed. 3-22 GDI Printer - Konica Minolta bizhub 181 | bizhub 181 GDI Print Controler User Manual - Page 66
Specifying printer driver settings 3 3.5 Layout tab From the Layout tab, select the number of document pages to be printed on a single sheet of paper. GDI Printer Controller 3-23 - Konica Minolta bizhub 181 | bizhub 181 GDI Print Controler User Manual - Page 67
3 Specifying printer driver settings Combination Multiple document pages can be printed together on a single sheet of paper. Use combined printing to economize on the number of printed pages. From the drop-down list, select the number of pages to be printed on a single sheet of paper. For example, - Konica Minolta bizhub 181 | bizhub 181 GDI Print Controler User Manual - Page 68
Specifying printer driver settings 3 Combination Details Click the [Combination Details] button to specify the printing order and whether or not to print page outlines. Combination Order Select the number of pages to be printed on a single sheet of paper. This is the same setting selected in the - Konica Minolta bizhub 181 | bizhub 181 GDI Print Controler User Manual - Page 69
3 Specifying printer driver settings Double-sided printing Document pages can be printed on both sides of the paper. Print on both sides when binding a multi-page document. 1 Click the Layout tab. 2 From the "Double Sides" drop-down list, select "Double Sided". 2 Note From the " - Konica Minolta bizhub 181 | bizhub 181 GDI Print Controler User Manual - Page 70
Specifying printer driver settings 3 3.6 Per Page Setting tab From the Per Page Setting tab, specify whether or not a cover page is added. Front Cover Page Select whether or not a cover page is added and whether or not a document page is printed on the cover page. Settings: None Blank Printed - Konica Minolta bizhub 181 | bizhub 181 GDI Print Controler User Manual - Page 71
3 Specifying printer driver settings 3.7 Watermark tab From the Watermark tab, specific text can be printed in the background as a watermark. Watermark Select From the Watermark Select list, select the text. A setting is available for specifying whether the watermark is printed on all pages or - Konica Minolta bizhub 181 | bizhub 181 GDI Print Controler User Manual - Page 72
printer driver settings of 20 characters can be entered for the text. - A maximum of 32 watermarks can be registered (including "No Wa- termark"). 4 Specify the 7 and 300 points. - Angle: Specify the angle that the text is printed on the paper. A set- ting between 0° and 359° can be specified - Konica Minolta bizhub 181 | bizhub 181 GDI Print Controler User Manual - Page 73
3 Specifying printer driver settings - Offset from Center: Specify the horizontal and vertical positions for the location where the text is to be printed. Settings between -100 and 100 can be specified. - The position can also be changed by using the sliders below and to the right of the - Konica Minolta bizhub 181 | bizhub 181 GDI Print Controler User Manual - Page 74
Specifying printer driver settings 3 Editing a watermark A registered watermark can be edited Size: Specify a character size between 7 and 300 points. - Angle: Specify the angle that the text is printed on the paper. A set- ting between 0° and 359° can be specified. - Darkness: Specify the density - Konica Minolta bizhub 181 | bizhub 181 GDI Print Controler User Manual - Page 75
3 Specifying printer driver settings - The position can also be changed by using the sliders below and to the right of the preview The watermark is changed. 2 Note To delete a registered watermark, select the watermark from the list, and then click the [Delete] button. 3-32 GDI Printer Controller - Konica Minolta bizhub 181 | bizhub 181 GDI Print Controler User Manual - Page 76
Specifying printer driver settings 3 3.8 Quality tab From the Quality tab, settings for the print quality can be specified. Resolution From the drop-down list, select "600 × 600 dpi" or "300 × 300 dpi" as the print resolution. 2 Note When "600 × 600 dpi" is selected, the print quality is - Konica Minolta bizhub 181 | bizhub 181 GDI Print Controler User Manual - Page 77
3 Specifying printer driver settings Adjustment Click the [Adjustment] button to specify the brightness and contrast. Brightness Contrast Adjust the brightness of the printed image. A setting between -50 and 50 can be specified. The larger the number, the higher the contrast and the more - Konica Minolta bizhub 181 | bizhub 181 GDI Print Controler User Manual - Page 78
machine are provided below. 4.1 Printing operations The default mode of the machine is the Copy mode. Normally, when printing is performed from a connected computer, printing begins automatically. For details, refer to "Starting the print operation" on page 4-3. To print with "Bypass" selected in - Konica Minolta bizhub 181 | bizhub 181 GDI Print Controler User Manual - Page 79
this key when the Printer mode screen appears. Refer to "Canceling a print job" on page 4-4. • This indicator lights up in orange when the machine is receiving print data. • This indicator lights up when an error or malfunction has occurred. 2 Note The [Fax] key and the fax function keys can be - Konica Minolta bizhub 181 | bizhub 181 GDI Print Controler User Manual - Page 80
of print data has priority. After the reception job is completed in Fax mode, the print data is printed, and then the fax is printed. - While printing, copy settings can be specified and fax operations can be performed. (Copies and faxes are printed after printouts are printed.) GDI Printer - Konica Minolta bizhub 181 | bizhub 181 GDI Print Controler User Manual - Page 81
is flashing or is lit, and then press the [Printer] key. 2 Check that "PRINTER MODE PRINTING" appears in the machine's dis- play. - The message that appears differs depending on the status of the machine. 3 Press the [Clear/Stop] key. The confirmation message "JOB CANCEL" appears. 4-4 GDI - Konica Minolta bizhub 181 | bizhub 181 GDI Print Controler User Manual - Page 82
Control panel operations 4 4 Press the [+] or [,] key to select "YES", and then press the [OK] key. - To continue printing, select "No". - If no key is pressed within five seconds, printing continues. "ACCEPTED" appears in the display and the print job is canceled. GDI Printer Controller 4-5 - Konica Minolta bizhub 181 | bizhub 181 GDI Print Controler User Manual - Page 83
the procedure described above. PAPER EMPTY PAPER JAM PAPER SIZE ERROR RESET PAPER NO SUITABLE PAPER UPPER TRAY FULL REMOVE PAPER IN BYPASS TRAY LOAD PAPER INCORRECT PAPER SIZE MEDIA TYPE ERROR *RECEIVING* FRONT COVER OPEN 1st SIDE COVER OPEN DUPLEX COVER OPEN TONER EMPTY 4-6 GDI Printer Controller - Konica Minolta bizhub 181 | bizhub 181 GDI Print Controler User Manual - Page 84
the computer, display the Setup tab for the printer driver, and then select "Bypass" in the "Paper Source" list (page 3-18). 2 Perform the print operation from the computer. 3 When the message "PRINTER MODE LOAD PAPER" appears, load pa- per into the manual bypass tray. - Insert one sheet of paper - Konica Minolta bizhub 181 | bizhub 181 GDI Print Controler User Manual - Page 85
. Follow the procedure described below if the paper is loaded into the manual bypass tray before the print operation is performed from the computer. Remove the paper from the manual bypass tray. Press the [Reset] key. Press the [Printer] key. Perform step 3 of the procedure. Load the paper into the - Konica Minolta bizhub 181 | bizhub 181 GDI Print Controler User Manual - Page 86
and the procedures for correcting the error are provided below. If a problem occurs during computer printing, check the following. 5.1 Checking error messages If a computer printing error occurs while any screen other than the Printer mode screen is displayed, the Caution indicator lights up and the - Konica Minolta bizhub 181 | bizhub 181 GDI Print Controler User Manual - Page 87
5 1 Press the [Printer] key. Troubleshooting The Print mode screen appears. 2 Check the error message that currently appears in the display, and then perform the desired operation to correct the error. 5-2 GDI Printer Controller - Konica Minolta bizhub 181 | bizhub 181 GDI Print Controler User Manual - Page 88
Troubleshooting 5 5.2 Main error messages The main error messages that appear in the Printer mode screen are described below. Error message PAPER SIZE ERROR NO SUITABLE PAPER INCORRECT PAPER SIZE PAPER EMPTY MEDIA TYPE ERROR MEMORY NEAR FULL SECURE PRINT IS NOT AVAILABLE NOT ACCEPTED PASSWORD - Konica Minolta bizhub 181 | bizhub 181 GDI Print Controler User Manual - Page 89
Troubleshooting 5.3 Print data when an error occurs The operation performed with the print data when an error occurs differs depending on the type of error that occurred. With a "MACHINE TROUBLE errors occur, the print data currently in the memory is saved. Printing automatically restarts as soon - Konica Minolta bizhub 181 | bizhub 181 GDI Print Controler User Manual - Page 90
(when printing on A4/Letter v paper at 600 × 600 dpi) Memory Shared with machine Interface port Compliant with USB Revision 2.0 (Windows 98 SE is not supported.) Printer language GDI Font Windows Supported operating systems Windows Vista, Windows Server 2003, Windows XP (Service Pack 2 or - Konica Minolta bizhub 181 | bizhub 181 GDI Print Controler User Manual - Page 91
6 Specifications 6-2 GDI Printer Controller - Konica Minolta bizhub 181 | bizhub 181 GDI Print Controler User Manual - Page 92
http://konicaminolta.com A08E-9576-22 2007 Copyright Printed in China 2007.12
-
 1
1 -
 2
2 -
 3
3 -
 4
4 -
 5
5 -
 6
6 -
 7
7 -
8
-
9
-
10
-
11
-
12
-
13
-
14
-
15
-
16
-
17
-
18
-
19
-
20
-
21
-
22
-
23
-
24
-
25
-
26
-
27
-
28
-
29
-
30
-
31
-
32
-
33
-
34
-
35
-
36
-
37
-
38
-
39
-
40
-
41
-
42
-
43
-
44
-
45
-
46
-
47
-
48
-
49
-
50
-
51
-
52
-
53
-
54
-
55
-
56
-
57
-
58
-
59
-
60
-
61
-
62
-
63
-
64
-
65
-
66
-
67
-
68
-
69
-
70
-
71
-
72
-
73
-
74
-
75
-
76
-
77
-
78
-
79
-
80
-
81
-
82
-
83
-
84
-
85
-
86
-
87
-
88
-
89
-
90
-
91
-
92
 |
 |
User’s Guide
[GDI Printer Controller]