Konica Minolta bizhub 181 bizhub 181 GDI Print Controler User Manual - Page 25
Reinstalling the printer driver by using Plug and Play
 |
View all Konica Minolta bizhub 181 manuals
Add to My Manuals
Save this manual to your list of manuals |
Page 25 highlights
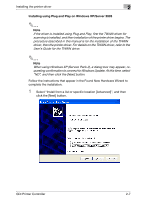
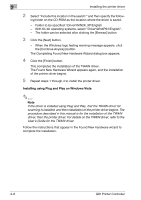
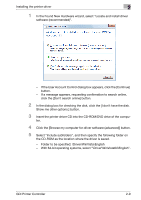
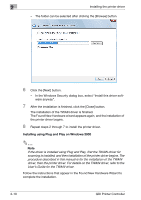
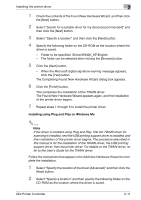
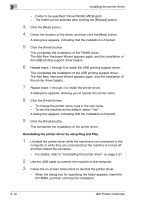
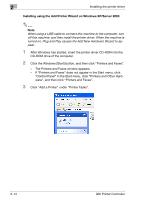
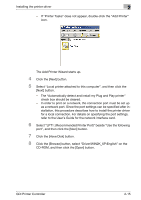
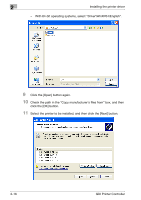
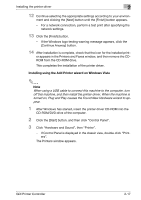
2 Installing the printer driver - Folder to be specified: \Driver\Win98_ME\English - The folder can be selected after clicking the [Browse] button. 3 Click the [Next] button. 4 Check the location of the driver, and then click the [Next] button. A dialog box appears, indicating that the installation is finished. 5 Click the [Finish] button. This completes the installation of the TWAIN driver. The Add New Hardware Wizard appears again, and the installation of the USB printing support driver begins. 6 Repeat steps 1 through 5 to install the USB printing support driver. This completes the installation of the USB printing support driver. The Add New Hardware Wizard appears again, and the installation of the printer driver begins. 7 Repeat steps 1 through 4 to install the printer driver. A dialog box appears, allowing you to specify the printer name. 8 Click the [Finish] button. - To change the printer name, type in the new name. - To set this machine as the default, select "Yes". A dialog box appears, indicating that the installation is finished. 9 Click the [Finish] button. This completes the installation of the printer driver. Reinstalling the printer driver by using Plug and Play 1 Uninstall the printer driver while the machine is not connected to the computer or while they are connected but the machine is turned off, and then restart the computer. - For details, refer to "Uninstalling the printer driver" on page 2-27. 2 Use the USB cable to connect the machine to the computer. 3 Follow the on-screen instructions to reinstall the printer driver. - When the dialog box for specifying the folder appears, insert the CD-ROM, and then continue the installation. 2-12 GDI Printer Controller
-
 1
1 -
2
-
3
-
4
-
5
-
6
-
7
-
8
-
9
-
10
-
11
-
12
-
13
-
14
-
15
-
16
-
17
-
18
-
19
-
 20
20 -
 21
21 -
 22
22 -
 23
23 -
 24
24 -
 25
25 -
 26
26 -
 27
27 -
 28
28 -
 29
29 -
 30
30 -
31
-
32
-
33
-
34
-
35
-
36
-
37
-
38
-
39
-
40
-
41
-
42
-
43
-
44
-
45
-
46
-
47
-
48
-
49
-
50
-
51
-
52
-
53
-
54
-
55
-
56
-
57
-
58
-
59
-
60
-
61
-
62
-
63
-
64
-
65
-
66
-
67
-
68
-
69
-
70
-
71
-
72
-
73
-
74
-
75
-
76
-
77
-
78
-
79
-
80
-
81
-
82
-
83
-
84
-
85
-
86
-
87
-
88
-
89
-
90
-
91
-
92
 |
 |
