Konica Minolta bizhub 42 bizhub 36/42 Fax Operations User Guide - Page 110
Basic] tab, Configuring a custom size
 |
View all Konica Minolta bizhub 42 manuals
Add to My Manuals
Save this manual to your list of manuals |
Page 110 highlights
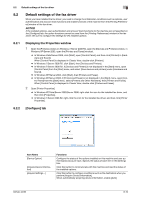
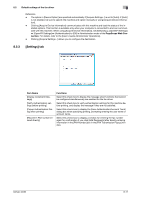
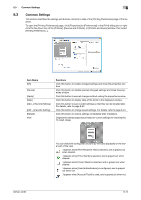
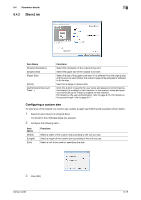
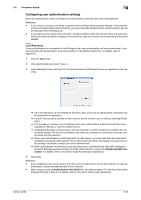
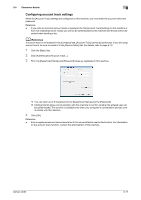
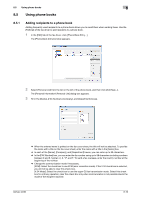
8.4 Parameter details 8 8.4.2 [Basic] tab Item Name [Original Orientation] [Original Size] [Paper Size] [Zoom] [Authentication/Account Track...] Functions Select the orientation of the original to be sent. Select the paper size of the original to be sent. Select the size of the paper to be sent. If it is different from the original size and the zoom is set to [Auto], the output image will be enlarged or reduced to fit the size. Select an enlarge or reduce ratio. Click this button to specify the user name and password when [User Authentication] is enabled on this machine, or the account name and password when [Account Track] is enabled on this machine. For details on the user authentication, refer to page 8-16. For details on the account track, refer to page 8-17. Configuring a custom size To send a fax of the original of a custom size, specify a paper size following the procedure shown below. 1 Select [Custom Size] from [Original Size]. The [Custom Size Settings] dialog box appears. 2 Configure the following items. Item Name [Width] [Length] [Unit] Functions Select a width of the custom size according to the unit you use. Select a length of the custom size according to the unit you use. Select a unit to be used for specifying the size. 3 Click [OK]. bizhub 42/36 8-15
-
 1
1 -
2
-
3
-
4
-
5
-
6
-
7
-
8
-
9
-
10
-
11
-
12
-
13
-
14
-
15
-
16
-
17
-
18
-
19
-
20
-
21
-
22
-
23
-
24
-
25
-
26
-
27
-
28
-
29
-
30
-
31
-
32
-
33
-
34
-
35
-
36
-
37
-
38
-
39
-
40
-
41
-
42
-
43
-
44
-
45
-
46
-
47
-
48
-
49
-
50
-
51
-
52
-
53
-
54
-
55
-
56
-
57
-
58
-
59
-
60
-
61
-
62
-
63
-
64
-
65
-
66
-
67
-
68
-
69
-
70
-
71
-
72
-
73
-
74
-
75
-
76
-
77
-
78
-
79
-
80
-
81
-
82
-
83
-
84
-
85
-
86
-
87
-
88
-
89
-
90
-
91
-
92
-
93
-
94
-
95
-
96
-
97
-
98
-
99
-
100
-
101
-
102
-
103
-
104
-
 105
105 -
 106
106 -
 107
107 -
 108
108 -
 109
109 -
 110
110 -
 111
111 -
 112
112 -
 113
113 -
 114
114 -
 115
115 -
116
-
117
-
118
-
119
-
120
-
121
-
122
-
123
-
124
-
125
-
126
-
127
-
128
-
129
-
130
-
131
-
132
-
133
-
134
-
135
-
136
-
137
-
138
-
139
-
140
-
141
-
142
-
143
-
144
-
145
-
146
-
147
-
148
-
149
-
150
-
151
-
152
-
153
-
154
-
155
-
156
-
157
-
158
-
159
-
160
-
161
-
162
-
163
-
164
-
165
-
166
-
167
-
168
-
169
-
170
-
171
-
172
-
173
-
174
-
175
-
176
-
177
-
178
-
179
-
180
-
181
-
182
-
183
-
184
-
185
-
186
-
187
-
188
-
189
-
190
-
191
-
192
-
193
-
194
-
195
 |
 |
