Kyocera FS 1900 Operation Guide - Page 95
Operating the Storage Device, Activating the RAM Disk, RAM Disk Mode
 |
UPC - 783310458241
View all Kyocera FS 1900 manuals
Add to My Manuals
Save this manual to your list of manuals |
Page 95 highlights
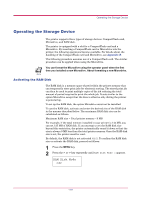
Operating the Storage Device Operating the Storage Device The printer supports three types of storage devices: CompactFlash card, Microdrive, and RAM disk. The printer is equipped with a slot for a CompactFlash card and a Microdrive. By inserting a CompactFlash card or Microdrive into the printer, the following operations become available. For details about the handling of the CompactFlash card and Microdrive, see Appendix B. The following procedure assumes use of a CompactFlash card. The similar procedure can be applied when using the Microdrive. You can format the Microdrive using the operator panel when the first time you installed a new Microdrive. About formatting a new Microdrive. Note Activating the RAM Disk The RAM disk is a memory space shared within the printer memory that can temporarily store print jobs for electronic sorting. The stored print job can then be used to print multiple copies of the job reducing the total amount of period required to print the whole job. It acts similar to the option Microdrive except that the data is effective only during the printer is powered up. To set up the RAM disk, the option Microdrive must not be installed. To use the RAM disk, activate and enter the desired size of the RAM disk in the manner described below. The maximum RAM disk size can be calculated as follows: Maximum RAM size = Total printer memory - 9 MB For example, if the total memory installed in your printer is 144 MB, you can set 135 MB of RAM disk. If you attempt to set the RAM disk size beyond this restriction, the printer automatically round it down so that the size is always 9 MB less than the total printer memory. Once the RAM disk size is set, the printer must be reset. By default, the RAM disk is not activated (Off). To confirm the RAM disk size or activate the RAM disk, proceed as follows: 1 Press the MENU key. 2 Press the or key repeatedly until RAM Disk Mode > appears. RAM Disk Mode Off 1-81
-
 1
1 -
2
-
3
-
4
-
5
-
6
-
7
-
8
-
9
-
10
-
11
-
12
-
13
-
14
-
15
-
16
-
17
-
18
-
19
-
20
-
21
-
22
-
23
-
24
-
25
-
26
-
27
-
28
-
29
-
30
-
31
-
32
-
33
-
34
-
35
-
36
-
37
-
38
-
39
-
40
-
41
-
42
-
43
-
44
-
45
-
46
-
47
-
48
-
49
-
50
-
51
-
52
-
53
-
54
-
55
-
56
-
57
-
58
-
59
-
60
-
61
-
62
-
63
-
64
-
65
-
66
-
67
-
68
-
69
-
70
-
71
-
72
-
73
-
74
-
75
-
76
-
77
-
78
-
79
-
80
-
81
-
82
-
83
-
84
-
85
-
86
-
87
-
88
-
89
-
 90
90 -
 91
91 -
 92
92 -
 93
93 -
 94
94 -
 95
95 -
 96
96 -
 97
97 -
 98
98 -
 99
99 -
 100
100 -
101
-
102
-
103
-
104
-
105
-
106
-
107
-
108
-
109
-
110
-
111
-
112
-
113
-
114
-
115
-
116
-
117
-
118
-
119
-
120
-
121
-
122
-
123
-
124
-
125
-
126
-
127
-
128
-
129
-
130
-
131
-
132
-
133
-
134
-
135
-
136
-
137
-
138
-
139
-
140
-
141
-
142
-
143
-
144
-
145
-
146
-
147
-
148
-
149
-
150
-
151
-
152
-
153
-
154
-
155
-
156
-
157
-
158
-
159
-
160
-
161
-
162
-
163
-
164
-
165
-
166
-
167
-
168
-
169
-
170
-
171
-
172
-
173
-
174
-
175
-
176
-
177
-
178
-
179
-
180
-
181
-
182
-
183
-
184
-
185
-
186
-
187
-
188
-
189
-
190
-
191
-
192
-
193
-
194
-
195
-
196
-
197
-
198
-
199
-
200
-
201
-
202
-
203
-
204
-
205
-
206
-
207
-
208
-
209
-
210
-
211
-
212
-
213
-
214
-
215
-
216
-
217
-
218
-
219
-
220
-
221
-
222
-
223
-
224
-
225
-
226
-
227
-
228
-
229
-
230
-
231
-
232
-
233
-
234
-
235
-
236
-
237
-
238
-
239
-
240
-
241
-
242
-
243
-
244
-
245
-
246
-
247
-
248
-
249
-
250
-
251
-
252
-
253
-
254
-
255
-
256
-
257
-
258
-
259
-
260
-
261
-
262
-
263
-
264
-
265
-
266
-
267
-
268
-
269
-
270
-
271
-
272
-
273
-
274
-
275
-
276
-
277
-
278
-
279
-
280
-
281
-
282
-
283
-
284
-
285
-
286
 |
 |
