Kyocera KM-1500 KM/CS-1500 Operation Guide Rev-2.0
Kyocera KM-1500 Manual
 |
View all Kyocera KM-1500 manuals
Add to My Manuals
Save this manual to your list of manuals |
Kyocera KM-1500 manual content summary:
- Kyocera KM-1500 | KM/CS-1500 Operation Guide Rev-2.0 - Page 1
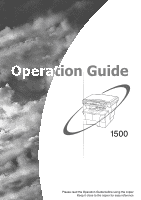
1500 Please read the Operation Guide before using the copier Keep it close to the copier for easy reference - Kyocera KM-1500 | KM/CS-1500 Operation Guide Rev-2.0 - Page 2
All rights reserved. No part of this material may be reproduced or transmitted in any form or by any means, electronic or mechanical, including photocopying, recording or by any information - Kyocera KM-1500 | KM/CS-1500 Operation Guide Rev-2.0 - Page 3
on the optional equipment that are available for use with this copier. Section 8 TROUBLESHOOTING This section contains explanations on handling problems that may occur during operation of this copier, such as when an error indication appears or if a paper jam occurs. Section 9 MAINTENANCE AND - Kyocera KM-1500 | KM/CS-1500 Operation Guide Rev-2.0 - Page 4
8 TROUBLESHOOTING 8-1 If one of the following indications is displayed 8-1 If paper jams 8-3 Misfeed location indicators 8-3 Cautions 8-3 Removal procedures 8-4 If other trouble occurs 8-9 Section 9 MAINTENANCE AND OPERATION INFORMATION 9-1 Cleaning the copier 9-1 Replacing the toner - Kyocera KM-1500 | KM/CS-1500 Operation Guide Rev-2.0 - Page 5
MAKING FULL USE OF THE COPIER'S ADVANCED FUNCTIONS 1 Enlarging/reducing copies to a 2 Copying at a mode> (See page 4-5) (See page 4-1) 50% 200% 4 Saving on toner use 5 6 Making one copy from either two or Sorting automatically (See page - Kyocera KM-1500 | KM/CS-1500 Operation Guide Rev-2.0 - Page 6
a set amount of time. When the copier includes printer and fax functions, the printer and fax must enter a "Low Power support a "Sleep Mode" where power consumption is reduced to a minimum when there is no activity within a set amount of time. This product is equipped with the following features - Kyocera KM-1500 | KM/CS-1500 Operation Guide Rev-2.0 - Page 7
Please read this Operation Guide before using the copier. Keep it close to the copier for easy reference. Please read this Operation Guide before using the copier. Keep it close to the copier for easy reference. The sections of this guide and parts of the copier marked with symbols are safety - Kyocera KM-1500 | KM/CS-1500 Operation Guide Rev-2.0 - Page 8
vi - Kyocera KM-1500 | KM/CS-1500 Operation Guide Rev-2.0 - Page 9
Caution labels have been attached to the copier at the following locations for safety purposes. BE SUFFICIENTLY CAREFUL to avoid fire or electric shock when removing a paper jam or when replacing toner. Label 1 High temperature inside. Do not touch parts in this area, because there is a danger - Kyocera KM-1500 | KM/CS-1500 Operation Guide Rev-2.0 - Page 10
, to avoid the danger of fire. To keep the copier cool and facilitate changing of parts and maintenance, allow access space as shown below. Leave possible, contact your service representative Other precautions Connect the power plug to the closest outlet possible to the copier. The power supply - Kyocera KM-1500 | KM/CS-1500 Operation Guide Rev-2.0 - Page 11
when performing cleaning operations If dust accumulates within the copier, there is a danger of fire or other trouble. It is therefore recommended that you consult with your service representative in regard to cleaning of internal parts. This is particularly effective if accomplished prior to - Kyocera KM-1500 | KM/CS-1500 Operation Guide Rev-2.0 - Page 12
copying. When lifting or moving the copier, contact your service representative. Do not touch electrical parts, such as connectors or printed circuit water. If coughing develops, contact a physician. • If you do happen to ingest toner, rinse your mouth out with water and drink 1 or 2 cups of water to - Kyocera KM-1500 | KM/CS-1500 Operation Guide Rev-2.0 - Page 13
the sale of laser United States. On this copier, the label is on the rear. 3. Optical unit When checking the optical unit unit. 4. Maintenance For safety of the service personnel, follow the maintenance instructions in the other section of this manual. 5. Safety switch The power to the laser unit - Kyocera KM-1500 | KM/CS-1500 Operation Guide Rev-2.0 - Page 14
on the equipment are only functional switches and are not suitable for isolating the equipment from the power source. ATTENTION! Le débranchement de la fiche secteur est le seul moyen de mettre l'appareil hors tension. Les interrupteurs sur l'appareil ne sont que des interrupteurs de fonctionnement - Kyocera KM-1500 | KM/CS-1500 Operation Guide Rev-2.0 - Page 15
have been serviced by a technician not employed by Kyocera or an Authorized Dealer, or (d) which have had the serial number modified, altered, or removed. 5. This warranty does not cover Maintenance Kits or the components of Maintenance Kits, which consist of the drum unit, the fixing unit, and the - Kyocera KM-1500 | KM/CS-1500 Operation Guide Rev-2.0 - Page 16
1-8 - Kyocera KM-1500 | KM/CS-1500 Operation Guide Rev-2.0 - Page 17
Section 2 NAMES OF PARTS Main Body (1) (7) (11) (3) (2) (4) (5) (6) (9) (8) (10) (1) toner container or if a paper jam occurs inside the copier.) (7) Process Unit (Take this unit out when you need to replace the toner container or if a paper jam occurs inside the copier.) (8) Toner - Kyocera KM-1500 | KM/CS-1500 Operation Guide Rev-2.0 - Page 18
Section 2 NAMES OF PARTS (16) (15) (14) (13) (13) (12) (12) Drawer (This drawer has a storage capacity of 250 sheets of standard copy paper (80 g/m²).) (13) Paper width guides (Adjust these guides to fit the width of the paper that is to be loaded in the drawer.) (14) Paper stopper (Adjust this - Kyocera KM-1500 | KM/CS-1500 Operation Guide Rev-2.0 - Page 19
Section 2 NAMES OF PARTS (23) (24) (21) (20) (22) (20) Power switch (Turn this switch ON ( need to add additional memory, contact your service representative or an authorized service center.) IMPORTANT! • Be sure to hold both the front and rear sides of the copier when carrying it, as shown in the - Kyocera KM-1500 | KM/CS-1500 Operation Guide Rev-2.0 - Page 20
Section 2 NAMES OF PARTS Operation panel (24) (23) (19) (21) (12) (22) (18) (20) ( press this key when the indicator is lit green.) (2) Reset/Power key (Press this key when you want to cancel to engage the Off mode. When you want to release the copier from the Off mode, press any one of the keys on - Kyocera KM-1500 | KM/CS-1500 Operation Guide Rev-2.0 - Page 21
is lit green. See page 5-10.) (16) Add Toner indicator (This indicator lights red when the toner supply has run low. See page 9-2.) (17) Memory jam occurs.) Section 2 NAMES OF PARTS Initial mode (the state that the copier enters at the end of warm-up or when the Reset/Power key is pressed) The upper - Kyocera KM-1500 | KM/CS-1500 Operation Guide Rev-2.0 - Page 22
Section 2 NAMES OF PARTS 2-6 - Kyocera KM-1500 | KM/CS-1500 Operation Guide Rev-2.0 - Page 23
to use paper that still has staples or clips attached to it. Doing so may result in lowered copying quality or even damage to the copier. • If you are using paper that has been folded or is curled at all, straighten it out before loading the paper into a drawer or setting - Kyocera KM-1500 | KM/CS-1500 Operation Guide Rev-2.0 - Page 24
the overhanging tabs. IMPORTANT! When pulling the drawer out of the copier, be sure to support it so that it doesn't fall out suddenly. 2 Adjust the more paper than indicated by the lines located on the width guides. NOTES • The paper sizes are marked on the bottom of the drawer. • The - Kyocera KM-1500 | KM/CS-1500 Operation Guide Rev-2.0 - Page 25
the drawer securely all the way back into the copier until it stops. Section 3 PREPARATIONS Adjusting the stopper extension lock from the paper stopper. IMPORTANT! If you will not be using the copier for a prolonged period of time, remove all paper from the drawer(s) and seal in its original - Kyocera KM-1500 | KM/CS-1500 Operation Guide Rev-2.0 - Page 26
Section 3 PREPARATIONS 4 Press down on the stopper extension lock and slide the paper stopper towards the rear of the drawer to set the lock into place. The paper stopper is now in position for Folio and Oficio II size paper. Selecting the paper size Perform the following procedure to use the - Kyocera KM-1500 | KM/CS-1500 Operation Guide Rev-2.0 - Page 27
Code number -A4 -A5 -Fo -Lg -Lt -o2 Size A4 A5 Folio Legal (8 1/2" × 14") Letter (8 1/2" × 11") Oficio II (8 1/2" × 13") 5 Press the Recall%/Enter key. The displayed numbers will flash and the copier the fixing process. The following products are recommended: Arkwright (LTR) 3M PP2500 (A4) 3-5 - Kyocera KM-1500 | KM/CS-1500 Operation Guide Rev-2.0 - Page 28
click into place. 4 Slide the paper all the way in, along the insert guides, as far as it will go. 2 Pull out the multi-bypass extension and then continue to support the paper by its trailing edge until all of the paper has been fed into the copier. 3 Adjust the insert guides to fit the - Kyocera KM-1500 | KM/CS-1500 Operation Guide Rev-2.0 - Page 29
The standard setting will remain in memory even when the power switch copier is turned OFF, while the temporary setting will be cleared each Copies / Zoom(-) key to select the appropriate paper size. The displayed code numbers refer to the available paper sizes as explained in the following table - Kyocera KM-1500 | KM/CS-1500 Operation Guide Rev-2.0 - Page 30
tray indicator is lit. 3 Press the Recall%/Enter key. The copier will return to a copy-ready state. 2 Press the Number of select the appropriate paper size. The displayed code numbers refer to the available paper sizes as explained in the following table. Code number -A4 -A5 -A6 -Fo - - Kyocera KM-1500 | KM/CS-1500 Operation Guide Rev-2.0 - Page 31
will be carried out at a higher fixing temperature and the copy speed will be lowered in order to ensure efficient fixing of the toner to the copy paper. 1 Press the Thick Paper key. The Thick Paper indicator will light. Section 3 PREPARATIONS 2 Perform the standard copying procedure. NOTE - Kyocera KM-1500 | KM/CS-1500 Operation Guide Rev-2.0 - Page 32
the standard copying procedure. Finished copies will be ejected onto the face-up tray. 1 Open the face-up tray (located at the rear of the copier). NOTES • Finished copies will be ejected face-up. • Copies will be stored in reverse order on the face-up tray. IMPORTANT! ALWAYS be sure to - Kyocera KM-1500 | KM/CS-1500 Operation Guide Rev-2.0 - Page 33
Text indicator is lit. 2 Selecting the desired functions Select from the copier's various functions. 3 Selecting the source of paper feed Select the will cause the copy exposure to be lightened in order to save on toner use. Select this mode only when high quality copies are not required. - Kyocera KM-1500 | KM/CS-1500 Operation Guide Rev-2.0 - Page 34
5 Adjusting the copy exposure The copy exposure can be manually adjusted in all of the image quality modes, except for as books, etc.). • When the copier is in a copy-ready state, the optical lamp will be lit. This does NOT indicate trouble with the copier. 8 Start copying Press the Start key - Kyocera KM-1500 | KM/CS-1500 Operation Guide Rev-2.0 - Page 35
storage table. Section 4 BASIC OPERATION NOTE The copy storage table has a storage capacity of 150 sheets of standard copy paper (80 g/m²). CAUTION If the copier will not be used for a short period of time (overnight, etc.), turn the power switch OFF ({). If it will not be used for an extended - Kyocera KM-1500 | KM/CS-1500 Operation Guide Rev-2.0 - Page 36
Section 4 BASIC OPERATION Making enlarged and reduced copies Zoom mode With this mode, the magnification ratio can be set to any 1% increment between 50% and 200%. 50% 3 Press the Recall%/Enter key. The new magnification ratio will be registered and the copy quantity/magnification display will - Kyocera KM-1500 | KM/CS-1500 Operation Guide Rev-2.0 - Page 37
Preset Zoom mode With this mode, the magnification ratio can be set to one of the pre-set ratios: Available magnification ratios (in the order they can be scrolled through*) 100%: (default setting) 78%: 8 1/2" × 14" Æ 8 1/2" × 11" 70%: A4 Æ A5 50%: 200%: 141%: A5 Æ A4 129%: 8 1/2" × 5 1/2" Æ 8 - Kyocera KM-1500 | KM/CS-1500 Operation Guide Rev-2.0 - Page 38
15 minutes. To enable copying again, press any one of the keys on the operation panel. If the optional Document Processor is installed on your copier, copying will be automatically enabled as soon as you set an original in the Document Processor. NOTES • It is possible to set the amount of - Kyocera KM-1500 | KM/CS-1500 Operation Guide Rev-2.0 - Page 39
to engage the Off mode manually. Press down on the Reset/Power key for at least 3 seconds. The Off mode will engage immediately. Section 4 BASIC OPERATION More about the Off mode The Off mode is a power-saving feature which automatically turns most of the power to the copier - Kyocera KM-1500 | KM/CS-1500 Operation Guide Rev-2.0 - Page 40
Section 4 BASIC OPERATION 4-8 - Kyocera KM-1500 | KM/CS-1500 Operation Guide Rev-2.0 - Page 41
Section 5 COPY FUNCTIONS Layout modes With this mode, the images from either 2 or 4 originals can be reduced and then combined onto a single copy. In addition, the borderline of each original can also be marked with a solid or dotted line. 2-in-1 Use this mode when you want to copy two originals - Kyocera KM-1500 | KM/CS-1500 Operation Guide Rev-2.0 - Page 42
Section 5 COPY FUNCTIONS Caution on setting the originals The following illustrations indicate how the orientation of the original will affect the resulting copies. NOTE Make sure the originals are set so that the first page is scanned first. 5-2 - Kyocera KM-1500 | KM/CS-1500 Operation Guide Rev-2.0 - Page 43
Section 5 COPY FUNCTIONS NOTE Make sure the originals are set so that the first page is scanned first. 5-3 - Kyocera KM-1500 | KM/CS-1500 Operation Guide Rev-2.0 - Page 44
2 Set the original(s). 3 Press the Start key. Scanning of the first original will start. NOTE If the optional Document Processor is installed on your copier, all of the originals set there will be scanned and the copy operation will start. 4 Once scanning of the first original is completed - Kyocera KM-1500 | KM/CS-1500 Operation Guide Rev-2.0 - Page 45
4-in-1 Use this mode when you want to copy four originals onto each sheet of copy paper. Section 5 COPY FUNCTIONS Original Copy Caution on setting the originals Be sure to set the originals as shown in the following illustrations. - Kyocera KM-1500 | KM/CS-1500 Operation Guide Rev-2.0 - Page 46
the borderline Perform the following procedure when you want to change the type of borderline. NOTE If the optional Document Processor is installed on your copier, all of the originals set there will be scanned and the copy operation will start. 4 Once scanning of the first original is completed - Kyocera KM-1500 | KM/CS-1500 Operation Guide Rev-2.0 - Page 47
refer to the available borderline types as explained in the following table. Code number 123- Borderline types None Solid line Dotted line 5 Press the Recall%/Enter key. The displayed numbers will flash and the copier will return to a copy-ready state. Section 5 COPY FUNCTIONS Selecting the - Kyocera KM-1500 | KM/CS-1500 Operation Guide Rev-2.0 - Page 48
/ Zoom(+) or the Number of Copies / Zoom(-) key until the number that corresponds to desired layout order (1 - 4) is shown. The displayed code numbers refer to the available layout orders as explained in the following table. 1-: 1 2 2-: 1 3 34 24 3-: 1 2 4-: 1 3 34 24 5 Press the Recall - Kyocera KM-1500 | KM/CS-1500 Operation Guide Rev-2.0 - Page 49
. 2 Set the original(s). 3 Press the Start key. Scanning of the first original will start. NOTES • If the optional Document Processor is installed on your copier, the Sort mode will be selected automatically once originals are set there. • If the optional Document Processor is installed on your - Kyocera KM-1500 | KM/CS-1500 Operation Guide Rev-2.0 - Page 50
the settings that were registered as the program. • If you want to clear the settings that are currently registered as the program, simply press the Reset/Power key while the Program key is lit. 5-10 - Kyocera KM-1500 | KM/CS-1500 Operation Guide Rev-2.0 - Page 51
the copier enters at the end of warm-up or when the Reset/Power key time the copier is turned on. Changes the number of exposure steps during manual adjustment of mode is selected as the image quality mode. The larger the code number, the darker the exposure. --- --- 1-: Auto exposure adjustment - Kyocera KM-1500 | KM/CS-1500 Operation Guide Rev-2.0 - Page 52
Line Correction Photo Processing Default Drawer Auto image quality mode. The larger the code number, the darker the exposure. If come out clearer if you select "Error diffusion" when using originals with both Reset/Power key is pressed. * If the optional Paper Feeder is not installed on your copier - Kyocera KM-1500 | KM/CS-1500 Operation Guide Rev-2.0 - Page 53
from between code numbers 3 and 4 when making copies width-wise. Sets the default borderline that will be used in the Layout modes (see page 5-1). Sets the amount of time after each copy job is finished until the Silent mode automatically engages and shuts down the motor inside the copier. If you - Kyocera KM-1500 | KM/CS-1500 Operation Guide Rev-2.0 - Page 54
to set a longer time interval before the Off mode engages if you use the copier frequently, and to a shorter time if it is used less frequently. * In ) (Default: 30 minutes) Sets whether the alarm which sounds when an ON error occurs, etc., will be turned ON or OFF. OFF* Adjusts the location of - Kyocera KM-1500 | KM/CS-1500 Operation Guide Rev-2.0 - Page 55
. * If the optional Document Processor is not installed on your copier, this default setting will not appear. Sets the width (short paper. Prints out a report that shows the number of copies made and average amount of toner used. -1.0 - 3.0 (mm) (Adjustment is complete at the time of purchase.) - Kyocera KM-1500 | KM/CS-1500 Operation Guide Rev-2.0 - Page 56
Section 6 COPY DEFAULT SETTINGS Accessing and changing the default settings NOTE If you want to access the "F30" default item (Document Processor Skewed Feed Adjustment), proceed directly to step 20. To access the "F26" default item (Document Processor Leading Edge Timing Adjustment), proceed - Kyocera KM-1500 | KM/CS-1500 Operation Guide Rev-2.0 - Page 57
Sample User Copy Setting List Sample Toner Coverage Report Section 6 COPY DEFAULT SETTINGS 5 Press the Number of Copies / Zoom(+) or the Number of Copies / Zoom(-) key to select either ON or OFF. ( - Kyocera KM-1500 | KM/CS-1500 Operation Guide Rev-2.0 - Page 58
Section 6 COPY DEFAULT SETTINGS 8 Press the Recall%/Enter key. The operation panel will return to the display in step 2. Once you are finished accessing default items, proceed to step 19. 11 Press the Start key. A pattern like that shown in the following illustration will be printed out. (F27, - Kyocera KM-1500 | KM/CS-1500 Operation Guide Rev-2.0 - Page 59
key. The operation panel will return to the display in step 2. Once you are finished accessing default items, proceed to step 19. 19 Press the Reset/Power key. The copier will return to a copy-ready state. 6-9 - Kyocera KM-1500 | KM/CS-1500 Operation Guide Rev-2.0 - Page 60
0.1 mm to the right. 26 Press the Recall%/Enter key. The operation panel will return to the display in step 2. 27 Press the Reset/Power key. The copier will return to a copy-ready state. 24 Fold the printed sheet (that you made in step 21) up the middle and compare the true - Kyocera KM-1500 | KM/CS-1500 Operation Guide Rev-2.0 - Page 61
. Section 6 COPY DEFAULT SETTINGS 33 Press the Recall%/Enter key. The operation panel will return to the display in step 2. 34 Press the Reset/Power key. The copier will return to a copy-ready state. 30 31 Refer to steps 1 and 2 and access the actual "F26" default item. Press the Recall%/Enter - Kyocera KM-1500 | KM/CS-1500 Operation Guide Rev-2.0 - Page 62
in the following order. (In this example, the total number of copies made is 1,234.) (1) (2) (3) 3 Once the total copy count has been shown, the copier will return to a copy-ready state. NOTE If you press the Start key while the total copy count is being shown, the Total Count Report - Kyocera KM-1500 | KM/CS-1500 Operation Guide Rev-2.0 - Page 63
Processor Automatically feeds and scans multiple sheet-originals one by one. Names of parts (3)(2) (1) (4) (5) Acceptable originals • Use sheet originals only • Paper the copier. (1) Original table (Set originals to be copied on this table.) (2) Original insert guides (Align these guides to - Kyocera KM-1500 | KM/CS-1500 Operation Guide Rev-2.0 - Page 64
originals in the Document Processor 1 Adjust the original insert guides to fit the width of original(s) to be copied. originals that is LESS than the level indicator on inside of the rear insert guide. Setting more than the acceptable number of originals can cause the originals to misfeed. • - Kyocera KM-1500 | KM/CS-1500 Operation Guide Rev-2.0 - Page 65
originals remaining on the original table or the original eject table. If there are any originals left on either table, they may fall off the copier when the Document Processor is opened. 2 Set the original to be copied face-down. Be sure to align the original flush up against the left - Kyocera KM-1500 | KM/CS-1500 Operation Guide Rev-2.0 - Page 66
can be added below the drawer that is included with this copier. The type, sizes and amount of paper that can be loaded the included drawer. Additional Memory It is possible to increase the memory in your copier. Adding additional memory will increase the number of originals that can be scanned at - Kyocera KM-1500 | KM/CS-1500 Operation Guide Rev-2.0 - Page 67
representative or an authorized service center. The toner container is not installed in the copier. Install the toner container. If the optional Document Processor is installed on your copier, there are originals remaining on the original table. Remove the originals, reset them on the original - Kyocera KM-1500 | KM/CS-1500 Operation Guide Rev-2.0 - Page 68
quantity/ magnification display "OP" appears on the copy quantity/ magnification display "OP1" appears on the copy quantity/ magnification display "J" and a number appear on the copy quantity/magnification display The Add Toner indicator lights The Add Toner indicator lights and "E33" appears on the - Kyocera KM-1500 | KM/CS-1500 Operation Guide Rev-2.0 - Page 69
TROUBLESHOOTING danger of electrical shock. CAUTION The copier's fixing unit is extremely hot. Take sufficient care copier. Failure to do so could cause another paper jam later. * Once all jammed paper has been removed, warm-up will begin. The error indications will disappear as well and the copier - Kyocera KM-1500 | KM/CS-1500 Operation Guide Rev-2.0 - Page 70
front cover. 5 Set the Process Unit into the copier by aligning the pins on both sides of the Process Unit with the guides inside the copier, and then slide the Process Unit all the way back into the copier until it stops. 3 Take the Process Unit out of the copier. 6 Close the front cover - Kyocera KM-1500 | KM/CS-1500 Operation Guide Rev-2.0 - Page 71
Paper jam in a drawer 1 Pull out the drawer that is currently being used. Section 8 TROUBLESHOOTING 4 Open and then close the upper front cover. The error indications will go out. 2 Remove the jammed paper. NOTE If a paper jam occurs in the optional Paper Feeder, the procedure to remove - Kyocera KM-1500 | KM/CS-1500 Operation Guide Rev-2.0 - Page 72
Section 8 TROUBLESHOOTING Paper jam in the paper eject section 1 Open the face-up tray. 4 Open and then close the upper front cover. The error indications will go out. 2 Remove the jammed paper. CAUTION The copier's fixing unit is extremely hot. Take sufficient care when working in this - Kyocera KM-1500 | KM/CS-1500 Operation Guide Rev-2.0 - Page 73
tray. Section 8 TROUBLESHOOTING Original jam in the optional Document Processor 1 Remove all of the originals remaining on the original table. 2 Open and then close the upper front cover. The error indications will go out. 2 Open the left cover to the Document Processor. 3 Reset the paper - Kyocera KM-1500 | KM/CS-1500 Operation Guide Rev-2.0 - Page 74
Section 8 TROUBLESHOOTING 5 Remove the jammed original. 6 Close the Document Processor. 7 Reset the originals. 8-8 - Kyocera KM-1500 | KM/CS-1500 Operation Guide Rev-2.0 - Page 75
TROUBLESHOOTING If other trouble occurs If trouble occurs with your copier, carry out the applicable checkpoints and procedures indicated on the following pages. If the trouble persists, contact your service representative or authorized service center. Trouble toner Remove the Process Unit and - Kyocera KM-1500 | KM/CS-1500 Operation Guide Rev-2.0 - Page 76
TROUBLESHOOTING Trouble Checkpoint Procedure Reference Page Black or white vertical bands Is the charger cleaner in its home position Remove the Process Unit insert guides securely remaining inside the copier? remove the Toner indicator Did you shake the new toner container Shake the toner - Kyocera KM-1500 | KM/CS-1500 Operation Guide Rev-2.0 - Page 77
portion, as shown in the illustration, with a soft cloth dampened with alcohol or mild detergent. If the optional Document Processor is installed on your copier, lift open the Document Processor and wipe the gray portion, as shown in the illustration, with a soft cloth dampened with alcohol or mild - Kyocera KM-1500 | KM/CS-1500 Operation Guide Rev-2.0 - Page 78
to force open or destroy the toner container. 3 Lift the Process Unit, together with the toner container, out of the copier. IMPORTANT! • Place the Process Unit on a clean, level surface. • The drum in the Process Unit is sensitive to light. Never expose the drum even to normal office lighting - Kyocera KM-1500 | KM/CS-1500 Operation Guide Rev-2.0 - Page 79
supplied plastic bag and dispose of it. 7 Remove the orange protective seal. CAUTION DO NOT attempt to incinerate the toner container. Dangerous sparks may cause burns. CAUTION DO NOT attempt to force open or destroy the toner container. 8 Set the new toner container into the Process Unit. 9-3 - Kyocera KM-1500 | KM/CS-1500 Operation Guide Rev-2.0 - Page 80
roller (A) inside the copier. (B) (A) IMPORTANT! While cleaning, be careful to avoid touching the black transfer roller (B). 13 After cleaning is finished, align the pins (C) on both sides of the Process Unit with the guides inside the copier, and slide the Process Unit slowly back into its - Kyocera KM-1500 | KM/CS-1500 Operation Guide Rev-2.0 - Page 81
14 Close the front cover. Section 9 MAINTENANCE AND OPERATION INFORMATION 15 Close the upper front cover. After use, ALWAYS dispose of the toner container in accordance with Federal, State and Local rules and regulations. 9-5 - Kyocera KM-1500 | KM/CS-1500 Operation Guide Rev-2.0 - Page 82
letterhead Continuous copying 1 - 99 sheets Light source Cold cathode lamp Developing system Single element reversing process Fixing system Heat roller Cleaning system Blade Photoconductor OPC Standard functions and modes Auto Exposure Adjustment, Eco-Copy mode, Zoom mode, Preset Zoom mode - Kyocera KM-1500 | KM/CS-1500 Operation Guide Rev-2.0 - Page 83
) and A5R Original paper weight 50 g/m² - 120 g/m² Acceptable number of originals Maximum of 50 (50 g/m² - 80 g/m²) Power source Via electrical connection to the copier Dimensions (W) × (D) × (H 17 15/16" × 13 1/16" × 3 11/16" 455 mm × 331 mm × 93 mm Weight Approx. 5.06 lbs. / Approx. 2.3 kg - Kyocera KM-1500 | KM/CS-1500 Operation Guide Rev-2.0 - Page 84
Section 9 MAINTENANCE AND OPERATION INFORMATION Environmental Specifications • Recovery time from the Low Power mode 10 seconds • Transition time to the Low Power mode (at time of purchase 15 minutes • Transition time to the Off and Sleep modes (at time of purchase 30 minutes Duplex (2-sided) - Kyocera KM-1500 | KM/CS-1500 Operation Guide Rev-2.0 - Page 85
following optional equipment are available for use with your copier. Document Processor Additional Memory Paper Feeder Document Processor Automatically An extra drawer can be added below the drawer that is included with this copier. The type, sizes and amount of paper that can be loaded in the - Kyocera KM-1500 | KM/CS-1500 Operation Guide Rev-2.0 - Page 86
quality (Text mode) (2) Image quality (Photo mode) (3) Image quality (Text & Photo mode) (4) Image quality (Eco-copy mode) (5) Copy exposure (Manual adjustment) (6) Copy exposure (Auto Exposure Adjustment mode) (7) Zoom mode (8) Preset Zoom mode (9) Program function (10) Thick Paper mode (11) Sort - Kyocera KM-1500 | KM/CS-1500 Operation Guide Rev-2.0 - Page 87
indications is displayed 8-1 If other trouble occurs 8-9 If paper jams Adjustment (default setting) .. 6-5 N Names of Parts 2-1 Non-Standard Size Paper Width (default setting copier 8-4 Photo mode (image quality mode 4-1 Photo Mode Exposure Adjustment (default setting 6-1 Photo Processing - Kyocera KM-1500 | KM/CS-1500 Operation Guide Rev-2.0 - Page 88
container 9-2 Toner Coverage Report (default setting 6-5 Total copy count 6-12 U Upper drawer 3-1 Upper Drawer Paper Size (default setting 3-4, 6-2 Upper Drawer Skewed Feed Adjustment (default setting) .........6-5 User Copy Setting List (default setting 6-1 Using programmed settings to make - Kyocera KM-1500 | KM/CS-1500 Operation Guide Rev-2.0 - Page 89
MEMO - Kyocera KM-1500 | KM/CS-1500 Operation Guide Rev-2.0 - Page 90
A1 - Kyocera KM-1500 | KM/CS-1500 Operation Guide Rev-2.0 - Page 91
For best copy results and machine performance, we recommend that you use only KYOCERA MITA original supplies for your KYOCERA MITA copier. - Kyocera KM-1500 | KM/CS-1500 Operation Guide Rev-2.0 - Page 92
©2003 http://www.kyoceramita.com is a trademark of Kyocera Corporation 2006. 2 302DC80014 Rev.2.0
-
 1
1 -
 2
2 -
 3
3 -
 4
4 -
 5
5 -
 6
6 -
 7
7 -
8
-
9
-
10
-
11
-
12
-
13
-
14
-
15
-
16
-
17
-
18
-
19
-
20
-
21
-
22
-
23
-
24
-
25
-
26
-
27
-
28
-
29
-
30
-
31
-
32
-
33
-
34
-
35
-
36
-
37
-
38
-
39
-
40
-
41
-
42
-
43
-
44
-
45
-
46
-
47
-
48
-
49
-
50
-
51
-
52
-
53
-
54
-
55
-
56
-
57
-
58
-
59
-
60
-
61
-
62
-
63
-
64
-
65
-
66
-
67
-
68
-
69
-
70
-
71
-
72
-
73
-
74
-
75
-
76
-
77
-
78
-
79
-
80
-
81
-
82
-
83
-
84
-
85
-
86
-
87
-
88
-
89
-
90
-
91
-
92
 |
 |

Please read the Operation Guide before using the copier
Keep it close to the copier for easy reference
1500