Lexmark 11N1000 User's Guide - Page 75
Enlarging or reducing an image, Understanding the Copy menu
 |
UPC - 734646043731
View all Lexmark 11N1000 manuals
Add to My Manuals
Save this manual to your list of manuals |
Page 75 highlights
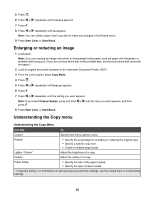
5 Press . 6 Press or repeatedly until Collate appears. 7 Press . 8 Press or repeatedly until On appears. Note: You can collate copies only if you did not make any changes in the Resize menu. 9 Press Start Color or Start Black. Enlarging or reducing an image 1 Load paper. Note: If you are copying an image onto photo or heavyweight matte paper, load the paper with the glossy or printable side facing you. (If you are not sure which side is the printable side, see the instructions that came with the paper.) 2 Load an original document facedown in the Automatic Document Feeder (ADF). 3 From the control panel, press Copy Mode. 4 Press . 5 Press or repeatedly until Resize appears. 6 Press . 7 Press or repeatedly until the setting you want appears. Note: If you select Custom Resize, press and hold or until the size you want appears, and then press . 8 Press Start Color or Start Black. Understanding the Copy menu Understanding the Copy Menu Use this To Copies* Specify how many copies to print. Resize* • Specify the percentage for enlarging or reducing the original copy. • Specify a specific copy size. • Create a multiple-page poster. Lighter / Darker* Adjust the brightness of a copy. Quality* Adjust the quality of a copy. Paper Setup • Specify the size of the paper loaded. • Specify the type of paper loaded. * Temporary setting. For information on saving temporary and other settings, see the related topic on Customizing settings. 75
-
 1
1 -
2
-
3
-
4
-
5
-
6
-
7
-
8
-
9
-
10
-
11
-
12
-
13
-
14
-
15
-
16
-
17
-
18
-
19
-
20
-
21
-
22
-
23
-
24
-
25
-
26
-
27
-
28
-
29
-
30
-
31
-
32
-
33
-
34
-
35
-
36
-
37
-
38
-
39
-
40
-
41
-
42
-
43
-
44
-
45
-
46
-
47
-
48
-
49
-
50
-
51
-
52
-
53
-
54
-
55
-
56
-
57
-
58
-
59
-
60
-
61
-
62
-
63
-
64
-
65
-
66
-
67
-
68
-
69
-
 70
70 -
 71
71 -
 72
72 -
 73
73 -
 74
74 -
 75
75 -
 76
76 -
 77
77 -
 78
78 -
 79
79 -
 80
80 -
81
-
82
-
83
-
84
-
85
-
86
-
87
-
88
-
89
-
90
-
91
-
92
-
93
-
94
-
95
-
96
-
97
-
98
-
99
-
100
-
101
-
102
-
103
-
104
-
105
-
106
-
107
-
108
-
109
-
110
-
111
-
112
-
113
-
114
-
115
-
116
-
117
-
118
-
119
-
120
-
121
-
122
-
123
-
124
-
125
-
126
-
127
-
128
-
129
-
130
-
131
-
132
-
133
-
134
-
135
-
136
-
137
-
138
-
139
-
140
-
141
-
142
-
143
-
144
-
145
-
146
-
147
-
148
-
149
-
150
-
151
-
152
-
153
-
154
-
155
-
156
-
157
-
158
-
159
-
160
-
161
-
162
-
163
-
164
-
165
-
166
-
167
-
168
-
169
-
170
-
171
 |
 |
