Marantz SR5002 SR4002_Rear_Panel_Drawing - Page 9
SETUP MIC jack - inputs
 |
View all Marantz SR5002 manuals
Add to My Manuals
Save this manual to your list of manuals |
Page 9 highlights
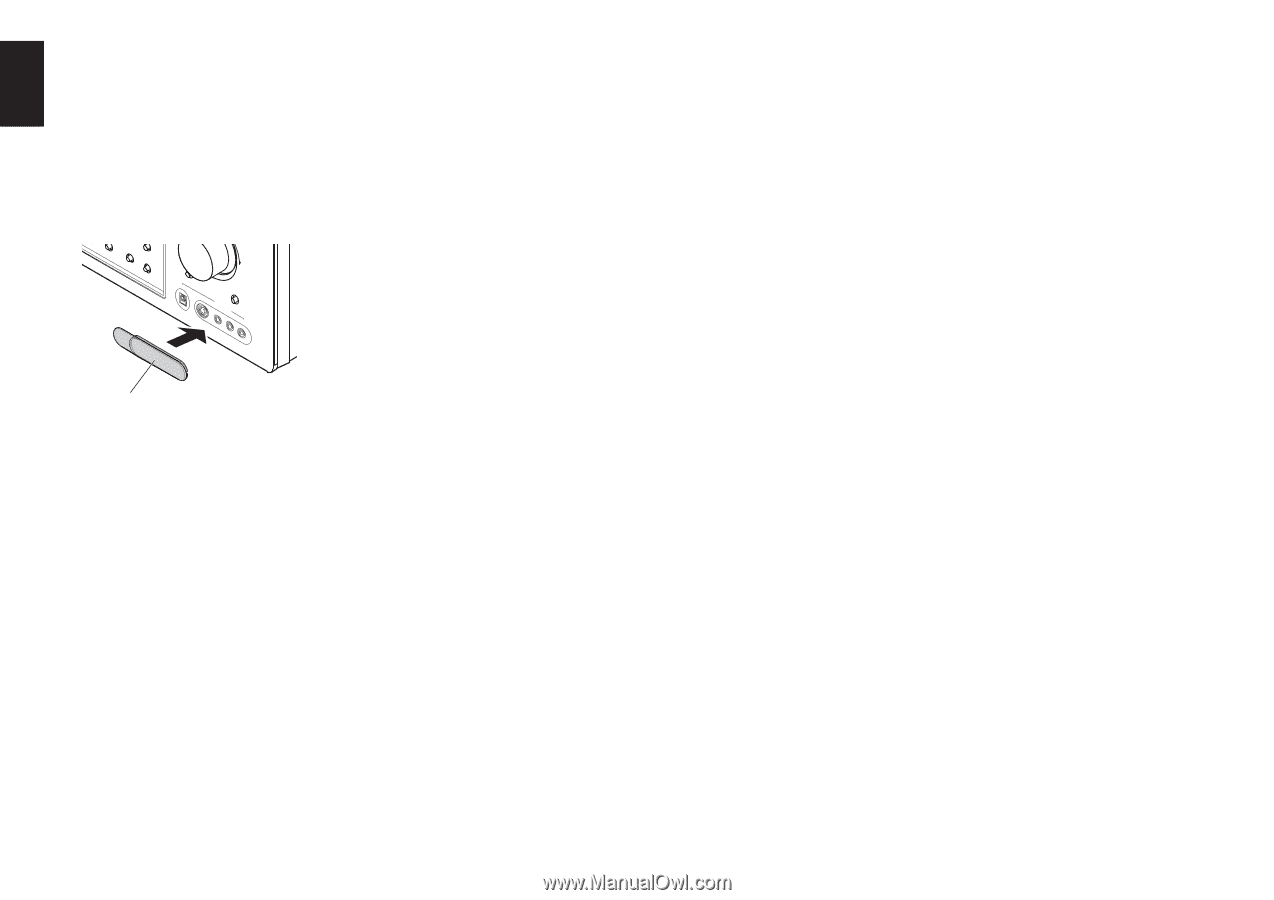
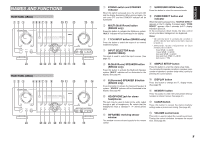
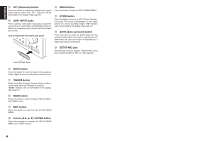
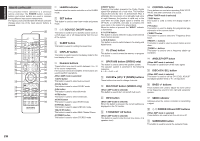
ENGLISH !4 ATT (Attenuate) button Press this button to reduce the analog audio signal input level by about half. "ATT" indicator will be illuminated in the display. (See page 39) !5 AUX1 INPUT jacks These auxiliary video/audio input jacks accept the connections of a camcorder, portable DVD, game etc. When not using these jacks, protect with the included jack covers. How to Attach the Front AUX Jack Cover BAND T-MODE PPUUSSHH MUTE UP DIGITAL S-VIDEO 7.1CH INPUT VIADUEXO1 INPUT L AUDIO R @1 MENU button Press this button to enter the SETUP MAIN MANU. @2 HT-EQ button Press this button to turn on or off HT(Home Theater)EQ mode. This mode compensates for the audio portion of a movie sounding "bright". "EQ" indicator will be illuminated in the display. (See page 40) @3 AUTO (Auto surround) button Press this button to select the AUTO mode from the surround modes. When this mode is selected, the unit determines the surround mode corresponding to a digital input signal automatically. @4 SETUP MIC jack Automatically measure speaker characteristics using the included microphone (MC-10). (See page 29) Front AUX Jack Cover !6 MUTE button Press this button to mute the output to the speakers. Press it again to return to the previous volume level. !7 T-MODE button Press this button to select the auto stereo mode or mono mode when the FM band is selected. "AUTO" indicator will be illuminated in the display. (See page 41) !8 BAND button Press this button to switch between FM and AM in the TUNER mode. !9 EXIT button Press this button to exit from the SETUP MAIN MENU. @0 Cursor (1, 2, 3, 4) / ENTER button Press these buttons to operate the SETUP MAIN MENU and TUNER function. 6
-
 1
1 -
2
-
3
-
 4
4 -
 5
5 -
 6
6 -
 7
7 -
 8
8 -
 9
9 -
 10
10 -
 11
11 -
 12
12 -
 13
13 -
 14
14 -
15
-
16
-
17
-
18
-
19
-
20
-
21
-
22
-
23
-
24
-
25
-
26
-
27
-
28
-
29
-
30
-
31
-
32
-
33
-
34
-
35
-
36
-
37
-
38
-
39
-
40
-
41
-
42
-
43
-
44
-
45
-
46
-
47
-
48
-
49
-
50
-
51
-
52
-
53
-
54
-
55
-
56
-
57
-
58
-
59
-
60
 |
 |