Nikon 25446B D90 User's Manual - Page 222
The Setup Menu: Camera Setup, Format Memory Card, LCD Brightness
 |
UPC - 689466140132
View all Nikon 25446B manuals
Add to My Manuals
Save this manual to your list of manuals |
Page 222 highlights
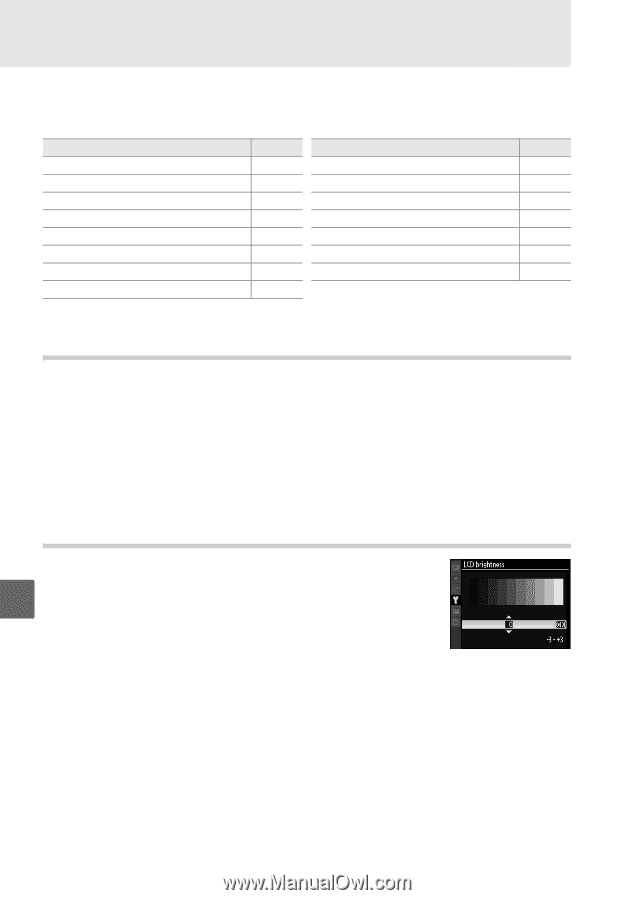
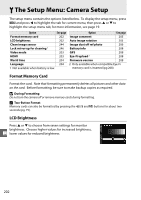
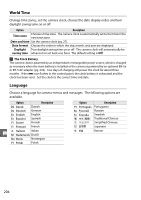
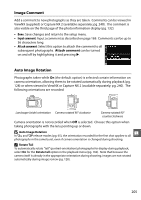
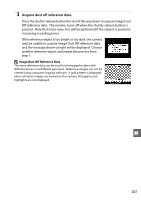
B The Setup Menu: Camera Setup The setup menu contains the options listed below. To display the setup menu, press G and press 4 to highlight the tab for current menu, then press 1 or 3 to highlight the setup menu tab; for more information, see page 19. Option See page Format memory card 202 LCD brightness 202 Clean image sensor 244 Lock mirror up for cleaning 1 246 Video mode 203 HDMI 203 World time 204 Language 204 1 Not available when battery is low. Option See page Image comment 205 Auto image rotation 205 Image dust off ref photo 206 Battery info 208 GPS 208 Eye-Fi upload 2 208 Firmware version 208 2 Only available when compatible Eye-Fi memory card is inserted (pg 208). Format Memory Card Format the card. Note that formatting permanently deletes all pictures and other data on the card. Before formatting, be sure to make backup copies as required. D During Formatting Do not turn the camera off or remove memory cards during formatting. A Two-Button Format Memory cards can also be formatted by pressing the Q (O and Z) buttons for about two seconds (pg. 75). LCD Brightness Press 1 or 3 to choose from seven settings for monitor brightness. Choose higher values for increased brightness, g lower values for reduced brightness. 202
-
 1
1 -
2
-
3
-
4
-
5
-
6
-
7
-
8
-
9
-
10
-
11
-
12
-
13
-
14
-
15
-
16
-
17
-
18
-
19
-
20
-
21
-
22
-
23
-
24
-
25
-
26
-
27
-
28
-
29
-
30
-
31
-
32
-
33
-
34
-
35
-
36
-
37
-
38
-
39
-
40
-
41
-
42
-
43
-
44
-
45
-
46
-
47
-
48
-
49
-
50
-
51
-
52
-
53
-
54
-
55
-
56
-
57
-
58
-
59
-
60
-
61
-
62
-
63
-
64
-
65
-
66
-
67
-
68
-
69
-
70
-
71
-
72
-
73
-
74
-
75
-
76
-
77
-
78
-
79
-
80
-
81
-
82
-
83
-
84
-
85
-
86
-
87
-
88
-
89
-
90
-
91
-
92
-
93
-
94
-
95
-
96
-
97
-
98
-
99
-
100
-
101
-
102
-
103
-
104
-
105
-
106
-
107
-
108
-
109
-
110
-
111
-
112
-
113
-
114
-
115
-
116
-
117
-
118
-
119
-
120
-
121
-
122
-
123
-
124
-
125
-
126
-
127
-
128
-
129
-
130
-
131
-
132
-
133
-
134
-
135
-
136
-
137
-
138
-
139
-
140
-
141
-
142
-
143
-
144
-
145
-
146
-
147
-
148
-
149
-
150
-
151
-
152
-
153
-
154
-
155
-
156
-
157
-
158
-
159
-
160
-
161
-
162
-
163
-
164
-
165
-
166
-
167
-
168
-
169
-
170
-
171
-
172
-
173
-
174
-
175
-
176
-
177
-
178
-
179
-
180
-
181
-
182
-
183
-
184
-
185
-
186
-
187
-
188
-
189
-
190
-
191
-
192
-
193
-
194
-
195
-
196
-
197
-
198
-
199
-
200
-
201
-
202
-
203
-
204
-
205
-
206
-
207
-
208
-
209
-
210
-
211
-
212
-
213
-
214
-
215
-
216
-
 217
217 -
 218
218 -
 219
219 -
 220
220 -
 221
221 -
 222
222 -
 223
223 -
 224
224 -
 225
225 -
 226
226 -
 227
227 -
228
-
229
-
230
-
231
-
232
-
233
-
234
-
235
-
236
-
237
-
238
-
239
-
240
-
241
-
242
-
243
-
244
-
245
-
246
-
247
-
248
-
249
-
250
-
251
-
252
-
253
-
254
-
255
-
256
-
257
-
258
-
259
-
260
-
261
-
262
-
263
-
264
-
265
-
266
-
267
-
268
-
269
-
270
-
271
-
272
-
273
-
274
-
275
-
276
-
277
-
278
-
279
-
280
-
281
-
282
-
283
-
284
-
285
-
286
-
287
-
288
-
289
-
290
-
291
-
292
-
293
-
294
-
295
-
296
-
297
-
298
-
299
-
300
 |
 |