Nokia IP1260 Installation Guide - Page 62
Removing, Installing, and Replacing NICs
 |
View all Nokia IP1260 manuals
Add to My Manuals
Save this manual to your list of manuals |
Page 62 highlights
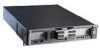
4 Installing and Replacing Network Interface Cards This chapter describes the following topics: „ Removing, Installing, and Replacing NICs „ Configuring and Activating Interfaces „ Monitoring Network Interface Cards For detailed information about specific network interface cards, see Chapter 5, "Connecting PMC Network Interface Cards." Caution You should have a working knowledge of networking equipment before you attempt to service an IP1200 Series. Limit service of the appliance to the procedures described in this chapter. Caution To help guard against electrostatic discharge damage, make sure you are properly grounded by using a grounding wrist strap and following the instructions provided with the wrist strap before you handle the components or open the appliance. If you do not have a grounding wrist strap, make sure you are properly grounded before you touch any electronic component. Removing, Installing, and Replacing NICs The IP1200 Series has two slots on the front of the appliance that hold two 6U PMC carriers. All NICs installed in the IP1200 Series are housed in the 6U PMC carrier. You must first remove the 6U PMC carrier from its slot before you can remove or install a NIC. 62 Nokia IP1200 Series Security Platform Installation Guide
-
 1
1 -
2
-
3
-
4
-
5
-
6
-
7
-
8
-
9
-
10
-
11
-
12
-
13
-
14
-
15
-
16
-
17
-
18
-
19
-
20
-
21
-
22
-
23
-
24
-
25
-
26
-
27
-
28
-
29
-
30
-
31
-
32
-
33
-
34
-
35
-
36
-
37
-
38
-
39
-
40
-
41
-
42
-
43
-
44
-
45
-
46
-
47
-
48
-
49
-
50
-
51
-
52
-
53
-
54
-
55
-
56
-
 57
57 -
 58
58 -
 59
59 -
 60
60 -
 61
61 -
 62
62 -
 63
63 -
 64
64 -
 65
65 -
 66
66 -
 67
67 -
68
-
69
-
70
-
71
-
72
-
73
-
74
-
75
-
76
-
77
-
78
-
79
-
80
-
81
-
82
-
83
-
84
-
85
-
86
-
87
-
88
-
89
-
90
-
91
-
92
-
93
-
94
-
95
-
96
-
97
-
98
-
99
-
100
-
101
-
102
-
103
-
104
-
105
-
106
-
107
-
108
-
109
-
110
-
111
-
112
-
113
-
114
-
115
-
116
-
117
-
118
-
119
-
120
-
121
-
122
-
123
-
124
-
125
-
126
-
127
-
128
-
129
-
130
-
131
-
132
-
133
-
134
-
135
-
136
-
137
-
138
-
139
-
140
-
141
-
142
-
143
-
144
-
145
-
146
-
147
-
148
-
149
-
150
-
151
-
152
-
153
-
154
-
155
-
156
 |
 |
