Nokia IP1260 Installation Guide - Page 63
To replace a network interface card, Suitable, grounded work surface on which to place the PMC carrier
 |
View all Nokia IP1260 manuals
Add to My Manuals
Save this manual to your list of manuals |
Page 63 highlights
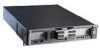
Removing, Installing, and Replacing NICs Note Because the IP1200 Series supports hot swapping of NICs, you do not have to turn off power from the system to remove, install, or replace a NIC. Before You Begin Before you install the card, make sure that the rubber gasket around the front of the card is installed properly. To remove, install, or replace a NIC you need the following: „ Phillips-head screwdriver „ Suitable, grounded work surface on which to place the PMC carrier „ Replacement or new NIC To replace a network interface card 1. Identify the location (PMC carrier and slot) of the NIC to be replaced. 2. Loosen the screws on each side of the PMC carrier. The screws are located behind the ejection levers. Caution To avoid damage to the ejection lever, loosen the retaining screw behind each ejection lever before you remove the PMC carrier. 3. Press the red buttons on the ejection and locking levers on the PMC carrier. The lock is released. Nokia IP1200 Series Security Platform Installation Guide 63
-
 1
1 -
2
-
3
-
4
-
5
-
6
-
7
-
8
-
9
-
10
-
11
-
12
-
13
-
14
-
15
-
16
-
17
-
18
-
19
-
20
-
21
-
22
-
23
-
24
-
25
-
26
-
27
-
28
-
29
-
30
-
31
-
32
-
33
-
34
-
35
-
36
-
37
-
38
-
39
-
40
-
41
-
42
-
43
-
44
-
45
-
46
-
47
-
48
-
49
-
50
-
51
-
52
-
53
-
54
-
55
-
56
-
57
-
 58
58 -
 59
59 -
 60
60 -
 61
61 -
 62
62 -
 63
63 -
 64
64 -
 65
65 -
 66
66 -
 67
67 -
 68
68 -
69
-
70
-
71
-
72
-
73
-
74
-
75
-
76
-
77
-
78
-
79
-
80
-
81
-
82
-
83
-
84
-
85
-
86
-
87
-
88
-
89
-
90
-
91
-
92
-
93
-
94
-
95
-
96
-
97
-
98
-
99
-
100
-
101
-
102
-
103
-
104
-
105
-
106
-
107
-
108
-
109
-
110
-
111
-
112
-
113
-
114
-
115
-
116
-
117
-
118
-
119
-
120
-
121
-
122
-
123
-
124
-
125
-
126
-
127
-
128
-
129
-
130
-
131
-
132
-
133
-
134
-
135
-
136
-
137
-
138
-
139
-
140
-
141
-
142
-
143
-
144
-
145
-
146
-
147
-
148
-
149
-
150
-
151
-
152
-
153
-
154
-
155
-
156
 |
 |
