Pfaff hobby 420 Owner's Manual
Pfaff hobby 420 Manual
 |
View all Pfaff hobby 420 manuals
Add to My Manuals
Save this manual to your list of manuals |
Pfaff hobby 420 manual content summary:
- Pfaff hobby 420 | Owner's Manual - Page 1
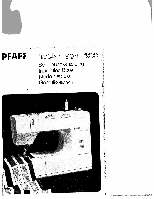
PFAFF ©Eby ©-4© Bedienungsanleitung Instruction Book Mode dbmploi Gebruiksaanwijzing I :iI - Pfaff hobby 420 | Owner's Manual - Page 2
whenever you have to leave the machine or want to clean it, oil it or change mechanical and acces sory parts. C) Be sure to use only a 15-watt light bulb in the sewing lamp. d) The drive belt must never be adjusted by anyone but an authorized Pfaff agent Mesures de sécurité selon IEC 335-2-28 - Pfaff hobby 420 | Owner's Manual - Page 3
orn 4 \ J - Pfaff hobby 420 | Owner's Manual - Page 4
Bedienungsteile der Nähmaschine 4 Parts of the sewing machine 1 Fadenhebel 2 Fadenfuhrung 3 Tragegriff 4 Stichmuster-Tabelle 5 Spuler 6 Thread guide 3 Carrying handle 4 Stitch patterns 5 Bobbin winder 6 Hand wheel 7 Disengaging knob 8 Reverse control 9 Detachable work support with - Pfaff hobby 420 | Owner's Manual - Page 5
Elements constitutifs de Ia machine a coudre 1 Levier releveur de fil 2 Guide-fil 3 Poigné 4 Tableau des points 5 Dévidoir 6 Volant 7 Disque de debrayage 8 Levier de marche arrière 9 Boite de rangement formant plan de travail a 10 Plaque aiguille 11 Passages du fil 12 Tension du fil d'aiguille 13 Sé - Pfaff hobby 420 | Owner's Manual - Page 6
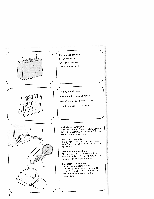
. Electrical connection: Set the foot control on plug S in the machine the and floor. plug Insert T in the wall socket. a machine et Ia fiche T dans Ia prise murale. Electrische aansluiting: Zet de voetweerstand op een gemakkelijk bereikbare plaats op de vloer. Eerst stekker S in de machine - Pfaff hobby 420 | Owner's Manual - Page 7
links herausziehen. Bobbin winding preparations: Reach under work support 9 and pull it out towards the left. Preparer le bobinage: Passer Ia main sous Ia boite de rangement 9 et retirer celle-ci vers Ia gauche. Spoelen: Met de linkerhand de werkbox verwijderen. Verschlu8klappe 19 nach unten öffnen - Pfaff hobby 420 | Owner's Manual - Page 8
S drukken. Nähwerk ausschalten: Handrad 6 fest halten und Scheibe 7 nach vorn drehen. Disengaging the sewing mechanism: Hold hand wheel 6 firmly and turn knob 7 towards you. Débrayer le mécanisme de couture: Retenir le volant 6 et tourner le disque 7 vers l'avant. Naaimechanisme uitschakelen: Het - Pfaff hobby 420 | Owner's Manual - Page 9
, let go of the thread again. Push the filled bob bin to the left, remove it and cut the thread. N Spoelen: De draad van de garenklos in de voorspanning (17) trekken, naar de spoel leiden, door een gaatje steken en vasthouden. Voetweerstand indrukken en opspoelen na een aantal omwentelingen van - Pfaff hobby 420 | Owner's Manual - Page 10
sewing mechanism: Hold the balance wheel firmly and turn knob 7 away from you. Embrayage du mécanisme: Retenir le volant et tourner le disque 7 vers l'arriére. Koppelschroef vastzetten. Om na het spoelen de machine and out of spring U. Mise en place de Ia canette (5), le fil se déroulant vers - Pfaff hobby 420 | Owner's Manual - Page 11
: Open latch T and push the bobbin case onto pin U until it snaps in place. Bobbin case finger V must fit into cutout W. Mise en place de Ia boite a canette: Lever le loquet T et engager Ia boite a canette a fond sur Ia broche U. Le doigt V doit s'engager dans I'encoche W. Spoelhuls inzetten: KIep - Pfaff hobby 420 | Owner's Manual - Page 12
dans a fente 5, vers le haut dans Ia fente T, dans le releveur de fil, revenir dans Ia fente T et dans le guide-fil droit U au pince-aiguille, Bovendraad inrijgen: Naald en draad hevel in de hoogste stand. Naaivoetje omhoog. De draad via geleiding 2, door gleuf S naar beneden, naar boven door gleuf - Pfaff hobby 420 | Owner's Manual - Page 13
Unterfaden nach rechts unter den Nähful3 legen. Place both threads towards the right under the sewing foot. Coucher es deux fits vers larrière a droite sous le pied presseur. Boven- en onderdraad onder de naaivoet door naar links leggen. Verschlu6klappe 19 schliel3en. Close free-arm cover 19. Fermer - Pfaff hobby 420 | Owner's Manual - Page 14
machines have a free arm for sewing tubular shaped articles. Les machines possédent un bras libre pour a mise en uvre d'articles tubu laires. De machines hebben Bohrungen). Push the detachable work support 9 onto the machine (guide pins in holes). Mettre le plan de travail 9 en place (les broches - Pfaff hobby 420 | Owner's Manual - Page 15
dale du rheostat. Plus abaissêe, plus Ia "Hobby" Ia coudra vite. Sdrnueklhoepidhseptepdeadaalailnrteragpelptedne. De voet snelheid van de machine. Oberfadenspannung 12 S = Einstellmarkierung. Needle thread The following is essential for obtaining good sewing results: 1. The needle must 2. - Pfaff hobby 420 | Owner's Manual - Page 16
glée a l'usine. Si, après contrôle, a tension inférieure (voir pag. 7) doit étre rajustée, ne tour ner que trés peu Ia vis de reglage. Contrôle de Ia tension du N d'aiguille: Position normale dans Ia plague entre 4 et 6. Tension d'autant plus forte que le chiffre est élevé. ContrOler avec le point - Pfaff hobby 420 | Owner's Manual - Page 17
Set the required stitch length, from 0 to 4 mm, at mark T. Range cz between 0 and 1 is for sewing buttonholes. Règle-point 15 Modèles 342-420 Regler Ia longueur de point désiréo, entre 0 et 4 mm, au-dessus du repêre T. La plage entre 0 et 1 sert au ré glage pour les boutonnières. Steeklengte - Pfaff hobby 420 | Owner's Manual - Page 18
control 8, The machine sews backwards as long as the control key is 8 held down. Couture en arrière: Abaisser Ia touche 8. La machine coud en arrière aussi longtemps que cette touche est tenue abaissée. Afhechten: Toets 8 indrukken en de machine stikt achteruit. Zolang men de toots ingedrukt - Pfaff hobby 420 | Owner's Manual - Page 19
siehe unten. Stitch pattern thumb wheel 16 Models 301-337 Turn the required stitch symbol to mark For a table of stitch patterns see below. Sélecteur de point 16 des modéles 301-337 Placer le point désirA au-dessus du repere S. Voir le tableau - Pfaff hobby 420 | Owner's Manual - Page 20
letter on thumb wheel 13 at mark S. Before you do that on machine models 385-420 re lease button 14 must be pushed up wards and held there. and 19 you will find a table of possible utility stitches. Sélecteur de point 13 des modèles 342-420 Choisir le point dans le tableau 4 et, a l'aide du disque - Pfaff hobby 420 | Owner's Manual - Page 21
n towards On pages 20 and 21 you will find a table of possible stretch stitches. Points stretchs des modèles 353-420 Psrptietooorpuinenérttrcvechesotr"Trsue.dtdcS+ruehuiodcvpuiease,snqurtutpaelcoOecitn1roge5tuser,naaclrupileo-lpadndcaegeersersrtupiolsesatsarutmdi,ruooonlteta vers -. Le tableau - Pfaff hobby 420 | Owner's Manual - Page 22
Stichlage links Utility stitches Models 342-420 Stitch Points utilitaires Modètes 342-420 point Buttonhole symbols Straight stitch Point droit llI M EinfaBstich N Zierstich Binding stitch Fancy stitch Point de bordage Point fantaisie hllIIIlIIilJ' 0 Zierstich Fancy stitch Point fantaisie - Pfaff hobby 420 | Owner's Manual - Page 23
, Models, Modéles, Modellen Steek 342 348 353 370 375 380 385 390 395 400 405 410 415 420 Knoopsgaten symbolen a a• aaa•aaa aaaa Rechtesteek naaldstand midden aaa aa a a aaa aaa a Rechtesteek naaldstand links • a• • aa aa a aaaa Zigzagzone aaaaaaaaaaaaaa Gestiktezigzag a aa a a aa - Pfaff hobby 420 | Owner's Manual - Page 24
triple stretch stitch E Wabenstich Honeycomb stitch Points stretchs Modèles 353-420 point Triple point stretch droit median Triple point stretch droit a gauche stitch Point zigzag fantaisie Closed serging stitch Poi. nt de surfilage term Elastic decorative stitch Point zigzag fantaisie 0 - Pfaff hobby 420 | Owner's Manual - Page 25
Modelle, Models, Modeles, Modellen 353 370 375 380 385 390 395 400 405 410 415 420 aaa aa a a iretch3voudige aaaa aa a Stretch-3voudge a a a aaa Wafeisteek Pulloversteek breed aaa ) aaaa aaa aaa aa Pulloversteek sinaI Over)ocksteek Gesloten overlocksteek aa a aaaaa a I aa - Pfaff hobby 420 | Owner's Manual - Page 26
out the sniedeedlfea.ciPngushtowthaerdnseethdeleba(wckit)h its up flat as far as it will go. Tighten the screw. Remplacement de laiguille (système 130/705 H): Débrancher Ia machine du secteur. Desserrer Ia vis S et retirer laiguille. Engager l'aiguille neuve (le méplat du talon vers l'arrière - Pfaff hobby 420 | Owner's Manual - Page 27
. V und neals. W X sind zum Befestigen des Li st die NähfuBhalterschraube. Hole W and screw V are used for attaching an edge guide. Screw X is the sewing foot holder srew. V et W servent a fixer l'éirier guide bord. La vis X fixe le support de semelle. LmienteaValvkalsetmze:ttLenin. eaXalis - Pfaff hobby 420 | Owner's Manual - Page 28
der Nähfläche 9 öffnen. Dar unter ist Platz für Nähzubehör. compartment. the lid of work support 9. open Bo?te de rangement Ouvrir le couvercle formant plan de tra vail. La bolte serf au rangement des accessoires de couture. Accessoiresbakje De deksel van werkbox 9 openen In het bakle is plaats voor - Pfaff hobby 420 | Owner's Manual - Page 29
whenever you have to leave the machine or want to clean it, oil it or change mechanical and acces sory parts. c) Be sure to use only a 15-watt light bulb in the sewing lamp. d) The drive belt must never be adjusted by anyone but an authorized Pfaff agent L Mesures de sécurité selon IEC 335-2-28 - Pfaff hobby 420 | Owner's Manual - Page 30
zum Einsatz kommen. Befestigung des Lineals (Sonderzubehör): Lneal S guide (special accessory): Stitch: B straight stitch Edge guide S can be used with nearly all sewing feet. Fitting the edge guide (Special accessory): Push edge guide S through hole T and secure it in position with guide - Pfaff hobby 420 | Owner's Manual - Page 31
regler le gLue idgeuidsuer-dlréocitarftaecmilietentcodnéssiidréé.rablement es surpiqQres paralléles et le surpiquage des bords. Ce faisant, le bord du tissu (fig. V) ou bien Ia piqüre précédente suit le guide-droit (fig. W). La couture sera toujours nette et régulière. Watteren Naaivoetje: Normate - Pfaff hobby 420 | Owner's Manual - Page 32
des BMsbeNoielinàwitinmheeddneiesntltriiFncnSSahkaidtteceueerhlln3zlsEeulciesinnhrnkäfrseascatnSihuctdtlsbhartleenAihegnbSei.nbnd.ed,eenUPdnarOtuo3A.bbndeeVsirn)ecs.ahthoNlaftafgdanueTult r einem Stotfrest. N Elastic blind stitch Sewing sewing foot. The crease line fabric runs along edge guide - Pfaff hobby 420 | Owner's Manual - Page 33
70 of 80 modellen gezoomd 301, 305, 313 en 317 met de zigzagsteek 5/1.5 (zie label op bldz. 14/15). Zo wordt de insteek van de naald gDalaaeennrgessgtdoeefdledoonngddeeelerrkiddainentg.voDTeetvaloenmggdgeeens,vlaomgeetentlazrtoeanonmd open. Met instelschroef 5, plaate I zover naar links - Pfaff hobby 420 | Owner's Manual - Page 34
und einige Vernähstiche náhen. D(SaosndKenrozpufbloechhör)miat udfesrcnhnPefiedieltnr.enner 4 Sewing buttonhoies Models 301, 305, 309 Sewing foot: Tension: Thread: clear-view foot needle thread tension a little slack fine machine embroidery thread Needle: sizes 70 to 80 1. Set the the - Pfaff hobby 420 | Owner's Manual - Page 35
lit 5 Zeichnungen sind ohne Nähtult Drawings do not include sewing toot. Pour plus do clarté, le pied presseur nest draaien. 2. De naald rechts in de stat steken. De naaivoet omhoog brengen, de stot 180° draaien en de kiesschijf weer op indikatie S draaien, De naaivoet omlaag en de naald omhoog - Pfaff hobby 420 | Owner's Manual - Page 36
Das Knopfloch mit dem Pfeiltrenner (Sonderzubehör) aufschneiden. 4 Sewing buttonholes Models 313-420 Sewing foot: Tension: Thread: clear-view foot needle thread tension a little slack fine machine embroidery thread Stitch length on models 342-420: buttonhole range cZz Needle: sizes 70 to 80 - Pfaff hobby 420 | Owner's Manual - Page 37
sewing fool Pour plus do dane. 10 pied pressour n eat pas represenie. Voor eon dolor overzicht 5 do k000pagatenvoel op do afb weggolaten Boutonniêres (Modèles 313-420 sur es modètes 342-420: Aiguille: plage boutonniere cZ 70 a 80 1. Tourner le sur ou disque des motifs 13/16 Al et coudre - Pfaff hobby 420 | Owner's Manual - Page 38
13 soweit in den Zickzackbereich drehen, bis die Nadel, beim Drehen des Handrades, in die rechte Bohrung sticht. Bei den Mo dellen 301- into the left hole. Place a match on the middle of the button. Lower the sewing foot (T). Sew a num ber of zigzag stitches and leave a thread end of about 6 inches. - Pfaff hobby 420 | Owner's Manual - Page 39
de boutons Pied presseur: sans pied presseur ou pied a semelle transparente Point: Griffe: C ou point droit déporté a gauche couverte par Ia plaque a repriser Fil: Fil a coudre fin Poser le bouton a 'emplacement marqué auparavant et sous le support du pied presseur. Descendre le support - Pfaff hobby 420 | Owner's Manual - Page 40
the toot so that its teeth run along the right guiding edge on the sole of the toot (Fig. T). Sew about halt the length of the zip at the required (Fig. U). Lower the zipper foot again, continue the seam and then sew across the end. Sew the other side of the zip at the same margin. Shortly before the - Pfaff hobby 420 | Owner's Manual - Page 41
naar links schuiven tot de naald boven de rechtse opening van de voet staat. De treksluiting zo onder de voet leggen dat de tandjes in de rechter geleiding van de voet lopen (afb. T). De sluiting tot de helft instikken, naald in de stof; naai voet omhoog; de sluiting dichtritsen (afb. U). Naaivoet - Pfaff hobby 420 | Owner's Manual - Page 42
Die Reil3verschlu6zähne laufen in der linken Fuhrungsrille des Ful3es (Abb. U). Zu Beginn der Naht (Abb. Y). Seam-like zip fastener For machine setting see page 36 How the zipper is prepared the teeth a little to feed them into the guiding groove. Sew the seam to the end and secure it. Close - Pfaff hobby 420 | Owner's Manual - Page 43
zichtbaar) Machine instelling zie blz 36. De treksluiting en de stof als volgt gereedmaken. Strijk de naden scherp om. De linkervouw openvouwen (afb. S). Leg de linkerzijde van de sluiting nu zo op de strijkvouw (afb. T) dat de tandjos or precies oversteken. De steken worden precies in de vouw - Pfaff hobby 420 | Owner's Manual - Page 44
HMDeoanssecRnhrieneilie3Bnv-veEresircnshscltuhelll3ulfuBunBg(Dnsaaiecmhheenli)Snkesitebi3s6.zum ADgdhssmzeNhsieeteinäneceeensifashthntbtcdclfenVStkaehaherbnenecensllla,aoahngscrlienghlsdumainss(taustnuAezte.sBindfennScknebdcDdthanbedoRk.gnii.nidfeeeeeetfaVibeiSnebmlARns)e3Rou.tenveNureegiibreb. - Pfaff hobby 420 | Owner's Manual - Page 45
.uferprereime,mdeloatpnuistrrseeeersrsaleeuprieedt terminer Ia couture. A Ia tin de Ia couture, coudre un arrèt. Treksluiting in ciamespantalon Machineinstelling Verschuif de zool zie blz 36. van de treksluitingvoet geheel naar links. DiodVhddLnnhseneeeeeesaoioandtntnaaoor,isedrl - Pfaff hobby 420 | Owner's Manual - Page 46
) Stitch type: B Straight stitch Needle position: Tension: Centre Ease needle thread tension Thread: Fine machine embroidery thread Needle: Size 70 Feet: How to fit the darning Remove the sewing foot secure the darning toot making sure that wire T foot: holder, then with screw 5, is - Pfaff hobby 420 | Owner's Manual - Page 47
w Travaux de repnsage Preparation de Ia machine: Pied presseur: Pied a repriser (contre supplement) Point: B Point droit median Tension du fiT d'aiguille: Fil: moms forte Fil a broder fin Aiguille: Griffe: Grosseur 70 montèr Ia plaque a repriser Mise en place du Enlever le support pied - Pfaff hobby 420 | Owner's Manual - Page 48
Caution: do not drop the sewing hook. NDLDpNvBntdAeleeeéaéheaamvtrbvtvtsqutsetterceiopuorisanutllsyyestne'tlleeeaeieecaorraxgrdhUnpteealaéal.a! schoonmaken. At en toe een drupje olie in de grijper baan doen. Beangrijk. De grijper niet laten valtent 44 - Pfaff hobby 420 | Owner's Manual - Page 49
that the pins enter slots U, push the bulb upwards and turn it in direction T. Be sure to use only a 15-watt light bulb in the sewing lamp. Changement de lampoule Débrancher Ia machine du secteur. Pousser l'ampoule vers le haut. Ia tourner vers S et l'enlever. Placer l'ampoule neuve - Pfaff hobby 420 | Owner's Manual - Page 50
el-Ta belie Die WahI der richtigen Nadel garantiert eine bessere Verarbeitung des Nähmaterials Stoffquaftat Ieicht Nadel 60 70 75 Stoffqualitat mittel Nadel -_80 , Simplex mittlere Kugelspitze gro8e Kugelspitze Speziell für Pfaff entwickelte Stretchnadel. Besonders gut geeignet für empfindliche - Pfaff hobby 420 | Owner's Manual - Page 51
N ad e I -Tabe He Bezeichnung Stichlange Stichbreite I 130/705 H-ZW( 2,5mm - Stärke: 80 2,5mm - I 130/705 H-ZWI Starke: 80 2,5mm - Stärke: 90 2,5mm - 1 Stärke: 100 3,0mm - Nadelentfernung 1,6mm 2,0mm 2,5mm 3,0mm 4,0mm Geeignet für normale Biesen normale Biesen breite Biesen - Pfaff hobby 420 | Owner's Manual - Page 52
Needle chart Uwsoirnkgintgheupadoefqtuhaetemanteeeridalle. guarantees a better Fabric weight: light Needle size: 60,70,75 Fabric weight: medium Needle size: 80,90 Fabric weight: heavy Needle size: 100,110,120 Needle points System & No. Profile Point & eye Suitable for 130/705 H 70, 80 I 130 - Pfaff hobby 420 | Owner's Manual - Page 53
eedIe chart System & No. Stitch length . 1 130/705 H-ZWI 2.5 mm 80 2.5 mm fI 130/7051i-ZWI 80 2.5 mm •. 90 2.5 mm ) 100 3.0 mm Stitch width - - - - - Needle spacing 1.6 mm 2.0 mm 2.5 mm 3.0 mm 4.0 mm Suitable for Medium-wide cording Wide cording Extra wide cording. Extra-wide - Pfaff hobby 420 | Owner's Manual - Page 54
: lourdes Aiguilles: 100 110 120 Pointes d'aiguille Designation 130/705 H Grosseur de l'aiguille: 70, 80 130/705 H-SUK Gl'ariogsusileleu:r7d0ea 110 130/705 pointe bille Aiguille Stretch, spécialement développee pour machines Pfaff. Convient tout particullé rement pour tissus stretch et maille - Pfaff hobby 420 | Owner's Manual - Page 55
'Iaotumprleeaqmdu'eoen.rntAaetiminosefinlvtaoavtuiesocnn,aeitgoriuusirqlnlueeeszzjlupemavseollqeauneest et contrOlez es aiguilles si les aguilIes pénètrent impeccable cassent au cours de a couture. Motifs au point d'omementation/Motifs au point zigzag IIII ) Grosseur:80 Grosseur:80 Grosseur: 80 - Pfaff hobby 420 | Owner's Manual - Page 56
,togfarandeert een Stofkwaliteit dun naald 60 70 75 Stotkwaliteit middel naald 80 90 Stofkwaliteit: dik naald 100 110 120 Vorm van de Naaldpunt Benaming 130/705 H naalddikte: 70/80 130/705 H-SIlK naalddikte: 70/110 130/705 H-PS naalddikte: 75/90 [ 130/705 - Pfaff hobby 420 | Owner's Manual - Page 57
esotptewedkeeegslietnemgeknaapakalatldawt okrodmt eene.rsVtocoornvtreoll)iegreenm,adxoimoralderasateieenkbmreeet dhteet vliegwiel, toets "tweelingnaald" indrukken. Il Zigzagstiksels met de tweelingnaald 130/705 H-ZWI dikte80 0,5-1,5mm dikte 80 0,5-1,5mm H dikte 80 0,5-1,5mm Dubbele - Pfaff hobby 420 | Owner's Manual - Page 58
verbogen. Die Nadel 1st zu dunn oder zu dick. Durch Ziehen oder Schieben des Stoffes wird die Nadel verbogen und stö8t auf die Stichplatte. Die Spulenkapsel 1st Der Untertaden 1st ungleich aufgespult. Fadenschlingen unterhaib oder oberhaib des Stoftes. Neue Nadel bis zum Anschlag schieben: Neue - Pfaff hobby 420 | Owner's Manual - Page 59
Ursache: Beseitigung: 5. Die Maschine trarisportiert nicht oder Zwischen den Transporteur-Zahnreihen hat sich Nähstaub festgeprel3t. nur unregeImäI3g Stichplatte abnehmen, sel entfernen. Nähstaub mit Pin- 6. Die Maschine gent schwer Fadenreste befinden sich in der Greiferbahn. Fadenreste - Pfaff hobby 420 | Owner's Manual - Page 60
-quality thread. Insert new needle and push it up as far as it will go. Insert new needle. See Needle Chart. Let machine feed the work alone. Only guide the material lightly. When inserting the bobbin case, push it in as far as it will go. Check upper and lower tensions. Use - Pfaff hobby 420 | Owner's Manual - Page 61
tooth Remove needle plate and clean Out lint. rows of feed dog. 6. Machine runs with difficulty Thread ends in hook raceway. Remove thread ends and put a ,atnhetevrweenheifsnoracahpiisledhcroeerntofwarfheaiblear,ircobueunndsdu.erre the to sewing pull out the 57 - Pfaff hobby 420 | Owner's Manual - Page 62
La boite canette n'est pas introduite correctement. a Introduire Ia nouvetle aiguille fond. Remplacer 'aiguille. Tenir compte du tableau des aiguilles. Laisser Ia machine entrainer seule. Guider Iégerement l'ouvrage. Appuyer sur Ia bolte a canette a sa mise en place, jusqu'à lembottage perceptible - Pfaff hobby 420 | Owner's Manual - Page 63
Ia plaque aiguille, au pinceau. Oter es Ia griffe. 6. Marche dure de Ia machine Des bribes de fil se sont prises dans a coursière du crochet. Enlever les bribes de goutte d'huile dans Ia fil et mettre coursière. une 7NNqd.ueeeisRtjptaeeeamnmsIfaaaaoisnmruqtbsmaulcieedehstraitnrndieesme - Pfaff hobby 420 | Owner's Manual - Page 64
4 Opheffen van kleine storingen Oorzaak Opheffen 1. De machine slaat steken over De naa{d is niet goed ingezet. U gebruikt een verkeerd systeem naald. De naald is krom of stomp. De machine is niet goed ingeregen. De naald is te dun voor het garen. Naald zover mogeiijk naar boven schui yen. met - Pfaff hobby 420 | Owner's Manual - Page 65
Steekplaat wegnemen, stofkwastje weghaien. stof met het 6. De machine loopt zwaar Draadresten in de grijperbaan. Draadresten verwijderen en een druppel olie in de grijperbaan doen. 7. Belangrijke aanwijzingen Laat de Schakel ingeregen machine eerst de stroom uit niet open, zonder stof onder - Pfaff hobby 420 | Owner's Manual - Page 66
Sonderzubehär Das Sonderzubehör it für spezielle Näharbeiten. Es st bei ihrem Handler gegen Berechnung erhâltlich. /behdr Bestell-Nr. Naharbeit ApplikationstuB 93-035920-91 zum Applizieren Bandenfasser (Nàhfulfhalter entternen) Biesenfu(3 5 Rilten (ZwHtingsnadeln mit Nadetabstand 18-25) - Pfaff hobby 420 | Owner's Manual - Page 67
Fadenabschneider Glühlampe auswechseln HosenreiBverschlul3 (Damen) Knopfannähen Knopflochnähen Modelle 301, 305, 309 Knopflochnähen Modelle 313-420 Kotfer abheben Nade auswechseln Nadeltabelle NahtreiBverschtuI3 Nãhfül3e Nãhfüf3e auswechseln Nahstorungen und ihre Beseitigung Nähwerk aus- und - Pfaff hobby 420 | Owner's Manual - Page 68
grooves (twin needle with 1.4-1.8 mm needle gauge) Fringe sewing foot Edge guide Straight-stitch foot Needle plate . with round needle hole Hemmer foot, 3 mm Darning foot (remove sewing foot holder) Teflon foot \ncy-stitch foot Part No. Sewing Operation 93-035920-91 For appliqué work - Pfaff hobby 420 | Owner's Manual - Page 69
chart Notes on safe machine operation Operating the foot control Presser bar lifter Removing the carrying case Reverse sewing Seam-like zip fastener Setting the stitch length Sewing buttonholes, Models Sewing buttonholes, Models 301, 305, 313-420 309 Sewing feet Sewing on buttons Stitch - Pfaff hobby 420 | Owner's Manual - Page 70
tacturation. 4 ccessoires Pied pour applications Bordeur (enlever support du pied) jPuimedelaéenserevnuréecs,ar5termaiennutrsesde(a1ig8u,il2le,5s mm) jPuimedeléenserevnuréecsa, r7termaiennutrsesde(a1ig,4u;il1le,8s mm) Pied pose franges Guide-droit Pied pour point droit Plaque a aiguille avec - Pfaff hobby 420 | Owner's Manual - Page 71
Couture en arrière Debrayage du mécanisme de couture Derangements et remédes Elements constitutifs de Ia machine Embrayage du mécanisme Fermetures a glissiere, insertion Fixation de l'étrier guide-bord Mesures de sécurité a Mise en place de Ia canette Mise en place de Ia boite canette Mise en place - Pfaff hobby 420 | Owner's Manual - Page 72
zijn voor bijzondere werzaamheden. Ze zijn verkrijgbaar bij de officiële Pfaft dealer. /essoires Applikatievoet Biaisbandvoet naavoethouder afnemen Biezenvoet 5 rillen (tweehngnaald, naaldafstand 1,8-'2,5) Biezenvoet 7 rillen (tweelingnaald, naaldatstand 1.4-18) Doorslagvoet - Pfaff hobby 420 | Owner's Manual - Page 73
Spoelhu{s in de machine Spoelspanning kontroleren Steokiengte instellen Stofdrukker Stoppen Steken-kiesschijf modellen Steken-kiesschijf modellen Stekentabel-nuttige steken, Stekentabel-stretchsteken, Stekentabel-stretchsteken, 301-337 342-420 modellen modellen modelten 301-337 342-420 353-420
-
 1
1 -
 2
2 -
 3
3 -
 4
4 -
 5
5 -
 6
6 -
 7
7 -
8
-
9
-
10
-
11
-
12
-
13
-
14
-
15
-
16
-
17
-
18
-
19
-
20
-
21
-
22
-
23
-
24
-
25
-
26
-
27
-
28
-
29
-
30
-
31
-
32
-
33
-
34
-
35
-
36
-
37
-
38
-
39
-
40
-
41
-
42
-
43
-
44
-
45
-
46
-
47
-
48
-
49
-
50
-
51
-
52
-
53
-
54
-
55
-
56
-
57
-
58
-
59
-
60
-
61
-
62
-
63
-
64
-
65
-
66
-
67
-
68
-
69
-
70
-
71
-
72
-
73
 |
 |
I
:iI
PFAFF
©Eby
©-4©
Bedienungsanleitung
Instruction
Book
Mode
dbmploi
Gebruiksaanwijzing