Pfaff tipmatic 1151 Owner's Manual
Pfaff tipmatic 1151 Manual
 |
View all Pfaff tipmatic 1151 manuals
Add to My Manuals
Save this manual to your list of manuals |
Pfaff tipmatic 1151 manual content summary:
- Pfaff tipmatic 1151 | Owner's Manual - Page 1
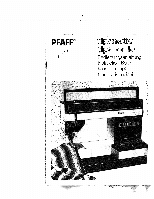
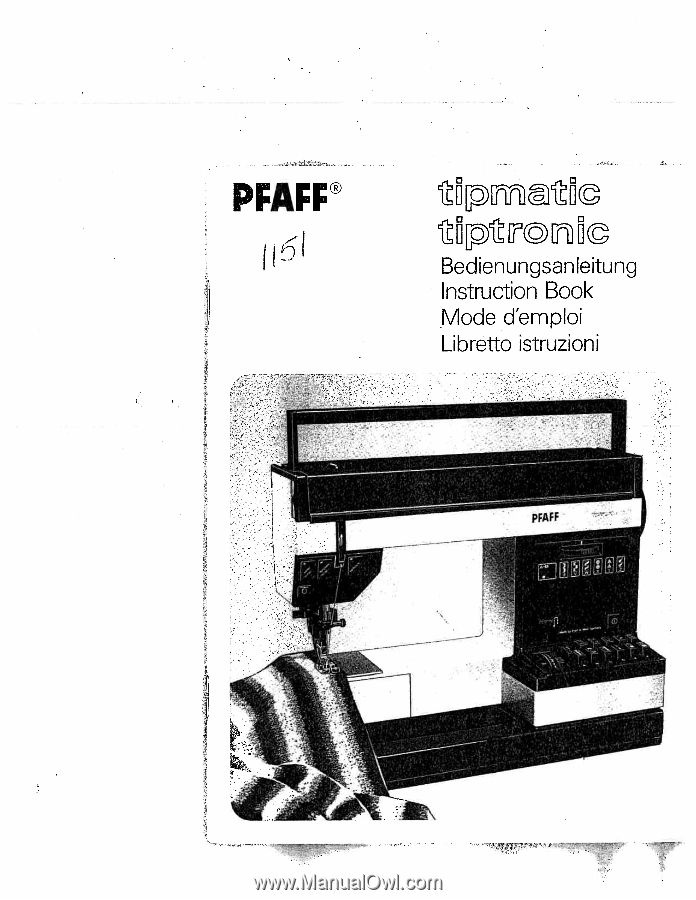
PFAFF® I Bedienungsanleitung Instruction Book Mode d'emploi Libretto istruzioni 3 - Pfaff tipmatic 1151 | Owner's Manual - Page 2
the power cord whenever you leave the machine or wish to clean it, oil it or change mechanical and accessory parts. c) Be sure to use only a 15-watt light bulb in the sewing lamp. d) The drive belt must never be adjusted by anyone but an authorized Pfaff agent. For safety rules applicable to the - Pfaff tipmatic 1151 | Owner's Manual - Page 3
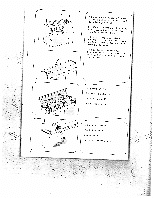
_______ . 113 Jj 112 111 1 F'\ 114 110 \iiz 116 / 107 -' L 100 101 102 I [ T° PEAFF tlptroc 71 ** I j_i 133 117 104 105 106 118 132 18 19 122 1 iJi 121 1 [ - Pfaff tipmatic 1151 | Owner's Manual - Page 4
4 Parts of your sewing machine 100 Carrying handle 101 Hinged top cover 102 Hand wheel 103 Stop motion knob 104 Master switch 105 Finger-tip stitch buttons 106 Stitch length control 107 Detachable work support with accessory box and compartment 108 Needle plate 109 Sewing foot holder with sewing - Pfaff tipmatic 1151 | Owner's Manual - Page 5
Fold down the caring Compartment N contains foot and Instruction book. a drREa'neanmlbgeaevptseltorrelieledarechopeauoovismgetnaracteclehe.inpdDeeea.dnIaaslevaaeltcisaeastetneo. 101 backwards. ::: c::r:o Netzkabel anschlielen. Plug in the machine Brancher le cable. 2 Collegare il cavo elettrico a - Pfaff tipmatic 1151 | Owner's Manual - Page 6
place the foot control on the floor. Brancher le cable du rheostat sur Ia machine et poser le rheostat sur le sol. Collegare ii cavo del reostato alla mac china e porre 1 reostato sul pavimento. I Hauptschalter 104 drücken, wobei das Nàhlicht aufleuchtet. Push master switch 104; the sewing light - Pfaff tipmatic 1151 | Owner's Manual - Page 7
4 4 - 4tugBSonrwopedbiauefbreredinnnthtuhewvneodwinrloedbdfrieitke,nrsgeseuitppnerpaneco:phrUat rianannttkedisrosndswciseh:inwNRgeäenhatkcfolehdunct,he csPeorluleesp-caairevbreorilseteIbadoegbariuancnahggeee.m: ePnatssaetrfaIairemapiinvoter gaPifrrfaeerprlroaarrvaeezriiisoopnieasninpoiesdtrriaa. - Pfaff tipmatic 1151 | Owner's Manual - Page 8
finché II perno N fessura 0. spolatore 119 e si nserisce nella / I Nähwerk ausschalten: Handrad festhal ten und Scheibe 103 nach vorn dreher. Disengaging the sewing mechanism: Hold the hand wheel steady and turn knob 103 toward you. Débrayer le mécanisme: Retenir le volart et tourner le disque - Pfaff tipmatic 1151 | Owner's Manual - Page 9
____ F -Jr 1 L 11 11 it___ ci... 119 I I 4 dhksdSmrZhefFep•eSurpuennneuaüunpnuh.,iBdHclgcu,leruek.aehuanlnnweubennuN.dwnnnnougpiuD,dneibntncsrhivD1egnkedcdri2odeeihni7vAeznneledaenoeneb/nF.AiinSetrlgs,eüaeiFpDntcrnFch, - Pfaff tipmatic 1151 | Owner's Manual - Page 10
a eesatqrtdeple•udeglRarabese'narsogvuelTcusoqbuemnlooceruirieluntuhsdeepgrepeedsdnluIgr:e4iaee.eisutridrIoudslPitaedesluarxo'1uonerrg/fiue2rsni4isèeltts7itieimloseslr1e.dueervn2e1reiArrce5u2orNppbt7Isaauip.apto,rpeuuceEc'bcueeiraayans-niarvnne,nfrltngaieroeerelsnéeeutte:sftntt0itll.ueelceéto. - Pfaff tipmatic 1151 | Owner's Manual - Page 11
(0) • Switch on master switch. Engage dual feet. Raise the sewing foot. The needle must be in its 'up' position. Place a bobbin on spindle 119. Disengage the sewing mechanism. Draw the needle thread under the sewing foot, up and into guide 127 (see drawing>. Wind the thread around the bobbin a few - Pfaff tipmatic 1151 | Owner's Manual - Page 12
net tagliafibo "N". 3 I Ndhwerk einschalten: Handrad festhal ten und Scheibe 103 nach hinten drehen. Dann Handrad nach vorne drehen, bis es einrastet. Engaging the sewing mechanism: Hold the hand wheel firmly and turn disk 103 toward the back, then turn the hand wheel forward again until it snaps - Pfaff tipmatic 1151 | Owner's Manual - Page 13
Spule einlegen N (Faden nach hinten). Den Faden in den Schlitz 0 und bis zur Offnung P ziehen. Inserting the bobbin (N), wit the thread unreeling toward the back. Drai the thread into slot 0 and into eye R Mise en place de Ia canette (N), le fil se déroulant vers l'arrière. Tirer le fil par Ia fente - Pfaff tipmatic 1151 | Owner's Manual - Page 14
4 N Spulenkapsel einsetzen: • Hauptscha/ter 104 ausschalten. Kiappe N anheben und die Kapsel bis zum Anschlag auf Stift 0 schieben. Ausschnitt P mul' dabei nach oben zeigen. Inserting the bobbin case: • Switch off master switch 104. Raise latch N and push the bobbin case onto stud 0 as far as - Pfaff tipmatic 1151 | Owner's Manual - Page 15
. Taste B tippen (Seite 21). Upper threading: • Switch off master switch 104. With the needle positioned at the top, raise the sewing foot. Draw the thread into slot N to the left past guide P. from below into slot 0 and take-up lever 126 (see arrows), then back into slot 0 and into the right thread - Pfaff tipmatic 1151 | Owner's Manual - Page 16
4 Einfädler nach vorn an die Nadel schwen ken, Push the threader forward against the needle. Basculer l'enfileur vers l'avant par l'aiguille. Far girare I'infilatore in avanti verso 'ago. Den Faden von unten in den Haken R hangen. Place the thread in hook R form below. Accrocher le fil den bas sur - Pfaff tipmatic 1151 | Owner's Manual - Page 17
del fib superiore. 0 0 121 14 Ober- und Unterfaden nach rechts unter den Nähful legen. Place both threads toward the right unde the sewing foot. Coucher les deux fils vers l'arrière a droite sous be pied presseur. Porre i fili superiore ed inferiore verso destra sotto Il piedino. -'I 4 Verschlu1 - Pfaff tipmatic 1151 | Owner's Manual - Page 18
Swing work support 107 back against the free arm. Remettre en place a bolte de rangement 107 contre le bras. Avvicinare ii piano variabile 107 alla macchina. 4 N • Hauptschalter 104 ausscha)ten. Stoff unter den NähfuL legen. • Switch off master switch 104. Place fabric under the sewing foot - Pfaff tipmatic 1151 | Owner's Manual - Page 19
man drückt, urn so schneller näht die Pfaff Operating the foot control: The r you press down machine runs. the pedal, the fastcr t[e Abaisser Ia tighter the tension. To check the tension, set the machine at the zigzag stitch. Sew a short seam. The threads should interlock in the middle of the - Pfaff tipmatic 1151 | Owner's Manual - Page 20
Tensions des fils: Position de réglage normale dans a plage blanche, entre 3 et 5. Tension d'autant plus er a forte l'aide que le chiffre est du point zigzag. élevé. ContrO Coudre quel ques points. Les fils doivent se nouer dens l'épaisseur des tissus. 4 Controllo della tensione del fib: La - Pfaff tipmatic 1151 | Owner's Manual - Page 21
fuB dem Emanheben. oder Ausschalten den Nàh.. Dual fabric feed This prevents shifting against each other. of the fabric plies Before engaging presser foot. or disengaging, raise the Entralnement double du tissu: II empêche le decalage des tissu. Avant l'embrayage ou relever le pied - Pfaff tipmatic 1151 | Owner's Manual - Page 22
6 mm. Turn the control to set the number indicating the stitch length at mark N. Fig. 0 (bottom) shows how to set the stitch length control for sewing stretch stitches (red stitch symbols on push buttons). Reglage de Ia longueur du point: Les chiffres sur le disque 106 indiquent Ia longueur du point - Pfaff tipmatic 1151 | Owner's Manual - Page 23
ücken, Solange die Taste gedruckt wird, näht die Maschine rückwärts. Reverse sewing Press button 117. As long as you hold this button the machine sews backwards. Couture en marche arrière: Abaisser Ia touche 117. La machine coud en arrière aussi longtemps que a touche est maintenue en bas. La - Pfaff tipmatic 1151 | Owner's Manual - Page 24
4I fl . A B C D -E Tipptasten: A, B, C Knopflochtasten Die Taste B st gleichzeitig die Ausschaft taste zum Läsen der getippten Tasten und linke Stichiage (siehe Seite 27). D Stretch-3fach-Zickzackstich 2 mm Zickzackstich 2 mm E Stretch-3fach-Zjckzackstich 3,5 mm Zickzackstich 3,5 mm F Stretch - Pfaff tipmatic 1151 | Owner's Manual - Page 25
all stitches and stitch combinations together with their possible applications. On Model 1171 the fancy-stitch thumb wheel has to be disengaged in order to sew the stitches on the finger-tip buttons. To do so, set the white dot at the setting mark, see page 28. 22 - Pfaff tipmatic 1151 | Owner's Manual - Page 26
r Touches: A, B, C Touches boutonniere tLoautcohuecsheenBfosnocrét eésgaelteamdeénptoartdeérblerapyoeirntesa gauche (voir page 27). D Triple point zigzag élastique, 2 mm Point zigzag 2 mm E Triple point zigzag élastique, 3,5 mm Point zigzag 3,5 mm F Triple point zigzag élastique, 5 mm Point zigzag - Pfaff tipmatic 1151 | Owner's Manual - Page 27
Nutzstiche einstellen: (weile Symbole) Taste tippen und die gewunschte Stich lange zwischen 1 und 6 einstellen. Alle Zickzack- und Nutzstiche werden durch zusàtzliches Tippen der Taste G in der Breite halbiert. Selecting utility stitches (white symbols> H Push the button required and set the - Pfaff tipmatic 1151 | Owner's Manual - Page 28
Stretchstiche einstellen: (rote Symbole) Taste tippen und Stichlangen-Einsteller bis zum Anschlag auf rotes Symbol stel en. Alle Stretchstiche werden durch zusätzli ches Tippen der Taste G in der Breite hal biert. Selecting stretch stitches (red symbols) Push the button required and turn the stitch - Pfaff tipmatic 1151 | Owner's Manual - Page 29
in the chart on the inside of the hinged top cover and at the end of this booklet, together with sewing instruc tions. For example, if you want to sew an elastic blindstitch, push buttons M and F, select a stitch length between 1 and 4. Points utilitaires et elastiques combines: Les combinaisons de - Pfaff tipmatic 1151 | Owner's Manual - Page 30
4 C?D N ri > LJ i H 4 Stichiage einstellen bei Geradstich: Stichiage links: Taste B tippen Stichiage Mitte: Taste G tippen Stichlage rechts: Taste H und I tippen 4 Selecting the needle position for straight stitching Left needle position: push button B Central needle position: push button G Right - Pfaff tipmatic 1151 | Owner's Manual - Page 31
. Select the fancy stitch from the table. Set the correspondin9 letter at mark "0" by turning thumb wheel N. Select a stitch length between 0,5 and 1. For sewing utility stitches, thumb wheel N for fancy stitches must be disengaged. To do so, set the white dot at mark "0'. 4 Disque de reglage des - Pfaff tipmatic 1151 | Owner's Manual - Page 32
4 IIII_,iIHh1I_dhIIIIIk..IIIIItl_.,IIIlIt,..,IItIh,.,,IIIIC._ >< (9 IiIlI hhhl hI [lhhI1hl hI I 1hhi1lIlIlI Iluutl l hI11uhhl l _.1IllIll___JJIIIfIL_...ilIIllL_JlIIllL_1JllhIL > I)IIIIfIJlJJij}lIIl!IlIlII!iiIjIlIIJjI D CD D I-i... stretch xu stretch > tretch stretch stretch x stretch IiI I I P1lI - Pfaff tipmatic 1151 | Owner's Manual - Page 33
r ) 4 tiptronic Bedieriurigsteile der Elektronic Heften: jdgueubddsNNiendnleitieedeedeataierhNcmbdTFünhSttaecuatddAiiksbodnmsetietfekneetl,fimethdSieg,Njloa,relrtneelunaoBldtahihdsfenesdetfeaencmgeeninhnsin)zottaiud.eAumebcednhinWhengnmitetneheeenio.eearnnFbdrNli"(tnuee,zuodenndunbnusikrmeendü - Pfaff tipmatic 1151 | Owner's Manual - Page 34
green indicator lamp P lights up. Drop the machine feed (page 44) and screw on the darning foot (page 39). Place the fabric under the sewing foot. Each time you press and release the foot pedal the machine sews one stitch. Move the fabric under the sewing foot until the length of stitch required is - Pfaff tipmatic 1151 | Owner's Manual - Page 35
4 tiptronic Organes de commande electroniques Positionnement haut et bas de l'aiguifle: Après le dernier point de Ia couture, l'ai guille s'arrète toujours en haut. En enfon cant Ia touche "aiguille en bas", Ia lampe témoin N s'allume. at I'aiguille s'immobi use, a chaque arrét de a machine, en - Pfaff tipmatic 1151 | Owner's Manual - Page 36
tiptronic Elementi di comando dell'elettronica: Posizione ago bassa e alta: Al termine della cucitura l'ago si ferma sempre in alto. Premendo ii tasto "ago basso" s'illumina l' - Pfaff tipmatic 1151 | Owner's Manual - Page 37
f Unter die Nähfläche greifen nach links schwenken. und diese Reach swing under the work support it out toward the left and Passer et faire Ta main pivoter sous Ia celle-ci boite de rangeme vers Ia gauche. Prendere spostarlo iT piano variabile verso sinistra. da sotto e 7Q N 34 - Pfaff tipmatic 1151 | Owner's Manual - Page 38
feet, needles and bobbins in the accessory box. O Ordinary sewing foot 1 Fancy-stitch foot for top feed 2 Fancy-stitch foot (without top feed) 3 Blindstitch and overlock foot 4 Zip foot 5 Buttonhole foot 6 Darning foot 7 Hemmer 8 Edge guide BoIte de rangement et accessoires: Enlever Ia boite de - Pfaff tipmatic 1151 | Owner's Manual - Page 39
sewing foot at the rear and lift it lightly at the front. Push down the buttonhole foot at the front. Remplacement de Ia semelle du pied presseur: Mettre cuit a I7nterrupteur Ia machine the Sewing foot retaining screw. P et ci servent a fixer les accessoires. R est Ia vis de fixation du support de - Pfaff tipmatic 1151 | Owner's Manual - Page 40
Säumer 8 lineal Sewing feet (standard o Ordinary sewing foot accessories) 1 Fancy-stitching foot, for top feed 2 Fancy-stitching foot (without top feed) 3 Blindstitching or overlock foot 4 Zip- and edge-stitching foot 5 Buttonhole foot 6 Darning foot 7 Hemmer 8 Edge guide Semelles de pieds - Pfaff tipmatic 1151 | Owner's Manual - Page 41
hrung Q bis zum Anschlag nach rechts drehen. Der Stoff läuft an der Fuhrungs kante R entlang. 4 Blindstitching and overlook foot Blindstitching (N): turn screw P to set guide Q at the left. The guide is then adjusted according to the needle penetra tions. The folded edge of the material runs along - Pfaff tipmatic 1151 | Owner's Manual - Page 42
N: at the same time, fork R engages the presser baG and push the foot fully in. Let go of bar P, which then rests on retaining screw 0. Tighten screw 0. For wool darning the woollen thread is pulled into guide S. Pied a repriser: Lever Ia barre a aiguille. Deplacer l'étrier P vers I'arrière et - Pfaff tipmatic 1151 | Owner's Manual - Page 43
nach Einstellen des gewünschten Abstan des Schraube P festdrehen. Zipper foot (edge sewing foot (N): The zipper foot is secured on the left or right, depending on the side of the zip to be sewn (N) Edge guide (0): Push the edge guide into hole 0, set the required edge distance and tighten it there - Pfaff tipmatic 1151 | Owner's Manual - Page 44
ver wenden. Buttonhole setting: Push button C. Set the needle thread ten sion at range 3 for buttonhole sewing. Attach the buttonhole foot. Set the stitch density at range N. Insert a gimp thread in the sewing foot as shown in the illustra tion: Place the thread over the back ridge, and pull it - Pfaff tipmatic 1151 | Owner's Manual - Page 45
und abschneiden. 6 Knopfloch aufschneiden. Achtung! Bel den tipmatic-Modellen muB die Nadel hochgestellt werden wo das Symbol Ct ück em Probeknopfloch zu nahen. 4 Sewing buttonholes Pull the bottom of the buttonhole foot for ward as far as it will go. 1 Sew first buttonhole seam. Raise the needle. - Pfaff tipmatic 1151 | Owner's Manual - Page 46
sind ohne NShfuI. Drawings do not include sewing foot. Les illustrations ne montrent pas Ia semelle du passe légerement tendu at le couper. 6 Ouvrir Ia boutonnièr. mportant! a Sur es modèles tipmatic, l'aiguille est placer en haut Iorsque le symbole [Ti apparait dans Ia description de I'opération - Pfaff tipmatic 1151 | Owner's Manual - Page 47
Svitare Ia vite N. Togliere rago. Inserire un nuovo ago (Ia parte piatta del fusto verso dietro) spingendolo verso I'alto fino all'ar 121. Push the dropfeed control toward D (feed dog dropped) or toward 0 (sewing position). Abaissement de Ia griffe: Ouvrir le cache 121 et déplacer le curseur - Pfaff tipmatic 1151 | Owner's Manual - Page 48
plate up at the back (N) and take it out (0). Clean the feed dog and the parts in the sewing hook area with a soft brush. Clean the bobbin thread monitor as instructed on page 59. Do not oil the machine. Only apply a drop of oil in the hook raceway (see ill.) occasionally. 7Nettoyage et huilage - Pfaff tipmatic 1151 | Owner's Manual - Page 49
Close the hinged top cover and swing up the carrying handle. Insert the edge guide into cutout 0. push down the lamp housing and hold it there. Turn the R Pousser I'ampoule vers le haut et Pa tourner vers 0. Enlever le guide-bord. Come sostitUire Ia lampadina: En Togliere Ia spina dalla presa a muro - Pfaff tipmatic 1151 | Owner's Manual - Page 50
.dfgoreruii(naslsFselptgceeioueoebtusromssrlieruueblurpe:rl-renip'aftagauolFiepnasrd2.uaitteAbsAcddl)dhe.u'dulue'eLnn,aaieldseuef 4 tiptronic Come sostituire ii fusibile: hrqctnqTueoaouunusognnaoiaglnsrcvirlttioetaiiooeeorccnreffcdeauz.duiicsaiasEIcigaivbgibsFiiaiitrsitl2rrvoleipoAae.iirtgvn)vern - Pfaff tipmatic 1151 | Owner's Manual - Page 51
Kugelspitze Grobmaschige Strickstoffe, Wirkstoffe, Lastex, Interlock, Quiana, Simplex mittlere Kugelspitze EE grol3e Kugelspitze Speziell für Besonders Pfaff entwickelte Stretchnadel. gut geeignet für empfindliche Stretch- und Wirkstoffe Grobmaschige Miederwaren, Lycra, Simplex. Lastex spitze - Pfaff tipmatic 1151 | Owner's Manual - Page 52
N ad el-Ta belie Bezeichnung 130/705 H-ZWI Stärke: 80 130/705 H-ZWI Stärke: 80 Stärke: 90 Stärke: 100 StchIange 2,5mm 2,5mm 2,5mm 2,5 mm 3,0 mm Stichbr&te Nadel entfernung 1,6mm 2,0mm 2,5 mm 3,0mm 4,0mm Geeignet für normale Biesen normale Biesen breite Biesen extra breite Biesen - Pfaff tipmatic 1151 | Owner's Manual - Page 53
Needle chart wUosirnkgintgheupadoefqthueatme anteeeridalle. guarantees a better Fabric weight: light Needle size: 60, 70, 75 Needle points Fabric weight: medium Needle size: 80,90 Fabric weight: heavy Needle size: 100, 110, 120 System & No. 130/705 H 70,80 Profile 130/705 H-SIJK 70, 110 130/ - Pfaff tipmatic 1151 | Owner's Manual - Page 54
Needle chart System & No. Stitch length 1R 130/705 H-ZWI 2.5 mm 80 2.5 mm 130/705 H-ZWI 80 90 100 2.5 mm 2,5mm 3.0 mm Stitch width Needle spacing 1.6mm 2.0 mm 2.5mm 3.0mm 4.0 mm Suitable for Medium-wide cording Wide cording Extra wide cording Extra-wide cording - Pfaff tipmatic 1151 | Owner's Manual - Page 55
, tissus maille, Lastex, Interlock, Quiana, Simplex pointe bile moyenne grande pointe bile Aigu mile Stretch, spécialement déveioppée pour machines Pfaff. Convient tout rement pour tissus stretch et maille particullé délicats. Lycra grande maille (gaines, combines, etc.) Lycra, Simplex, Lastex - Pfaff tipmatic 1151 | Owner's Manual - Page 56
Tableau des aiguilies Designation LL 130/705F1-ZWI Grosseur:80 130/705 H-ZWI Grosseur: 80 Grosseur: 90 ' Grosseur: 100 Longueur de point 2,5 mm 2,5 mm 2,5mm 2,5mm 3,0 mm Largeur de point Espacement des aiguilles 1,6mm 2,0 mm Utilisations nervures normales 2,5 mm 3,0 mm 4,0 mm nervures - Pfaff tipmatic 1151 | Owner's Manual - Page 57
lana, velluto, cuciture ornamentali, ricami. stoffe a maglia larga, tessuti in maglia in genere, Lastex, Interlock, Qulana, Simplex. ago speciale Pfaff per punti flexi. Adatto particolarmente per stoffe delicate elastiche e in maglia. Tessuti per busti a maglia larga, Lycra, Simplex, Lastex. punta - Pfaff tipmatic 1151 | Owner's Manual - Page 58
Tabella degli aghi Denominazione 130/705 H-ZWI Grossezza: 80 130/750 H-ZWI tunghezza punto 2,5 mm 2,5 mm Iarghezza punto distanza aghi 1,6mm 2,0 mm Indicato per: nervature normali nervature normali Grossezza: 80 Grossezza: 90 Grossezza: 100 2,5 mm 2,5 mm 3,0 mm ePMnriotmrtaivaniodoi - Pfaff tipmatic 1151 | Owner's Manual - Page 59
Nahstorungen urid ihre Beseitigung Ursache: 1. Die Maschine IäBt Stiche aus Die Nadel ist nicht richtig eingesetzt. Es ist eine falsche Nadel eingesetzt. Die Nadel ist verbogen oder stumpf. Die Maschine st nicht richtig eingefädelt. Die Nadel st für das Cam zu fein. Beseitigung: Nadel Flache bis - Pfaff tipmatic 1151 | Owner's Manual - Page 60
und Schmutz entfernen; mit besonderer Vorsicht von dem zweiten Kontrollauge. 9. Das lMählicht Ieuchtet und die Maschine Iäuft nicht (tiptronic) Sicherung st defekt. Neue Sicherung einsetzen. Wichtjge Hinweise Vor dem Auswechseln ausgeschaltet werden. von Nähfüen und Nadein muS der - Pfaff tipmatic 1151 | Owner's Manual - Page 61
thread. Insert new needle and push it up as far as it will go. Insert new needle. Refer to needle table. Allow machine feed to work alone. Only guide the material lightly. When inserting the bobbin case, push it in as for as it will go. Check upper and lower tensions. Use - Pfaff tipmatic 1151 | Owner's Manual - Page 62
thread ends and dirt. Special care should be taken in the area round the second indicator lamp. 9. The sewing lamp lights up, but the machine does not run. (tiptronic) Fuse is faulty. Insert new fuse. 10. Important note: foNBoffeeovftto.ehrrIeef rymeuoxnaucsahthaetahnrvrgseeiwnatdogitecledhei - Pfaff tipmatic 1151 | Owner's Manual - Page 63
que du fit de qualite. Introduire Ia nouvelle aiguille fond. Remplacer l'aiguille. Tenir compte du tableau des aiguilles. Laisser Ia machine entrainer seule. Guider Iégèrement l'ouvrage. Appuyer sur Ia bolte a canette a sa mise en place, jusqu'à l'emboitage perceptible. Verifier les tensions - Pfaff tipmatic 1151 | Owner's Manual - Page 64
9. L.a lampe d'éclairage Fusible défectueux. est allumee mais Ia machine ne fonctionne Le remplacer par un neuf. pas (tiptronic) Remarques importantes dmNNPaeoeanucsjprhaamirasneeammoiusqpébumlmlaaiceeeperttprodriueIèearcetepqno.iuuemejdolaquprurcrseehssdeséienIbausrrtamayenaettcrs(h.'lia - Pfaff tipmatic 1151 | Owner's Manual - Page 65
è troppo stretta. Filato nodoso e di cattiva qualità 0 filato troppo secco perchè vecchio. Come ovviare Inserire 'ago fine all'arresto, Con parte piatta del fuste verse dietro. Inserire un ago sistema 130/705 H. Cambiare I'age. Controllare l'infilatura. Impiegare aghi piü grossi. Vedi sotto - Pfaff tipmatic 1151 | Owner's Manual - Page 66
è accesa, ii fusible è difettoso. ma Ia macchina non cuoe Inserire un (tiptronic) nuovo fusibile. Avvisi importanti ALd&aibsubimanansandecdorcfohtsnoiin.asanodspoteirtuacismuccaoircnecohniponinaeddaiennviceheedespasegerhreib, rale'zviineotnetearrmtuatptsooer,neszppaeripgnoncreirpreealselt - Pfaff tipmatic 1151 | Owner's Manual - Page 67
I Sonderzubehor Das lich. Sonderzubehär ist Das Zubehör ohne fBüer sstpeeilzniuelmlemNerähsatrbineiVteonr.bEerseistut nbge) lhrem Händter und kann noch ngiecghetnerBweorercbhcn, un.egrdeernhäft' "ubehär ApplikationsfuS Bandeinfasser (NShfu5halter entfernen) BiesenfuB 5 Rillen (Zwillingsnadeln - Pfaff tipmatic 1151 | Owner's Manual - Page 68
rihaltsverzeichnis Anlasser Doppelter Stofftransport EnsteHrad für Zierstiche (Modelle mit Zierstichen Elektrscher AnschIu Elektronische Endgeschwindigkeitsvorwahl Eektronische Unterfadenüberwachung Fadenabschneider Garnrolle aufschieben Glühlampe auswechsein Heften Knopfiochn hen Nadel auswechseln - Pfaff tipmatic 1151 | Owner's Manual - Page 69
available. They can be obtained fro 4 Accessory Appliqué foot Binder (remove sewing foot holder) Cording foot, 5 grooves (twin needle with 1.8-2,5 mm needle gauge) Cording foot, 7 grooves (twin needle with 1.4-1.8 mm needle gauge) Cording blade (2 ea.) Part. No. 93-042 941-91 98-053 484-91 - Pfaff tipmatic 1151 | Owner's Manual - Page 70
z o _ - Pfaff tipmatic 1151 | Owner's Manual - Page 71
Pfaff contre factu.. a Les pièces sans référence sont en preparation. ENes seront iivrables une date ultérieure. : I 7- Accessoi res Pied pour applications Bordeur (enlever support Pied guide-cordonnet a Plaque pour broderie jour Ourleur 4 mm (pour entrainement supèrieur) Pied guide-bord - Pfaff tipmatic 1151 | Owner's Manual - Page 72
Table des matières Abaissement de Ia griffe Accessoires spéciaux 44 Boltes de rangement et Branchement électrique accessoires 68 34, 35 Causes de derangements et Changement de I'ampoule remëdes 2 60, 61 Changement Coupe-fit de Ia semelle du pied presseur 46 36 Couture en marche - Pfaff tipmatic 1151 | Owner's Manual - Page 73
Accessori fuori correclo Gli accessori fuori corredo servono per avon concessionario Pfaff contro pagamento. di cucito speciali. Si possono acquistare pesc. 1 VOst- Accessori senza numero di catalogo non sono ancora disponibi)i in quanto in via di preparazione - Pfaff tipmatic 1151 | Owner's Manual - Page 74
nd ice Abbassare II trasporto . Accessori fuori corredo 44 Bobinare attraverso l'ago 70 Bobinare da un secondo rocchetto 9 Collegamento elettrico 7 Combinazioni del punti, utili e flexi (stretch) 2 Confezionare occhielli 26 Controllo del fib inferiore 41-43 Controlbo della tensione - Pfaff tipmatic 1151 | Owner's Manual - Page 75
Programmtabelle Die Tabelle zeigt die Programmnummer, den dazugehörenden Stich und darunter die Einstellung der Maschine. Bei allen Programmen mit dem Hinweis ,,stretch" st I der Stichlängen-Einsteller bis zum Anschlag auf ,,stretch" zu drehen. Bej alien 01 02 II II \ / I \ cDcDcD< GH 0 I - Pfaff tipmatic 1151 | Owner's Manual - Page 76
übrigen wählen. ist In die Stichlange derTextta belle nach sind Wunsch Bezeich zu nung und Anwendung gramme angegeben. der einzelnen Pro 07 08109 10 - I\ , 2 ' (, - ' - I/ ' , I 7 \ '. '. - -- -- - EFG 11 12 13 /\/ /1/ \/\ \I\ *_\\ /\/ \/\ /1/ \t\ I/ /\/ /1/ .4/ \/\ - Pfaff tipmatic 1151 | Owner's Manual - Page 77
21 22 23 24 25 26 27 L i INI \I 1I i/I /I Ii I-' i I'\I \J - I/I /-l øi r-J %J INI I/I \-J /-I Ii K K I I ILl) I-I DG -S CD 1 S -t -, . C) C) C) C) C) D :z-iJzr D 28 29 3031 32 \\ I- I, \-/'\I Z / " ic \\\ K 1(d) 1(Q) .-I- I -+ H D. D C) C) C) 33 I -, ,_ < - Pfaff tipmatic 1151 | Owner's Manual - Page 78
35 36 37 38 39 40 41 -9I jI /11 /A \\\ N -II -II /11 /A -j LI -II -II \It /11 M II \li \' ,' L L H H H IC,) L F CD D G. CD D. C•) C) C) C) :T 42 4 'a I Ci) FR. C) 43 N N N S..." C,) L .-+ lCD C) XI L K. C) 45 46 47 XI III XI III 'II XI I0 I_ + D. C) L E. ITC) IC,) '-4- G. - Pfaff tipmatic 1151 | Owner's Manual - Page 79
II = - r II ii = ii III Il Il Il II 05 JGD> A BC GDM . CD) C) - FzC)r Stitch 01 Straight stitch Application All ordinary sewing operations stitching operations. and 6-mm fancy 02 Zigzag stitch 03 Buttonholes 04 Elastic triple straight stitch 05 Elastic triple zigzag stitch 06 - Pfaff tipmatic 1151 | Owner's Manual - Page 80
•-i L -Th M5f. M. I F. G. 0 C) :r D FG Stitch 11 Honeycomb stitch 12 Joint stitch 13 Florentine stitch, narrow 14 Florentine stitch, wide Application Sewing on or covering elastic seams threads on terry cloth. A durable ornamental joining seam. For decorating hems, e.g. on bed linen - Pfaff tipmatic 1151 | Owner's Manual - Page 81
do not fray Ornamental seams, e.g. on girls' dresses. Covering folded fabric edges with a fancy seam. Decorative joining seam and sewing on borders. Sewing on dainty lace. Topstitching patches. Elastic seams assembly and edge on knitted fabrics. finishing Festive ornamental seam, e.g. on table - Pfaff tipmatic 1151 | Owner's Manual - Page 82
36 37 38 ll ll ll ll Jl -il II II 39 40 /11 ji \II /11 M \fl 41 \\\ /\\ Th li -JI ll /11 \ll M \' /\\ LH L°' I-IC,, I ,-4. IL_C- ,, CD '-4. D. G. C) :,- zC). C) CD r. D. C:z) 42 'II 'It I U) L ,.+ 1 C) 43 N II N II N I_ lCD C) 44 XI I-. K9. C) 45 \) - Pfaff tipmatic 1151 | Owner's Manual - Page 83
Tableau des programmes Le tableau gramme, le dant et les indique le numéro du pro schema du point correspon différents réglages a effectuer rpséuogrulraIvanutmslaadcelhoinInagemu. ePeunortuidrountop"uosstirnletetscehsp"tr,aoletgorHuar-rm 01 02 I II /\ / I I I" €DcDc< GH D I - .-' - - Pfaff tipmatic 1151 | Owner's Manual - Page 84
a fond sur a position "stretch". Pour les paueutrtesêtprerocghroaimsime eas,voIalolnotné.guDeaunrsdlue point tableau descriptif figurent es designations et les applications des différents points. 07 08 o9_10 11 12 13 1/ -I, I 's-. \) /1/ -I, < I- \/\ \l\ < 4.... /1/ -I, \/\ L M M MM. - Pfaff tipmatic 1151 | Owner's Manual - Page 85
21 22 23 24 25 26 27 < - < rI-i' I-I 1 N.j I/I INI '-I < - - Pfaff tipmatic 1151 | Owner's Manual - Page 86
La tabella dei programmi La tabella indica ii programma, ii relativo punto e, sotto, quail tasti occorre premere. in tutti i occorre rpergooglraarme mii irecgoonlamtodriecadzeilonpeun"tfoiexi" fino aiI'arresto su "stretch". 01 02 II II \ II cD CD c \ / GH D I 4No Descrizione -... --. D E - Pfaff tipmatic 1151 | Owner's Manual - Page 87
35 36 37 38 39 40 41 Th -j L -Il -Il iI -Ii II -Il -11 -II /11 \lI 'U \U 'II M 1%. IA \\\ /\\ \' L LH H L L. F CD '-4. D. GCD C) C) C) D. CD '-p C) C) :3- 42 'It I L .-+ CD C) :1- 43 N N N L. lCD -p C, 44 XI IC,) I_ 4. K. C) :3- 45 ' - Pfaff tipmatic 1151 | Owner's Manual - Page 88
L In tutti gli Iunghezza altri del punti punto si a pub regolare voontà. NeHa Ia tabella b descritto dei singoli denominazione programmi. e applicazione 07 08 09 10 11 - .... - ... 5 - -' -I '. - -' \ / -,. .' , -\ \ 7 I\. ,- \.,. -I-- -wM -- -- 12 /V \\ /1/ \i\ /1/ \l\ 13 - Pfaff tipmatic 1151 | Owner's Manual - Page 89
L) c) CA) C) CA) CA) 0 Co co 7,') 7'.) 7'.) 7,') z 0) 01 C') 7'.) 0 V C 0 CD 0 CD VVVVVV C C C C C C z D D rt ,-fr -F -. -F 0 0 0 0 0 0 3 V CD 0 -I. 0 D < U) rr CD < U) - CD C, 0 0. 0) 0 < Va) CD < 0 0 C, )c CD -' CD U-). 0) U) -4- VV C C D '-4. - Pfaff tipmatic 1151 | Owner's Manual - Page 90
35 36 37 38 39 40 41 -I -1I /11 ji -jJ \II \\\ /\\ -II -II 'II M It /\\ r -II -I' 'II \' II Jl LL F N5. HS. IC), l_ * 'LI) CD -4. D. GR. C) C) :- D. CD -4. C) C) 42 il 4''ft 'II 4' I Cl) L ,..+ F C) 43 NJ NJ 'U, L .-+ C:r) 44 '1 XI XI IC)) I_ '-4. K. C) 45 46 '
-
 1
1 -
 2
2 -
 3
3 -
 4
4 -
 5
5 -
 6
6 -
 7
7 -
8
-
9
-
10
-
11
-
12
-
13
-
14
-
15
-
16
-
17
-
18
-
19
-
20
-
21
-
22
-
23
-
24
-
25
-
26
-
27
-
28
-
29
-
30
-
31
-
32
-
33
-
34
-
35
-
36
-
37
-
38
-
39
-
40
-
41
-
42
-
43
-
44
-
45
-
46
-
47
-
48
-
49
-
50
-
51
-
52
-
53
-
54
-
55
-
56
-
57
-
58
-
59
-
60
-
61
-
62
-
63
-
64
-
65
-
66
-
67
-
68
-
69
-
70
-
71
-
72
-
73
-
74
-
75
-
76
-
77
-
78
-
79
-
80
-
81
-
82
-
83
-
84
-
85
-
86
-
87
-
88
-
89
-
90
 |
 |
PFAFF®
I
Bedienungsanleitung
Instruction
Book
Mode
d’emploi
Libretto
istruzioni
3