Pioneer P90HDD Owner's Manual - Page 38
Erasing a track from playlist file
 |
UPC - 012562575896
View all Pioneer P90HDD manuals
Add to My Manuals
Save this manual to your list of manuals |
Page 38 highlights
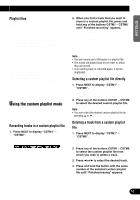
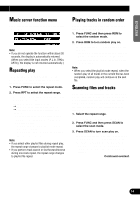
Music Server Play Selecting the playlist mode In playlist mode, a playlist file is used to distinguish a group of tracks that have been defined as a group when recorded. This mode allows you to play back the tracks you want to hear as a group. (See page 31.) 1. Press FUNC and NEXT and then press P.MODE to select the playlist mode selection mode. 2. Press P.MODE to select the desired playlist mode. Press P.MODE repeatedly to switch between the following mode: All (each recording date) = Digital (digital recordings) = Analog (analog recordings) = Artist (artist) = Custom (custom) Note: • If you switch to playlist mode when nothing has been recorded, "No PlayList" or "No audio" is displayed. Deleting tracks and track infor- mation In playlist mode it is possible to delete tracks and track information recorded in playlist mode. However, in "All" mode, the track data is deleted along with the track information. With the "All" mode, the confirmation screen will show other items than those selected, so always verify this when using this mode. When selecting "All" Erasing a track from playlist file Precaution: • Once a track is erased, it can not be restored. Always check the confirmation screen before erasing. 1. Press 5 or ∞ to select the desired playlist file. 2. Press FUNC and then press NEXT twice. 3. Press ERStrk to select the one-track erase mode. 4. Press 2 or 3 to select the desired track. 5. Press 5 to erase the currently playing track from the playlist file. 6. Press 2 and then press 5 to select "YES". • To prevent erasure of the track, press 3 and 5 and select "NO". Note: • When the playlist file changes, the one-track erase mode will be cancelled automatically. • You can not adjust the volume while "YES" is selected and during erasing. When selecting other than "All" 37
-
 1
1 -
2
-
3
-
4
-
5
-
6
-
7
-
8
-
9
-
10
-
11
-
12
-
13
-
14
-
15
-
16
-
17
-
18
-
19
-
20
-
21
-
22
-
23
-
24
-
25
-
26
-
27
-
28
-
29
-
30
-
31
-
32
-
 33
33 -
 34
34 -
 35
35 -
 36
36 -
 37
37 -
 38
38 -
 39
39 -
 40
40 -
 41
41 -
 42
42 -
 43
43 -
44
-
45
-
46
-
47
-
48
-
49
-
50
-
51
-
52
-
53
-
54
-
55
-
56
-
57
-
58
-
59
-
60
-
61
-
62
-
63
-
64
-
65
-
66
-
67
-
68
-
69
-
70
-
71
-
72
-
73
-
74
-
75
-
76
-
77
-
78
-
79
-
80
-
81
-
82
-
83
-
84
-
85
-
86
-
87
-
88
-
89
-
90
-
91
-
92
-
93
-
94
-
95
-
96
-
97
-
98
-
99
-
100
-
101
-
102
-
103
-
104
-
105
-
106
-
107
-
108
-
109
-
110
-
111
-
112
-
113
-
114
-
115
-
116
-
117
-
118
-
119
-
120
-
121
-
122
-
123
-
124
-
125
-
126
-
127
-
128
-
129
-
130
-
131
-
132
-
133
-
134
-
135
-
136
-
137
-
138
-
139
-
140
-
141
-
142
-
143
-
144
-
145
-
146
-
147
-
148
-
149
-
150
-
151
-
152
-
153
-
154
-
155
-
156
-
157
-
158
-
159
-
160
-
161
-
162
-
163
-
164
-
165
-
166
-
167
-
168
 |
 |
