Pioneer P90HDD Owner's Manual - Page 59
Using automatic sound levelizer Using position selector
 |
UPC - 012562575896
View all Pioneer P90HDD manuals
Add to My Manuals
Save this manual to your list of manuals |
Page 59 highlights
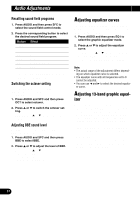
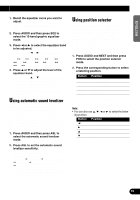
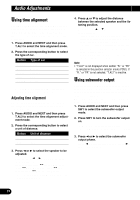
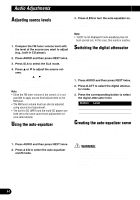
ENGLISH ESPAÑOL DEUTSCH 1. Recall the equalizer curve you want to adjust. Refer to "Recalling equalizer curves" on page 55. 2. Press AUDIO and then press EQ2 to select the 13-band graphic equalizer mode. 3. Press 2 or 3 to select the equalizer band to be adjusted. Each press of 2 or 3 selects equalizer bands in the following order: 50 Ô 80 Ô 125 Ô 200 Ô 315 Ô 500 Ô 800 Ô 1.25k Ô 2k Ô 3.15k Ô 5k Ô 8k Ô 12.5k (Hz) 4. Press 5 or ∞ to adjust the level of the equalizer band. Each press of 5 or ∞ increases or decreases the level of the equalizer band. • "+6" - "-6" is displayed as the level is increased or decreased. • You can then select another band and adjust the level. Using automatic sound levelizer During driving, noise in the car changes according to the driving speed and road conditions. The automatic sound levelizer (ASL) monitors such varying noise and automatically increases the volume level, if the noise becomes greater. The sensitivity (variation of volume level to noise level) of ASL can be set to one of five levels. 1. Press AUDIO and then press ASL to select the automatic sound levelizer mode. 2. Press ASL to set the automatic sound levelizer sensitivity. Press ASL repeatedly to switch between the following settings: OFF (off) = Low (low) = Mid-Low (mid-low) = Mid (mid) = Mid-High (mid-high) = High (high) • When the ASL mode is exited except for "OFF" is selected, "ASL" appears on the basic display. Using position selector One way to assure a more natural sound is to clearly position the stereo image, putting you right in the center of the sound field. The position selector function lets you automatically adjust the speakers' output levels and inserts a delay time to match the number and position of occupied seats. The result is a natural sound regardless of where you are seated. 1. Press AUDIO and NEXT and then press POSI to select the position selector mode. 2. Press the corresponding button to select a listening position. Button FL FR FRONT ALL Position Front seat left Front seat right Front seats All seats • Press the same button again to cancel the selected listening position. Note: • You can also use 5, ∞, 2 or 3 to select the listen- ing position. Button Position 2 Front seat left 3 Front seat right 5 Front seats ∞ All seats FRANÇAIS ITALIANO NEDERLANDS 58
-
 1
1 -
2
-
3
-
4
-
5
-
6
-
7
-
8
-
9
-
10
-
11
-
12
-
13
-
14
-
15
-
16
-
17
-
18
-
19
-
20
-
21
-
22
-
23
-
24
-
25
-
26
-
27
-
28
-
29
-
30
-
31
-
32
-
33
-
34
-
35
-
36
-
37
-
38
-
39
-
40
-
41
-
42
-
43
-
44
-
45
-
46
-
47
-
48
-
49
-
50
-
51
-
52
-
53
-
 54
54 -
 55
55 -
 56
56 -
 57
57 -
 58
58 -
 59
59 -
 60
60 -
 61
61 -
 62
62 -
 63
63 -
 64
64 -
65
-
66
-
67
-
68
-
69
-
70
-
71
-
72
-
73
-
74
-
75
-
76
-
77
-
78
-
79
-
80
-
81
-
82
-
83
-
84
-
85
-
86
-
87
-
88
-
89
-
90
-
91
-
92
-
93
-
94
-
95
-
96
-
97
-
98
-
99
-
100
-
101
-
102
-
103
-
104
-
105
-
106
-
107
-
108
-
109
-
110
-
111
-
112
-
113
-
114
-
115
-
116
-
117
-
118
-
119
-
120
-
121
-
122
-
123
-
124
-
125
-
126
-
127
-
128
-
129
-
130
-
131
-
132
-
133
-
134
-
135
-
136
-
137
-
138
-
139
-
140
-
141
-
142
-
143
-
144
-
145
-
146
-
147
-
148
-
149
-
150
-
151
-
152
-
153
-
154
-
155
-
156
-
157
-
158
-
159
-
160
-
161
-
162
-
163
-
164
-
165
-
166
-
167
-
168
 |
 |
