Pioneer P90HDD Owner's Manual - Page 68
Other Functions
 |
UPC - 012562575896
View all Pioneer P90HDD manuals
Add to My Manuals
Save this manual to your list of manuals |
Page 68 highlights
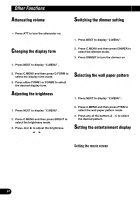
Other Functions Attenuating volume The attenuator lets you lower the volume level quickly (by about 90%). • Press ATT to turn the attenuator on. "ATT" appears in the display. • Press ATT again to turn the attenuator off and return to the original volume level. Changing the display form This product is equipped with two basic displays. You can select the desired display. 1. Press NEXT to display "C.MENU". Press NEXT until "C.MENU" appears. 2. Press C.MENU and then press D.FORM to select the display form mode. 3. Press either FORM1 or FORM2 to select the desired display form. Adjusting the brightness Display brightness adjustment lets you adjust the display for easier viewing when lighting conditions change. 1. Press NEXT to display "C.MENU". Press NEXT until "C.MENU" appears. 2. Press C.MENU and then press BRGHT to select the brightness mode. 3. Press 2 or 3 to adjust the brightness. Each press of 2 or 3 increases or decreases the brightness. • "00" - "31" is displayed as the brightness is increased or decreased. Switching the dimmer setting To prevent the display from being too bright at night, the display is automatically dimmed when the car's headlights are turned on. You can switch the dimmer on or off. 1. Press NEXT to display "C.MENU". Press NEXT until "C.MENU" appears. 2. Press C.MENU and then press DMMER to select the dimmer mode. 3. Press DMMER to turn the dimmer on. "ON" appears on the display. • Press DMMER again to turn the dimmer off. Selecting the wall paper pattern The wall paper pattern is only for display form 2 "FORM2", and there are three patterns to choose from. • When you select "FORM1", "PTRN" is not dis- played and this mode is inactive. 1. Press NEXT to display "C.MENU". Press NEXT until "C.MENU" appears. 2. Press C.MENU and then press PTRN to select the wall paper pattern mode. 3. Press any of the buttons A - C to select the desired pattern. Setting the entertainment display You can change the display to the movie screens, the spectrum analyzer displays, etc., while listening to any source. Setting the movie screen There are four stored movie screens to select from. 67
-
 1
1 -
2
-
3
-
4
-
5
-
6
-
7
-
8
-
9
-
10
-
11
-
12
-
13
-
14
-
15
-
16
-
17
-
18
-
19
-
20
-
21
-
22
-
23
-
24
-
25
-
26
-
27
-
28
-
29
-
30
-
31
-
32
-
33
-
34
-
35
-
36
-
37
-
38
-
39
-
40
-
41
-
42
-
43
-
44
-
45
-
46
-
47
-
48
-
49
-
50
-
51
-
52
-
53
-
54
-
55
-
56
-
57
-
58
-
59
-
60
-
61
-
62
-
 63
63 -
 64
64 -
 65
65 -
 66
66 -
 67
67 -
 68
68 -
 69
69 -
 70
70 -
 71
71 -
 72
72 -
 73
73 -
74
-
75
-
76
-
77
-
78
-
79
-
80
-
81
-
82
-
83
-
84
-
85
-
86
-
87
-
88
-
89
-
90
-
91
-
92
-
93
-
94
-
95
-
96
-
97
-
98
-
99
-
100
-
101
-
102
-
103
-
104
-
105
-
106
-
107
-
108
-
109
-
110
-
111
-
112
-
113
-
114
-
115
-
116
-
117
-
118
-
119
-
120
-
121
-
122
-
123
-
124
-
125
-
126
-
127
-
128
-
129
-
130
-
131
-
132
-
133
-
134
-
135
-
136
-
137
-
138
-
139
-
140
-
141
-
142
-
143
-
144
-
145
-
146
-
147
-
148
-
149
-
150
-
151
-
152
-
153
-
154
-
155
-
156
-
157
-
158
-
159
-
160
-
161
-
162
-
163
-
164
-
165
-
166
-
167
-
168
 |
 |
