Pioneer PDP-425CMX User Manual - Page 24
Operation - burn
 |
View all Pioneer PDP-425CMX manuals
Add to My Manuals
Save this manual to your list of manuals |
Page 24 highlights
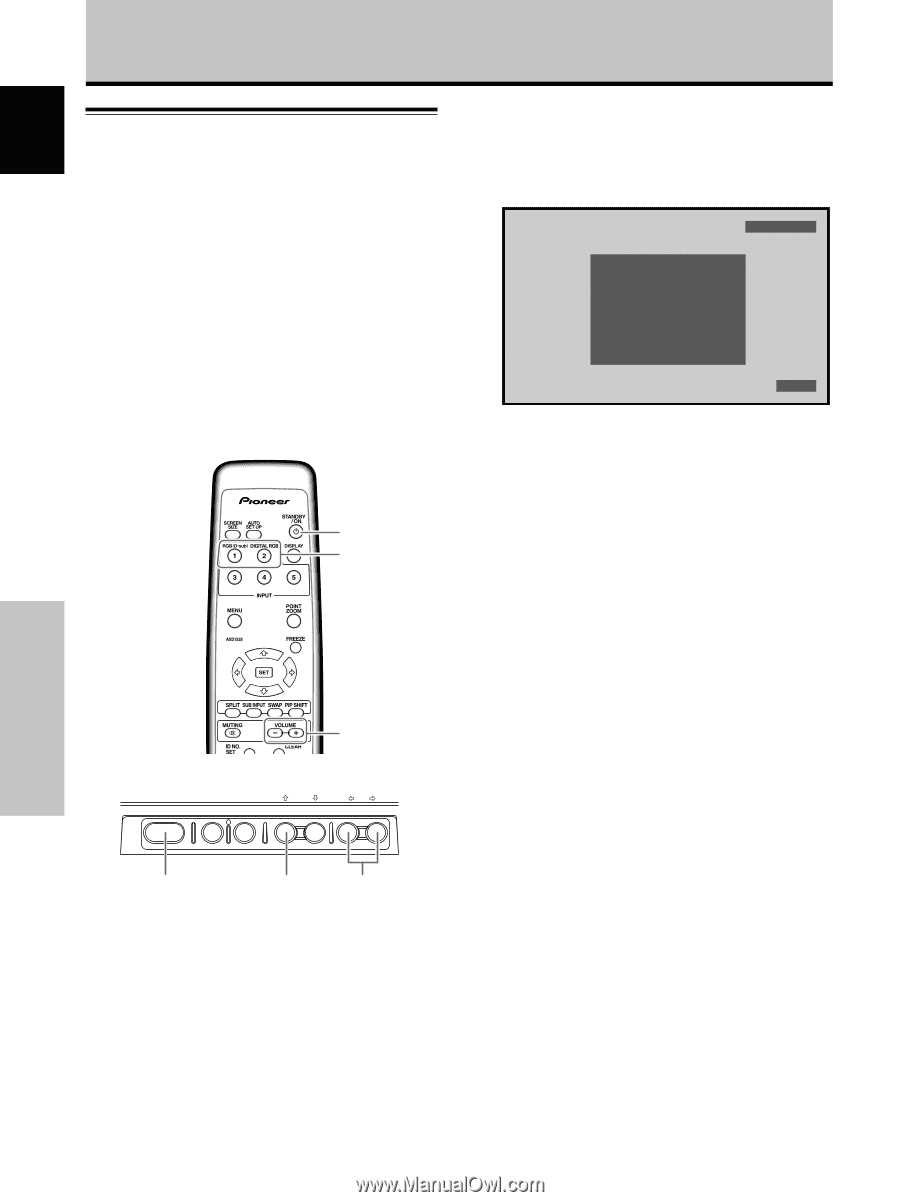
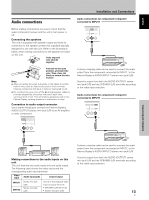
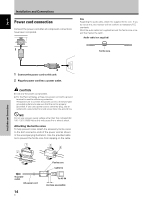
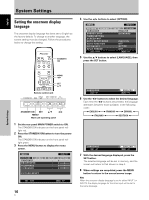
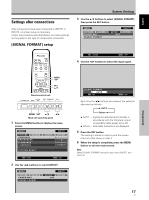
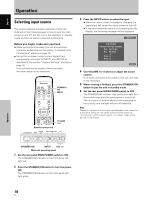
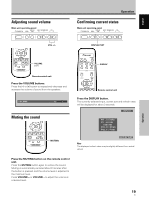
English Operation Selecting input source This section explains the basic operation of this unit. Outlined on the following pages is how to turn the main power on and off, put this unit in the operation or standby mode and how to select connected components. Before you begin, make sure you have: ÷ Made connections between this unit and personal computer as described in the section "Installation and Connections" starting on page 10. ÷ Set up the on-screen menu to input signals from components connected to INPUT1 and INPUT2 as described in the section "System Settings" starting on page 16. If no connections are made to these terminals, on-screen setup is not necessary. STANDBY/ ON INPUT VOLUME [+/-] Remote control unit STANDBY/ON DISPLAY MENU / SET INPUT SCREEN SIZE - VOL + 3 Press the INPUT button to select the input. ÷ When the menu screen is displayed, changing the signal input will cause the menu screen to turn off. ÷ If the input computer signal is not supported by the display, the following message will be displayed: INPUT1 CAUTION UNSUPPORTED SIGNAL FH: 86.7kHz FV: 88.5Hz - POL.H: - POL.V: - FULL 4 Use VOLUME (+/-) buttons to adjust the sound volume. If no audio connections are made to this unit, this step is not necessary. 5 When viewing is finished, press the STANDBY/ON button to put the unit in standby mode. 6 Set the rear panel MAIN POWER switch to OFF. The STANDBY/ON indicator may continue to light for a short while even after the main power is turned off. This is a result of residual electric load impressed on the circuitry, and the light will turn off presently. Note Please do not leave the same picture displayed on the screen for a long time. Doing so may cause a phenomenon known as "screen burn" which leaves a ghost, or residual, image of the picture on the screen. STANDBY/ON INPUT VOL +/- Main unit operating panel 1 Set the rear panel MAIN POWER switch to ON. The STANDBY/ON indicator on the front panel will light red. 2 Press the STANDBY/ON button to turn the power ON. The STANDBY/ON indicator on the front panel will light green. Operation 18 En
-
 1
1 -
2
-
3
-
4
-
5
-
6
-
7
-
8
-
9
-
10
-
11
-
12
-
13
-
14
-
15
-
16
-
17
-
18
-
 19
19 -
 20
20 -
 21
21 -
 22
22 -
 23
23 -
 24
24 -
 25
25 -
 26
26 -
 27
27 -
 28
28 -
 29
29 -
30
-
31
-
32
-
33
-
34
-
35
-
36
-
37
-
38
-
39
-
40
-
41
-
42
-
43
-
44
-
45
-
46
-
47
-
48
-
49
-
50
-
51
-
52
-
53
-
54
-
55
-
56
-
57
-
58
-
59
-
60
-
61
-
62
-
63
-
64
-
65
-
66
-
67
-
68
-
69
-
70
-
71
-
72
-
73
-
74
-
75
-
76
-
77
-
78
-
79
-
80
-
81
-
82
-
83
-
84
-
85
-
86
-
87
-
88
-
89
-
90
-
91
-
92
-
93
-
94
-
95
-
96
-
97
-
98
 |
 |