Pioneer VSX-35TX Owner's Manual - Page 22
Displays & Controls - thx
 |
View all Pioneer VSX-35TX manuals
Add to My Manuals
Save this manual to your list of manuals |
Page 22 highlights
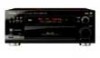
Displays & Controls Front Panel All the controls on the front panel are explained and/or referenced here. To open the front panel push gently on the lower third of the panel. 12 3 4 5 6 7 8 9 10 11 12 13 14 15 20 19 18 1 STANDBY/ON button Press to switch the receiver ON or into STANDBY mode. STANDBY indicator Lights when the receiver is in STANDBY mode. (Please note that this receiver consumes a small amount of power [1.0 W] in the standby mode.) 2 MIDNIGHT button (See p. 49) Switches the MIDNIGHT mode on or off (cannot be used in THX mode). 3 DIGITAL NR button (See p.48) Switches the DIGITAL Noise Reduction on or off (cannot be used in THX mode). 4 MULTI CH INPUT (See p.51) Use to hook up an external component that can decode other types of signals and input them into the VSX-35TX. 6 5 DSP MODE button (See p.43 - 44) Press repeatedly to select a DSP sound mode. (HALL 1, HALL 2, JAZZ, DANCE, THEATER 1, or THEATER 2, 5/7 CH STEREO). Use these modes to produce surround sound from standard (two channel) stereo sources and create different listening environments. STEREO/DIRECT button (See p.43 & 52) Switches the receiver into STEREO mode if it was in a different sound mode (like ADVANCED THEATER) or toggles between DIRECT and STEREO mode. For more on STEREO mode 7 see p. 46. DIRECT playback bypasses the tone controls and channel level for the most accurate reproduction of a program source. 22 17 16 / DTS buttons (See p. 41, 42, 86, 87) THX CINEMA - Cycles through the THX CINEMA, THX SURROUND EX or THX AUTO sound modes. Use when listening THX- certified sources if you have THX-certified speaker setup or want to re-create a THX-style sound environment. It is also appropriate for Dolby Digital, Dolby Pro Logic or DTS sources.Those with surround back speakers can use all three THX modes, those without should use the THX CINEMA mode. ADVANCED THEATER - Use to select one of the four Advanced Theater modes. Use to create certain types of sound environments when listening to Dolby Digital, Dolby Pro Logic or DTS sources. STANDARD - Use for pure decoding of multi channel sources, especially Dolby Digital, Dolby Pro Logic or DTS software. SPEAKERS (A/B) button Use to select the speaker system. A is the primary setting. It plays all speakers hooked up to the A system. A & B setting only plays the front speakers of both the A & B systems and the sub-woofer. Multi channel sources will be down-mixed to these speakers so no sound will be lost. B setting only plays the front speakers connected to the B system and multi channel sources will be down-mixed to these two speakers. The button cycles through the speaker systems as follows: A]B]A&B]off FL DIMMER button Use to adjust the brightness of the fluorescent display (FL = fluorescent display). Four levels of the brightness ranging from very dim to very bright can be selected. Each press changes the brightness of the display.
-
 1
1 -
2
-
3
-
4
-
5
-
6
-
7
-
8
-
9
-
10
-
11
-
12
-
13
-
14
-
15
-
16
-
 17
17 -
 18
18 -
 19
19 -
 20
20 -
 21
21 -
 22
22 -
 23
23 -
 24
24 -
 25
25 -
 26
26 -
 27
27 -
28
-
29
-
30
-
31
-
32
-
33
-
34
-
35
-
36
-
37
-
38
-
39
-
40
-
41
-
42
-
43
-
44
-
45
-
46
-
47
-
48
-
49
-
50
-
51
-
52
-
53
-
54
-
55
-
56
-
57
-
58
-
59
-
60
-
61
-
62
-
63
-
64
-
65
-
66
-
67
-
68
-
69
-
70
-
71
-
72
-
73
-
74
-
75
-
76
-
77
-
78
-
79
-
80
-
81
-
82
-
83
-
84
-
85
-
86
-
87
-
88
-
89
-
90
-
91
-
92
-
93
-
94
-
95
-
96
 |
 |
