Ricoh 3300D User Guide - Page 12
Altitude adjustment, Start, Programs, SP 3300 Series, Printer Settings Utility, Applications, SP 3300 - 3300 printer
 |
UPC - 026649062278
View all Ricoh 3300D manuals
Add to My Manuals
Save this manual to your list of manuals |
Page 12 highlights
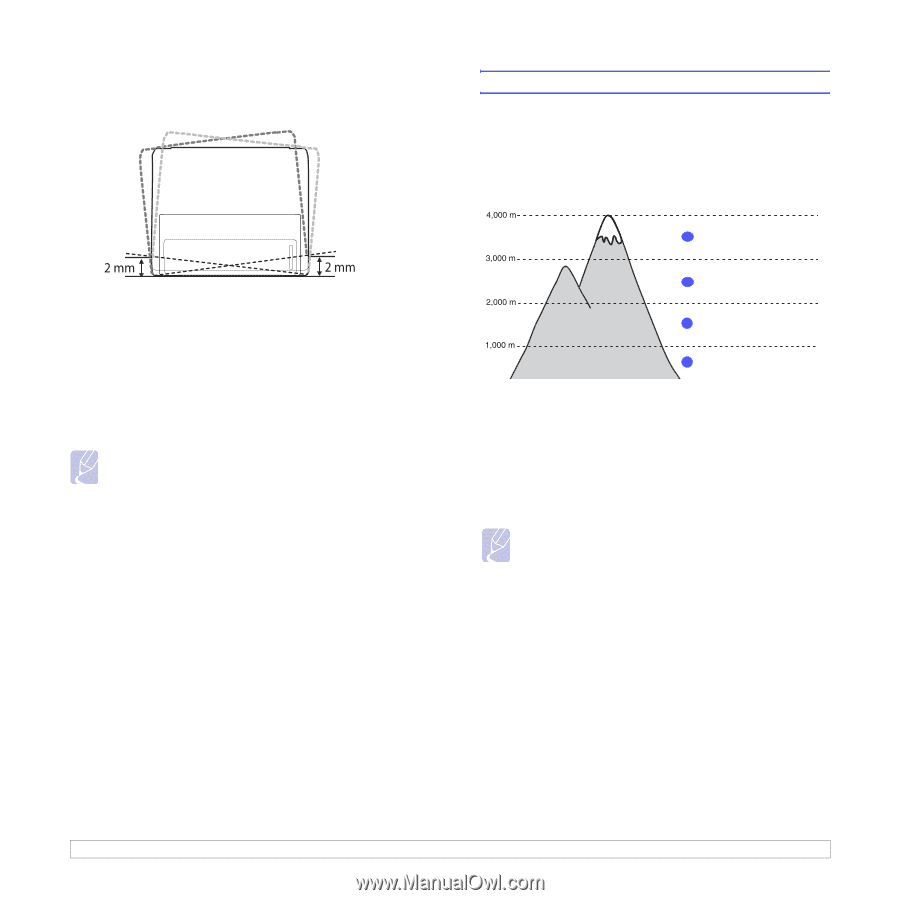
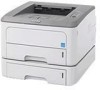
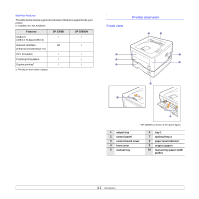
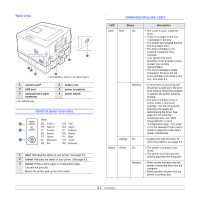
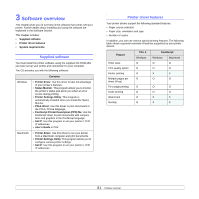
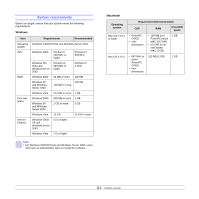
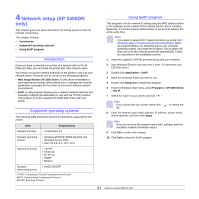
Place the machine on a flat and stable surface for not letting it tilt more than 2 mm (0.08 inches). Otherwise, it may affect the printing quality. 2 Unpack the machine and check all the enclosed items. 3 Remove the tape holding the machine tightly. 4 Install the toner cartridge. 5 Load paper. (See "Loading paper" on page 5.4.) 6 Make sure that all the cables are connected to the machine. 7 Turn the machine on. Notes • When you move the machine, do not tilt or turn it upside down. Otherwise, the inside of the machine may be contaminated by toner, which can cause damage to the machine or bad printing quality. • When the printer driver is in the installation process, the driver detects the locale information of your operating system, and sets the paper size for your machine. If you use the different Windows locale, you must change the paper size of your machine for matching your commonly used paper size. Open the printer properties to change the paper size. Altitude adjustment The print quality is affected by atmospheric pressure, which is determined by the height of the machine above sea level. The following information will guide you on how to set your machine to the best print quality. Before you set the altitude value, find the altitude where you are using the machine. Value 1 High 3 2 High 2 3 High 1 4 Normal 1 Ensure that you have installed the printer driver with the provided supplied CD-ROM. 2 For Windows, from the Start menu, select Programs or All Programs > SP 3300 Series > Printer Settings Utility. For MAC OS X, open the Applications folder > RNP > SP 3300 Series > Printer Settings Utility. 3 Click Setting > Altitude Adjustment. Select the appropriate value from the dropdown list, and then click Apply. Note If your machine is connected to a network, Web Image Monitor SP 3300 Series screen appears automatically. Click Machine Settings > Setup (or Machine Setup) > Altitude Adj. Select the appropriate altitude value, and then click Apply. 1.5
-
 1
1 -
2
-
3
-
4
-
5
-
6
-
 7
7 -
 8
8 -
 9
9 -
 10
10 -
 11
11 -
 12
12 -
 13
13 -
 14
14 -
 15
15 -
 16
16 -
 17
17 -
18
-
19
-
20
-
21
-
22
-
23
-
24
-
25
-
26
-
27
-
28
-
29
-
30
-
31
-
32
-
33
-
34
-
35
-
36
-
37
-
38
-
39
-
40
-
41
-
42
-
43
-
44
-
45
-
46
-
47
-
48
-
49
-
50
-
51
-
52
-
53
-
54
-
55
-
56
-
57
-
58
-
59
-
60
-
61
-
62
-
63
-
64
-
65
-
66
-
67
-
68
-
69
-
70
-
71
-
72
-
73
-
74
-
75
-
76
-
77
-
78
-
79
-
80
-
81
-
82
-
83
-
84
-
85
-
86
-
87
-
88
-
89
-
90
-
91
-
92
-
93
-
94
-
95
-
96
-
97
-
98
-
99
-
100
-
101
 |
 |