Ricoh 3300D User Guide - Page 94
IPP port, Configuring IPP in the print server, Configuring a Windows client, Setting IPP security - 3300 windows 7 driver
 |
UPC - 026649062278
View all Ricoh 3300D manuals
Add to My Manuals
Save this manual to your list of manuals |
Page 94 highlights
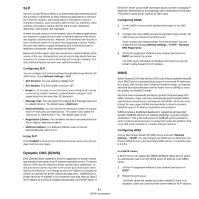
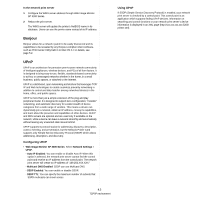
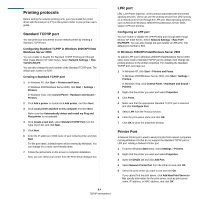
6 When the port name displays in the Print to the following port list, click OK or Close. IPP port Internet Printing Protocol (IPP) allows printing across the Internet, meaning that you can send a print job to your printer from a remote place if you are an Internet user, no matter what operating system you use or where you are. Configuring IPP in the print server The network administrator must specify information required for IPP, such as the URI (Uniform Resource Identifier). 1 Run your web browser and access Web Image Monitor SP 3300 Series. 2 Click Network Settings > Raw TCP/IP,LPR,IPP. 3 Configure the IPP parameters: • Printer Name: Enter the network printer's name to be used with IPP printing. • Printer URI: Enter the URL of the printer using the following format: ipp://the IP address of the printer or http://the IP address of the printer:631 (Ex:ipp://168.10.17.82 or http:// 168.10.17.82:631) 631 is the IPP port number. • Printer Information: Enter additional information about the printer. • More Printer Information: Enter more additional information about the printer. • Printer Location: Enter the name of the location where the printer is physically located. • Multiple Operation Timeout: Enter the time to elapse before the printer ends a print job. When there is no incoming data after the specified number of seconds, the printer ends reception. • Time to Keep Jobs in History: Set the length of time the IPP printer keeps job information. • Operator Message: Enter printer information for printer users. • Job Count: shows the number of print jobs. • Driver Installer: shows the URL where you can get the driver installer. • Manufacturer: shows the URL where you can get manufacturer information. 4 Click Apply. Configuring a Windows client After the network administrator has configured the network print server, each printer user must install the printer driver and set the print port to IPP 1.1 Port Monitor. Note: Before following the steps below, each printer user should install the printer driver. If the printer driver is not already installed on the computer, install the printer driver that came with the printer. Select the local port (LPT) when you install the driver. 1 In Windows XP, click Start > Printers and Faxes. In Windows 2000/Windows Server 2003, click Start > Settings > Printers. In Windows Vista, click Control Panel > Hardware and Sound > Printers. 2 Right-click the printer you want and select Properties. 3 In Windows 2000/XP/Vista//Windows Server 2003, click Ports. 4 Click Add Port. 5 Select IPP Port from the Other list and click OK. 6 Enter the printer URL and port name and click OK. 7 When the port name displays on the print port list, click OK. Now you can select the network print server from the Print Setup dialogue box to send a job. Setting IPP security Web Image Monitor SP 3300 Series allows administrators to choose an authentication method and to create or modify user accounts. 1 Run your web browser and access Web Image Monitor SP 3300 Series. 2 Click Network Settings > Raw TCP/IP,LPR,IPP. • Authentication Type: You can set a user name and password encryption method (refer to http digest authentication in RFC). • User: You can set a user name and password for IPP printing. You can set up the user database for up to 10 items. 3 Click Apply. Note: A user name should be unique for all slots and should not include symbols. The length of the user name and the password should each be less than 7 characters. 4.5 TCP/IP environment
-
 1
1 -
2
-
3
-
4
-
5
-
6
-
7
-
8
-
9
-
10
-
11
-
12
-
13
-
14
-
15
-
16
-
17
-
18
-
19
-
20
-
21
-
22
-
23
-
24
-
25
-
26
-
27
-
28
-
29
-
30
-
31
-
32
-
33
-
34
-
35
-
36
-
37
-
38
-
39
-
40
-
41
-
42
-
43
-
44
-
45
-
46
-
47
-
48
-
49
-
50
-
51
-
52
-
53
-
54
-
55
-
56
-
57
-
58
-
59
-
60
-
61
-
62
-
63
-
64
-
65
-
66
-
67
-
68
-
69
-
70
-
71
-
72
-
73
-
74
-
75
-
76
-
77
-
78
-
79
-
80
-
81
-
82
-
83
-
84
-
85
-
86
-
87
-
88
-
 89
89 -
 90
90 -
 91
91 -
 92
92 -
 93
93 -
 94
94 -
 95
95 -
 96
96 -
 97
97 -
 98
98 -
 99
99 -
100
-
101
 |
 |