Ricoh 3300D User Guide - Page 49
Installing Printer Software in Windows, Installing Software for Local Printing
 |
UPC - 026649062278
View all Ricoh 3300D manuals
Add to My Manuals
Save this manual to your list of manuals |
Page 49 highlights
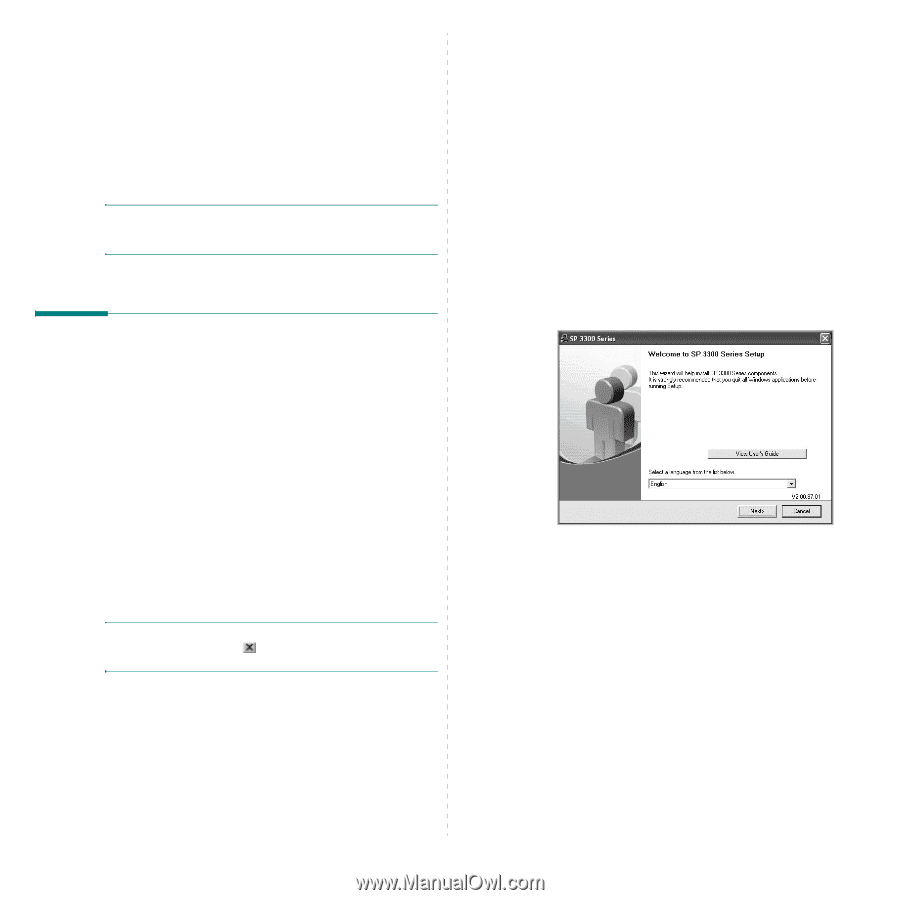
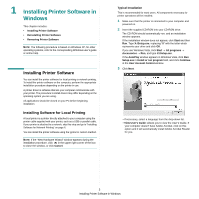
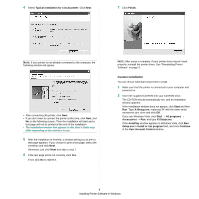
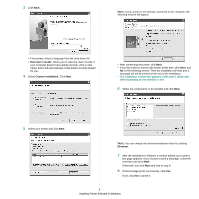
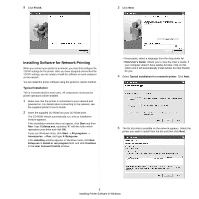
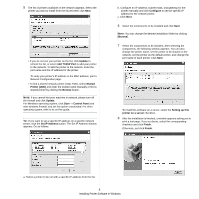
1 Installing Printer Software in Windows This chapter includes: • Installing Printer Software • Reinstalling Printer Software • Removing Printer Software NOTE: The following procedure is based on Windows XP, for other operating systems, refer to the corresponding Windows user's guide or online help. Installing Printer Software You can install the printer software for local printing or network printing. To install the printer software on the computer, perform the appropriate installation procedure depending on the printer in use. A printer driver is software that lets your computer communicate with your printer. The procedure to install drivers may differ depending on the operating system you are using. All applications should be closed on your PC before beginning installation. Installing Software for Local Printing A local printer is a printer directly attached to your computer using the printer cable supplied with your printer, such as a USB or parallel cable. If your printer is attached to a network, skip this step and go to "Installing Software for Network Printing" on page 6. You can install the printer software using the typical or custom method. NOTE: If the "New Hardware Wizard" window appears during the installation procedure, click in the upper right corner of the box to close the window, or click Cancel. Typical Installation This is recommended for most users. All components necessary for printer operations will be installed. 1 Make sure that the printer is connected to your computer and powered on. 2 Insert the supplied CD-ROM into your CD-ROM drive. The CD-ROM should automatically run, and an installation window appears. If the installation window does not appear, click Start and then Run. Type X:\Setup.exe, replacing "X" with the letter which represents your drive and click OK. If you use Windows Vista, click Start → All programs → Accessories → Run, and type X:\Setup.exe. If the AutoPlay window appears in Windows Vista, click Run Setup.exe in Install or run program field, and click Continue in the User Account Control window. 3 Click Next. • If necessary, select a language from the drop-down list. • View User's Guide: Allows you to view the User's Guide. If your computer doesn't have Adobe Acrobat, click on this option and it will automatically install Adobe Acrobat Reader for you. 3 Installing Printer Software in Windows
-
 1
1 -
2
-
3
-
4
-
5
-
6
-
7
-
8
-
9
-
10
-
11
-
12
-
13
-
14
-
15
-
16
-
17
-
18
-
19
-
20
-
21
-
22
-
23
-
24
-
25
-
26
-
27
-
28
-
29
-
30
-
31
-
32
-
33
-
34
-
35
-
36
-
37
-
38
-
39
-
40
-
41
-
42
-
43
-
 44
44 -
 45
45 -
 46
46 -
 47
47 -
 48
48 -
 49
49 -
 50
50 -
 51
51 -
 52
52 -
 53
53 -
 54
54 -
55
-
56
-
57
-
58
-
59
-
60
-
61
-
62
-
63
-
64
-
65
-
66
-
67
-
68
-
69
-
70
-
71
-
72
-
73
-
74
-
75
-
76
-
77
-
78
-
79
-
80
-
81
-
82
-
83
-
84
-
85
-
86
-
87
-
88
-
89
-
90
-
91
-
92
-
93
-
94
-
95
-
96
-
97
-
98
-
99
-
100
-
101
 |
 |