Ricoh Epson Stylus Pro 7700 User Guide - Page 134
Choosing Roll Paper Options, If you are printing on roll paper
 |
View all Ricoh Epson Stylus Pro 7700 manuals
Add to My Manuals
Save this manual to your list of manuals |
Page 134 highlights
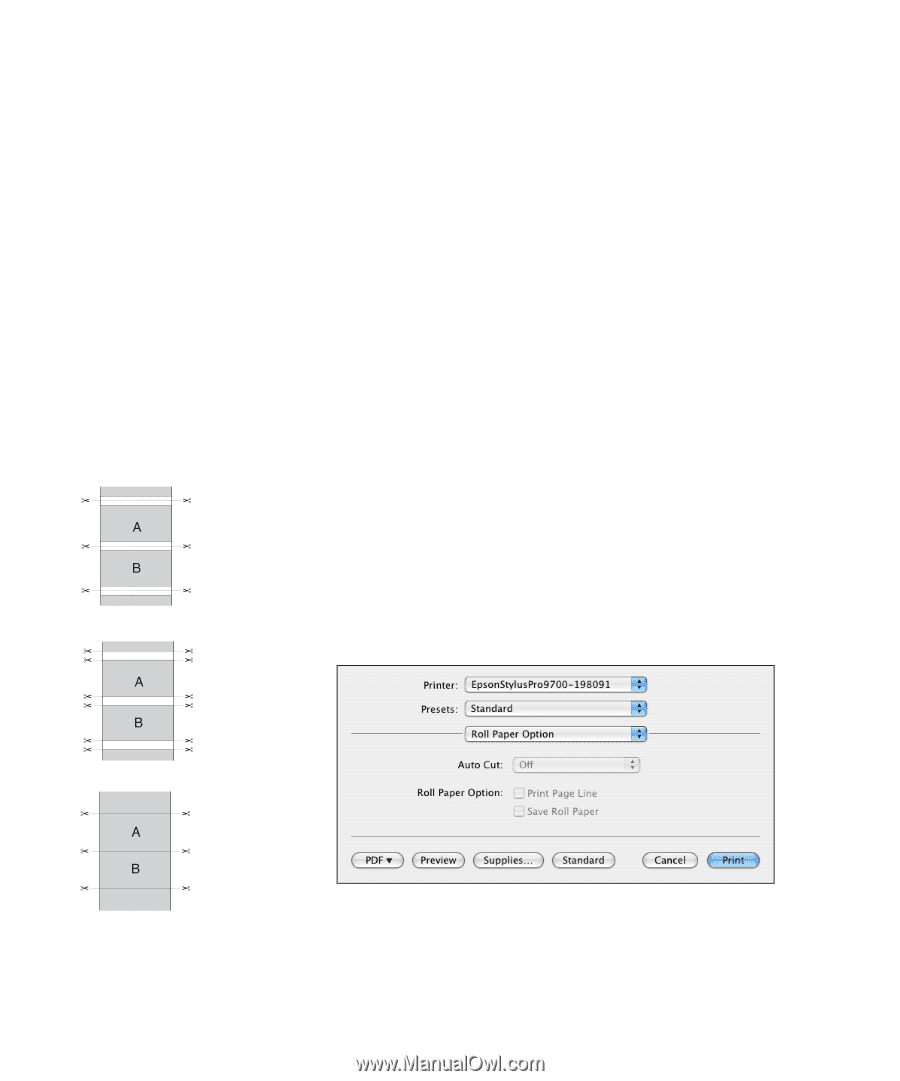
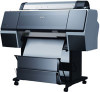
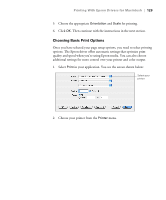
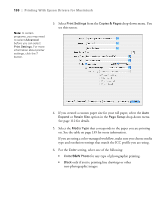
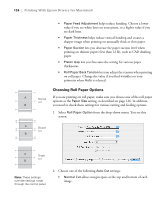
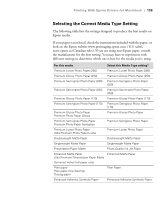
134 | Printing With Epson Drivers for Macintosh • Paper Feed Adjustment helps reduce banding. Choose a lower value if you see white lines on your prints, or a higher value if you see dark lines. • Paper Thickness helps reduce vertical banding and creates a sharper image when printing on unusually thick or thin paper. • Paper Suction lets you decrease the paper suction level when printing on thinner papers (less than 12 lb), such as CAD drafting paper. • Platen Gap lets you fine-tune the setting for various paper thicknesses. • Roll Paper Back Tension lets you adjust the tension when printing on roll paper. Change the value if you find wrinkles on your printouts when Auto is selected. Normal cut Choosing Roll Paper Options If you are printing on roll paper, make sure you choose one of the roll paper options as the Paper Size setting, as described on page 126. In addition, you need to check these settings for various cutting and feeding options. 1. Select Roll Paper Option from the drop-down menu. You see this screen: Double cut Single cut Note: These settings override settings made through the control panel. 2. Choose one of the following Auto Cut settings: • Normal Cut allows margin space at the top and bottom of each image. 134
-
 1
1 -
2
-
3
-
4
-
5
-
6
-
7
-
8
-
9
-
10
-
11
-
12
-
13
-
14
-
15
-
16
-
17
-
18
-
19
-
20
-
21
-
22
-
23
-
24
-
25
-
26
-
27
-
28
-
29
-
30
-
31
-
32
-
33
-
34
-
35
-
36
-
37
-
38
-
39
-
40
-
41
-
42
-
43
-
44
-
45
-
46
-
47
-
48
-
49
-
50
-
51
-
52
-
53
-
54
-
55
-
56
-
57
-
58
-
59
-
60
-
61
-
62
-
63
-
64
-
65
-
66
-
67
-
68
-
69
-
70
-
71
-
72
-
73
-
74
-
75
-
76
-
77
-
78
-
79
-
80
-
81
-
82
-
83
-
84
-
85
-
86
-
87
-
88
-
89
-
90
-
91
-
92
-
93
-
94
-
95
-
96
-
97
-
98
-
99
-
100
-
101
-
102
-
103
-
104
-
105
-
106
-
107
-
108
-
109
-
110
-
111
-
112
-
113
-
114
-
115
-
116
-
117
-
118
-
119
-
120
-
121
-
122
-
123
-
124
-
125
-
126
-
127
-
128
-
 129
129 -
 130
130 -
 131
131 -
 132
132 -
 133
133 -
 134
134 -
 135
135 -
 136
136 -
 137
137 -
 138
138 -
 139
139 -
140
-
141
-
142
-
143
-
144
-
145
-
146
-
147
-
148
-
149
-
150
-
151
-
152
-
153
-
154
-
155
-
156
-
157
-
158
-
159
-
160
-
161
-
162
-
163
-
164
-
165
-
166
-
167
-
168
-
169
-
170
-
171
-
172
-
173
-
174
-
175
-
176
-
177
-
178
-
179
-
180
-
181
-
182
-
183
-
184
-
185
-
186
-
187
-
188
-
189
-
190
-
191
-
192
-
193
-
194
-
195
-
196
-
197
-
198
-
199
-
200
-
201
-
202
-
203
-
204
-
205
-
206
-
207
-
208
-
209
-
210
-
211
-
212
-
213
-
214
-
215
-
216
-
217
-
218
-
219
-
220
-
221
-
222
-
223
-
224
-
225
-
226
-
227
-
228
 |
 |