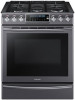
Samsung NX58K9500WG/AA User Manual - Page 45
Temperature, Temp. Unit °F / °C, English - 45, GAS OVEN, Options, START/SET
 |
View all Samsung NX58K9500WG/AA manuals
Add to My Manuals
Save this manual to your list of manuals |
Page 45 highlights
05 GAS OVEN Temperature The oven temperature has been calibrated at the factory. When first using the oven, follow the recommended recipe times and temperatures. If it appears that the oven is too hot or too cool, you can recalibrate the oven temperature. Before recalibrating, test a recipe by using a temperature setting that is higher or lower than recommended. The baking results should help you decide how much of an adjustment is needed. The oven temperature can be adjusted by ±35 °F (±19 °C). 1. Press the Options button and then 2 on the number pad. 3 4 1 12 2. Press the Options button to select a higher (+) or lower (-) temperature. 3. Enter an adjusting temperature value (0~35) using the number pad. 4. Press the START/SET button to save the changes. This adjustment does not affect the broiling or the self-cleaning temperature, and is retained in memory after a power failure. Temp. Unit (°F / °C) Change the temperature format of the oven to Fahrenheit or Centigrade. The default is Fahrenheit. 21 3 1 1. Press the Options button and then 3 on the number pad. 2. Press 1 (Fahrenheit) or 2 (Celsius) on the number pad. 3. Press the START/SET button to save the changes. English - 45
-
 1
1 -
2
-
3
-
4
-
5
-
6
-
7
-
8
-
9
-
10
-
11
-
12
-
13
-
14
-
15
-
16
-
17
-
18
-
19
-
20
-
21
-
22
-
23
-
24
-
25
-
26
-
27
-
28
-
29
-
30
-
31
-
32
-
33
-
34
-
35
-
36
-
37
-
38
-
39
-
 40
40 -
 41
41 -
 42
42 -
 43
43 -
 44
44 -
 45
45 -
 46
46 -
 47
47 -
 48
48 -
 49
49 -
 50
50 -
51
-
52
-
53
-
54
-
55
-
56
-
57
-
58
-
59
-
60
-
61
-
62
-
63
-
64
-
65
-
66
-
67
-
68
-
69
-
70
-
71
-
72
-
73
-
74
-
75
-
76
-
77
-
78
-
79
-
80
-
81
-
82
-
83
-
84
-
85
-
86
-
87
-
88
-
89
-
90
-
91
-
92
-
93
-
94
-
95
-
96
-
97
-
98
-
99
-
100
-
101
-
102
-
103
-
104
-
105
-
106
-
107
-
108
-
109
-
110
-
111
-
112
-
113
-
114
-
115
-
116
-
117
-
118
-
119
-
120
-
121
-
122
-
123
-
124
-
125
-
126
-
127
-
128
-
129
-
130
-
131
-
132
-
133
-
134
-
135
-
136
-
137
-
138
-
139
-
140
-
141
-
142
-
143
-
144
-
145
-
146
-
147
-
148
-
149
-
150
-
151
-
152
-
153
-
154
-
155
-
156
-
157
-
158
-
159
-
160
-
161
-
162
-
163
-
164
-
165
-
166
-
167
-
168
-
169
-
170
-
171
-
172
-
173
-
174
-
175
-
176
-
177
-
178
-
179
-
180
-
181
-
182
-
183
-
184
-
185
-
186
-
187
-
188
-
189
-
190
-
191
-
192
-
193
-
194
-
195
-
196
-
197
-
198
-
199
-
200
-
201
-
202
-
203
-
204
-
205
-
206
-
207
-
208
-
209
-
210
-
211
-
212
-
213
-
214
-
215
-
216
 |
 |
