Sony DAV-HDX285 Operating Instructions
Sony DAV-HDX285 - Bravia Theater Home System Manual
 |
UPC - 027242753495
View all Sony DAV-HDX285 manuals
Add to My Manuals
Save this manual to your list of manuals |
Sony DAV-HDX285 manual content summary:
- Sony DAV-HDX285 | Operating Instructions - Page 1
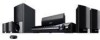
4-122-238-12(1) DVD Home Theatre System Operating Instructions DAV-HDX285 / HDX585 / HDX685 ©2009 Sony Corporation - Sony DAV-HDX285 | Operating Instructions - Page 2
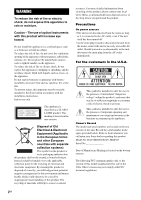
accompanying the appliance. Owner's Record The model and serial numbers are located on the rear exterior of the unit. Record the serial number in the space provided below. Refer to them whenever you call upon your Sony dealer regarding this product. Model No. DAV-HDX285/DAV-HDX585 Serial No Date - Sony DAV-HDX285 | Operating Instructions - Page 3
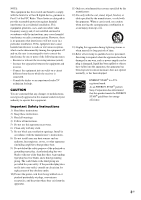
Part user is manual could void your authority to operate this equipment. Important Safety Instructions 1) Read these instructions. 2) Keep these instructions. 3) Heed all warnings. 4) Follow all instructions servicing to qualified service personnel. Servicing Sony Corporation has determined that this - Sony DAV-HDX285 | Operating Instructions - Page 4
are trademarks of DivX, Inc. and are used under license (Except for North American models). "S-AIR" and its logo are trademarks of Sony Corporation. About MPEG-4 Visual (Except for North American models) THIS PRODUCT IS LICENSED UNDER THE MPEG-4 VISUAL PATENT PORTFOLIO LICENSE FOR THE PERSONAL AND - Sony DAV-HDX285 | Operating Instructions - Page 5
: You can enjoy surround speaker sound wirelessly. • S-AIR receiver: You can enjoy system sound in another room. These S-AIR products can be purchased as an options (the S-AIR product lineup differs depending on the area). Notes or instructions for the surround amplifier or S-AIR receiver in these - Sony DAV-HDX285 | Operating Instructions - Page 6
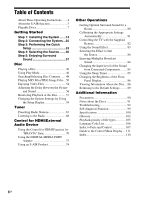
89 Additional Information Precautions 90 Notes about the Discs 91 Troubleshooting 92 Self-diagnosis Function 99 Specifications 100 Glossary 102 Playback priority of file types 105 Language Code List 106 Index to Parts and Control 107 Guide to the Control Menu Display ... 111 Index 114 6GB - Sony DAV-HDX285 | Operating Instructions - Page 7
must be in MPEG1 Audio Layer 3 format. 2)JPEG image files must conform to the DCF image file format. (DCF "Design rule for Camera File system": Image standards for digital cameras regulated by Japan Electronics and Information Technology Industries Association (JEITA).) 3)Except for North American - Sony DAV-HDX285 | Operating Instructions - Page 8
Disc * Except for North American models. Also, the system cannot play the following discs: • A DVD VIDEO with a different region code (page 9) • A disc that finalized. For more information, refer to the operating instructions for the recording device. Note that some playback functions - Sony DAV-HDX285 | Operating Instructions - Page 9
first session, only the first session will be played back. Region code Your system has a region code printed on the rear of the unit and will only play a DVD labeled with the same region code. A DVD VIDEO labeled ALL will also play on this system. If you try to play any other DVD VIDEO, the - Sony DAV-HDX285 | Operating Instructions - Page 10
Started Unpacking DAV-HDX285 • Front speakers (2) • Center speaker (1) • Surround speakers (2) • FM wire antenna (aerial) (1) • Foot pads (1 set) or • Speaker cords (6, red/white/ green/gray/blue/purple) • Video cord (1) • Operating Instructions • Quick Setup Guide For U.S. and Australian models - Sony DAV-HDX285 | Operating Instructions - Page 11
wire antenna (aerial) (1) • Posts (2) or • Bases (2) • Speaker cords (6, red/white/ green/gray/blue/purple) • Screws (black) (4) • Video cord (1) • Screws (with washer) (4) • Remote commander (remote) (1) • R6 (size AA) batteries (2) • Operating Instructions • Quick Setup Guide • Setup Disc - Sony DAV-HDX285 | Operating Instructions - Page 12
pads (1 set) or • Posts (4) • Speaker cords (6, red/white/ green/gray/blue/purple) • Bases (4) • Video cord (1) • Screws (black) (8) • Remote commander (remote) (1) • Screws (with washer) (8) • R6 (size AA) batteries (2) • Operating Instructions • Quick Setup Guide • Setup Disc (DVD) 12GB - Sony DAV-HDX285 | Operating Instructions - Page 13
) batteries (supplied) by matching the 3 and # ends on the batteries to the markings inside the compartment. To use the remote, point it at the remote sensor on the unit. Note • Do not leave the remote in an extremely hot or humid place. • Do not use a new battery with an old one. • Do not - Sony DAV-HDX285 | Operating Instructions - Page 14
Step 1: Installing the System Positioning the system For the best possible surround sound, place all speakers at the same distance from the listening position (A). The distance can be between 1.0 to 7.0 meters. If you cannot place the center speaker and surround speakers at the same distance - Sony DAV-HDX285 | Operating Instructions - Page 15
Getting Started Attaching the foot pads to the subwoofer Attach the foot pads (supplied) to the bottom of the subwoofer to stabilize the subwoofer and prevent it from slipping. , Remove the foot pads from the protective cover. 15GB - Sony DAV-HDX285 | Operating Instructions - Page 16
Assembling the speakers (DAV-HDX585/DAV-HDX685 only) Before connecting the speakers, attach the speaker stand to the speaker. (For the front speakers of DAV-HDX585, and the front and surround speakers of DAV-HDX685) Use the parts as follows: DAV-HDX585 • Front speakers (2) • Speaker cords (2, red - Sony DAV-HDX285 | Operating Instructions - Page 17
so that the screw on the post faces the front of the speaker. Speaker Screw , Post 2 Adjust the height of the speaker, then secure the post with two screws (with washer). You can change the height of the speaker depending on the screw positions. Adjust the screw holes of the post to the holes - Sony DAV-HDX285 | Operating Instructions - Page 18
as the label of the jacks to be connected. Use the speaker cords as follows: • Front left speaker (L): White • Front right speaker (R): Red • Surround left speaker (L): Blue (DAV-HDX685 only) • Surround right speaker (R): Gray (DAV-HDX685 only) Be careful with the orientation of the post. Thread - Sony DAV-HDX285 | Operating Instructions - Page 19
#. Color tube Front left speaker (L): White Front right speaker (R): Red Surround left speaker (L): Blue (DAV-HDX685 only) Surround right speaker (R): Gray (DAV-HDX685 only) Rear of the speaker 5 Attach the post to the base. Insert the post so that the slot on the lower part of the post aligns with - Sony DAV-HDX285 | Operating Instructions - Page 20
slack. Take up slack in the speaker cord by pulling from the bottom of the base. Secure the speaker cord by running it through the slot. Adjust the length of the cord. Fully-assembled illustration DAV-HDX585 Front left speaker (L): White label Front right speaker (R): Red label White Red 20GB - Sony DAV-HDX285 | Operating Instructions - Page 21
Getting Started DAV-HDX685 Front left speaker (L): White label Front right speaker (R): Surround left speaker (L): Surround right speaker (R): Red label Blue label Gray label White Red Blue Gray 21GB - Sony DAV-HDX285 | Operating Instructions - Page 22
a beam. Install the speakers on a vertical and flat wall where reinforcement is applied. • Sony is not responsible for inch) Hole on the back of the speaker 2 Fasten the screws to the wall. DAV-HDX285 For the center speaker 145 mm (5 3/4 inches) For the other speakers 8 to 10 mm (11/32 to 13 - Sony DAV-HDX285 | Operating Instructions - Page 23
10 mm (11/32 to 13/32 inch) 101.6 mm (4 inches) 8 to 10 mm (11/32 to 13/32 inch) DAV-HDX685 For the center speaker 145 mm (5 3/4 inches) For the other speakers 8 to 10 mm (11/32 to 13/32 inch) 8 to 10 mm (11/32 to 13/32 inch) 101.6 mm - Sony DAV-HDX285 | Operating Instructions - Page 24
Getting Started 3 Hang the speakers on the screws. 5 mm (7/32 inch) 10 mm (13/32 inch) Hole on the back of the speaker Rear of the speaker 24GB - Sony DAV-HDX285 | Operating Instructions - Page 25
Getting Started Step 2: Connecting the System For connecting the system, read the information on the following the speakers The connector of the speaker cords and the color tube are color-coded depending on the type of speaker. Connect the speaker cords to match the color of the SPEAKER jacks - Sony DAV-HDX285 | Operating Instructions - Page 26
on your TV, select the connection method. C Component video cable (not supplied) EZW-T100 ANTENNA AM FM COAXIAL 75 SPEAKER CENTER SUBWOOFER TV DIGITAL IN OPTICAL COAXIAL SPEAKER FRONT R SUR R FRONT L HDMI OUT SUR L DMPORT 0D.C7A5VMAX B HDMI cable (not supplied) COMPONENT VIDEO OUT - Sony DAV-HDX285 | Operating Instructions - Page 27
select either PAL or NTSC for the color system. The initial setting of the system for Australian and Middle Eastern models is PAL. The initial setting of the system for Asian models is NTSC. 1 Turn off the system by pressing "/1. 2 Turn on the system by pressing "/1 on the unit while pressing . on - Sony DAV-HDX285 | Operating Instructions - Page 28
an audio signal to the unit from the TV. To listen to TV sound via the system, perform this connection. SPEAKER CENTER SUBWOOFER TV DIGITAL IN OPTICAL COAXIAL E Digital optical cord (not supplied) SPEAKER FRONT R SUR R FRONT L HDMI OUT SUR L DMPORT 0D.C7A5VMAX EZW-T100 ANTENNA AM FM - Sony DAV-HDX285 | Operating Instructions - Page 29
IN OPTICAL/COAXIAL jacks instead of the TV. Wireless system options By using an S-AIR product (not supplied), you can enjoy wireless performance by transmission from the system. For details, see "Using an S-AIR Product" (page 74) or refer to the operating instructions of the S-AIR product. 29GB - Sony DAV-HDX285 | Operating Instructions - Page 30
the speakers of the system through the connected TV. Connect the components as follows. TV VCR, digital satellite receiver, PlayStation, etc. System VCR, digital satellite receiver, PlayStation, etc. :Signal flow Select the component on the TV. For details, refer to the operating instructions - Sony DAV-HDX285 | Operating Instructions - Page 31
) FM wire antenna (aerial) (supplied) Note • Keep the AM loop antenna (aerial) and cord away from the system or other wire antenna (aerial). • After connecting the FM wire antenna (aerial), keep it as horizontal as possible. Tip • Adjust the direction of the AM loop antenna (aerial) for best - Sony DAV-HDX285 | Operating Instructions - Page 32
a wall outlet (mains), connect all the speakers to the unit. Wall outlet (mains): The Press [/1 on the unit. The system turns on. 2 Press SYSTEM MENU. 3 Press X/x repeatedly until made. 6 Press SYSTEM MENU. The system menu turns off. Tip • When you purchase the system new, or if the system is at its - Sony DAV-HDX285 | Operating Instructions - Page 33
selector on your TV so that the signal from the system appears on the TV screen. [Press [ENTER] to run QUICK SETUP.] appears at the bottom of the TV screen. If this for HDMI function is set to off. The Setup Display for selecting the speaker formation appears. SPEAKER FORMATION STANDARD 33GB - Sony DAV-HDX285 | Operating Instructions - Page 34
The environment of the room in which the system is installed may affect measurements. When the measurements differ considerably from the status of the speaker installation, perform the speaker settings manually by following "Settings for the speakers" (page 64). 11 Unplug the calibration mic, press - Sony DAV-HDX285 | Operating Instructions - Page 35
refer also to the operating instructions supplied with the TV/projector, etc. system is in stop mode. The Control Menu display appears on the TV screen. 3 Press X/x to select [SETUP], then press . The options for [SETUP] appear. 4 Press X/x to select [CUSTOM], then press . The Setup - Sony DAV-HDX285 | Operating Instructions - Page 36
FM" y "TUNER AM" y "TV/VIDEO" y "DMPORT" y "AUDIO" y ... Function "DVD" "TUNER FM"/ "TUNER AM" "TV/VIDEO" "DMPORT" "AUDIO" Source Disc that is played by the system FM/AM radio (page 67) TV or component that is connected to the TV/ VIDEO jacks on the rear panel DIGITAL MEDIA PORT adapter (page - Sony DAV-HDX285 | Operating Instructions - Page 37
of movie theaters into your home. X/x/c, SYSTEM MENU Enjoying TV sound with the 5.1 channel surround sound effect 1 Press SYSTEM MENU. sound is output only from the center speaker. Selecting surround sound effects based on your listening preference 1 Press SYSTEM MENU. 2 Press X/x repeatedly until - Sony DAV-HDX285 | Operating Instructions - Page 38
music mode decoding. • Multi-channel source: The system outputs sound from the speakers depending on the number of channels of the source. The system outputs the sound from the front speakers and subwoofer regardless of sound format or number of channels. Multi-channel surround formats are downmixed - Sony DAV-HDX285 | Operating Instructions - Page 39
(HEADPHONE VIRTUAL) Effect The system outputs the sound from the headphones by adding a surround effect regardless of sound format or number of channels. To turn the surround effect ." • When changing the decoding mode while using the S-AIR receiver, sound from the S-AIR receiver may skip. 39GB - Sony DAV-HDX285 | Operating Instructions - Page 40
operating instructions supplied with your disc. Adjust the volume "/1 DISC 1-5/indicators 4 Press DISC 1-5. Press the button of the disc number you the system with an HDMI cable can be sync-operated with the system. For details, see "Using the Control for HDMI Function for "BRAVIA" Sync" - Sony DAV-HDX285 | Operating Instructions - Page 41
- "S-AIR STBY" is set to "STBY OFF" (page 77). To use the headphones Connect the headphones to the PHONES jack on the unit. The sound of the system is function works only for video files (except for North American models). 6)DVD VIDEO/DVD-RW/DVD-R only. The button can be used except for - Sony DAV-HDX285 | Operating Instructions - Page 42
Press SYSTEM MENU. The system channel and listen to the sound of the selected channel through both the right and left speakers. You cannot change the sound for a Super Audio CD. * Except for North American models code. See "Language Code List" (page 106) to confirm which language the code represents. - Sony DAV-HDX285 | Operating Instructions - Page 43
(MP3 file) • [STEREO]: The standard stereo sound. • [1/L]: The sound of the left channel (monaural). • [2/R]: The sound of the right channel (monaural). x DATA CD (DivX video file) /DATA DVD (DivX video file) (Except for North American models) The choice of DATA CD or DATA DVD audio signal formats - Sony DAV-HDX285 | Operating Instructions - Page 44
2 channel playback area and a multi-channel playback area. You can select the playback area you want to listen to. 1 Press DISPLAY while the system is item number you want using the number buttons. If you make a mistake, press CLEAR to cancel the number. 3 Press . 4 Follow the instructions in - Sony DAV-HDX285 | Operating Instructions - Page 45
operating instructions supplied with the disc. In this case, press H. Tip • To play without using the PBC function, press ./ > or the number buttons while the system in [SYSTEM SETUP] to [ON]. For details, see "[MULTI-DISC RESUME] (DVD VIDEO/VIDEO CD only)" (page 64). Note • This system stores the - Sony DAV-HDX285 | Operating Instructions - Page 46
the Control Menu display is turned off. To change or cancel a program 1 Follow Steps 1 to 3 of "Creating your own program." 2 Press X/x to select the program number of the track you want to change or cancel. If you want to delete the track from the program, press CLEAR. 3 Follow Step 5 for new - Sony DAV-HDX285 | Operating Instructions - Page 47
first folder will play in random order. Disc * Except for North American models. 4 Press . Shuffle Play starts. To return to normal play Press DISC]: You can repeat all of the titles on the current disc. (When the system is playing a DVD-VR, you can repeat all of the titles of the selected disc - Sony DAV-HDX285 | Operating Instructions - Page 48
): You can repeat the current file (except for North American models). 4 Press . The item is selected. To return to Super VCD with PBC playback. • When the system is playing a DATA CD/DATA DVD which depending on the disc. 2 Press C/X/x/c or the number buttons to select the item you want to play or - Sony DAV-HDX285 | Operating Instructions - Page 49
available for DVD-VRs with a playlist created. 1 Press DISPLAY while the system is in stop mode. The Control Menu display appears on the TV screen (video file))* by pressing the number buttons and . * Except for North American models. To search for a scene using the time code 1 In Step 2, select - Sony DAV-HDX285 | Operating Instructions - Page 50
are not in MP3 or JPEG format. Playing these files may generate a loud noise which could damage your speaker system. • The system does not play back audio in MP3PRO format. • The system can recognize up to 200 folders, and will not play any folders beyond the 200th. (Depending on the folder - Sony DAV-HDX285 | Operating Instructions - Page 51
01_Geronimo_s_Cadillac 02_Riding_On_A_White_Swan 03_Give_Me_Peace_On_Earth 04_Sweet_Little_Shella 05_Ten_Thousand_Lonely_Drums 06_Lonely_Tears_In_Chinatown 07_In_Shaire Press X/x to select a file and press . The system starts playing the selected file. You can turn the file list off by pressing DVD - Sony DAV-HDX285 | Operating Instructions - Page 52
a JPEG image file. Press CLEAR to return to normal view. Note • You cannot rotate the JPEG image file when you set [JPEG RESOLUTION] in [HDMI SETUP] to [(1920 × 1080i) HD ] or [(1920 × 1080i) HD] (page 62). To stop playback Press x. To turn on/off the display Press DVD MENU. Other operations - Sony DAV-HDX285 | Operating Instructions - Page 53
system starts playing the selected folder. You can turn the folder list on/off by pressing DVD MENU repeatedly. Note • If you play a large MP3 file and JPEG image file at the same time, the sound may skip. Sony RESOLUTION] in [HDMI SETUP] to [(1920 × 1080i for North American models. 1 Press FUNCTION - Sony DAV-HDX285 | Operating Instructions - Page 54
file playback has priority. • [VIDEO] (Except for North American models): Video file playback has priority. • [PHOTO]: JPEG image file system only plays a DATA CD of format ISO 9660 Level 1/Level 2 or Joliet, and a DATA DVD of Universal Disk Format (UDF). Refer to the operating instructions - Sony DAV-HDX285 | Operating Instructions - Page 55
sound may skip or not match the pictures on the TV screen. • The system cannot play some DivX video files that are longer than 3 hours. • Depending Press X/x to select the folder you want to play. 7 Press H. The system starts playing the selected folder. To select video files, see "Selecting a video - Sony DAV-HDX285 | Operating Instructions - Page 56
DivX video file as many times as the preset number. The following occurrences are counted: - when the system is turned off. - when another file is played the Picture and Sound [A/V SYNC] * * * Except for North American models When the sound does not match the pictures on the TV screen, you can - Sony DAV-HDX285 | Operating Instructions - Page 57
for [SYSTEM SETUP] appear. 6 Press X/x to select [PARENTAL CONTROL t], then press . x If you have not entered a password The display for registering a new password appears. PARENTAL CONTROL Enter a new 4-digit password, then press ENTER . Enter a 4-digit password using the number buttons, then - Sony DAV-HDX285 | Operating Instructions - Page 58
4-digit password using the number buttons, then press . The system starts playback. Tip • SETUP], then press . The options for [SETUP] appear. 4 Press X/x to select [CUSTOM], then press . The Setup Display appears. 5 Press X/x to select [SYSTEM SETUP], then press . The options for [SYSTEM SETUP - Sony DAV-HDX285 | Operating Instructions - Page 59
5 Press X/x to select the setup item, then press . • [LANGUAGE SETUP] (page 59) • [VIDEO SETUP] (page 60) • [HDMI SETUP] (page 62) • [AUDIO SETUP] (page 63) • [SYSTEM SETUP] (page 64) • [SPEAKER SETUP] (page 64) Example: [VIDEO SETUP] Selected item VIDEO SETUP TV TYPE: PROGRESSIVE (COMPONENT - Sony DAV-HDX285 | Operating Instructions - Page 60
code from "Language Code List" (page 106) using the number buttons. Settings for the display [VIDEO SETUP] Select settings according to the TV to be connected. VIDEO SETUP Select this when you connect a 4:3 standard TV. The system automatically displays a wide picture on the entire screen and cuts - Sony DAV-HDX285 | Operating Instructions - Page 61
OUTPUT] is effective only when you set [TV TYPE] in [VIDEO SETUP] to [16:9]. x [COLOR SYSTEM (VIDEO CD)] (Asian, Australian, and Middle Eastern models only) You can select the color system when you play a VIDEO CD. [AUTO]: The system outputs the disc's video signal, either PAL or NTSC. If your TV - Sony DAV-HDX285 | Operating Instructions - Page 62
HDMI SETUP] HDMI SETUP BRAVIA" Sync" (page 70). [ON]: On. You can operate mutually between components that are connected with an HDMI cable. [OFF]: Off. x [VOLUME LIMIT] If you change the output method of the TV to the system speakers via the TV menu (or by pressing THEATER/THEATRE*), the System - Sony DAV-HDX285 | Operating Instructions - Page 63
] setting has higher priority than the [AUDIO] settings in [LANGUAGE SETUP] (page 59). (Depending on the disc, this function may not work.) • If PCM, DTS, Dolby Digital sound, and MPEG audio have the same number of channels, the system selects PCM, DTS, Dolby Digital sound, and MPEG audio in this - Sony DAV-HDX285 | Operating Instructions - Page 64
x [DivX] (Except for North American models) You can display the registration code for this system. For more information, go to http://www SETUP] settings to the default" (page 89). Settings for the speakers [SPEAKER SETUP] To obtain the best possible surround sound, set connection of the speakers - Sony DAV-HDX285 | Operating Instructions - Page 65
to 7.0 meters1) (0 to 23 ft). B [L/R] 3.0 m/10 ft2)3): Set the surround speaker distance (up to 5.0 meters (16 ft) closer to the front speakers). 1)0.0 to 6.9 meters for North American models. 2)When you perform the Quick Setup (page 33), the default settings are changed. 3)This item appears when - Sony DAV-HDX285 | Operating Instructions - Page 66
)]. [OFF]: The test tone is not emitted from the speakers. [ON]: The test tone is emitted from each speaker in sequence while adjusting the level. When you select one of the [SPEAKER SETUP] items, the test tone is emitted from each speaker in sequence. Adjust the sound level as follows. 1 Set - Sony DAV-HDX285 | Operating Instructions - Page 67
band and preset number FM FM 10 : 88.00 MHz SONY RADIO Station name system menu turns off. To change the preset number Select the desired preset number by pressing PRESET +/- (page 68), then perform the procedure from Step 3. To change the AM tuning interval (except for CIS and Middle Eastern models - Sony DAV-HDX285 | Operating Instructions - Page 68
press the button, the system tunes in one preset station. Tip • You can select the preset station number directly by pressing the number buttons. 3 Adjust the automatic tuning stops automatically when the system receives the radio station. To stop the automatic tuning manually, press TUNING +/- or x. - Sony DAV-HDX285 | Operating Instructions - Page 69
front panel display, and the station name is stored. 8 Press SYSTEM MENU. The system menu turns off. When the station name is not set 1 Frequency t 1 t .... x "TUNER FM" When the station name is set 1 Station name Ex. "SONY RADIO" 2 Frequency Ex. "FM1 87.50" 3 The "FM MODE" setting Ex. "STEREO" When - Sony DAV-HDX285 | Operating Instructions - Page 70
system's remote for operating the TV, such as THEATER/THEATRE*, ONE-TOUCH PLAY, TV [/1. For details, see "Controlling the TV with the Supplied Remote" (page 82) and refer to the operating instructions of the TV. * The button name differs depending on the area. ONE-TOUCH TV THEATER PLAY BRAVIA Sync - Sony DAV-HDX285 | Operating Instructions - Page 71
is output from the system's speakers automatically by pressing THEATER/THEATRE*. * The button remote or TV [/1 on the system's remote, the system turns off automatically. Note • Before using the System Power Off function, set the function for TV power. For details, refer to the operating instructions - Sony DAV-HDX285 | Operating Instructions - Page 72
(Volume Limit) If you change the output method of the TV to the system speakers via the TV menu (or by pressing THEATER/THEATRE*), loud sound may be output depending on the volume level of the system. You can prevent this by limiting the maximum level of the volume. For details, see "[VOLUME LIMIT - Sony DAV-HDX285 | Operating Instructions - Page 73
PORT adapter to/from the unit while the system is turned on. • When you use the system and the Bluetooth Wireless Audio Adapter (such as TDM-BT1, not component are played on the system or connected TV. For operation details, refer to the operating instructions of the DIGITAL MEDIA PORT adapter. - Sony DAV-HDX285 | Operating Instructions - Page 74
You can use up to three S-AIR main units. (The number of usable S-AIR main units depends on the use environment.) • S-AIR sub unit: This is for receiving sound. - Surround amplifier: You can enjoy surround speaker sound wirelessly. - S-AIR receiver: You can enjoy system sound in another room. Room - Sony DAV-HDX285 | Operating Instructions - Page 75
sub unit For details on installing the wireless transceiver into the S-AIR sub unit, such as a surround amplifier or S-AIR receiver, see the operating instructions of the S-AIR sub unit. Tip • When you change the S-AIR configuration, Sony recommends that you perform [AUTO CALIBRATION]. For details - Sony DAV-HDX285 | Operating Instructions - Page 76
. For details of the S-AIR receiver, refer to the operating instructions of the S-AIR receiver. 1 Press SYSTEM MENU. 2 Press X/x repeatedly until "S-AIR MODE" appears in the front panel display, then press or c. Note • When the wireless transmitter is not inserted in the unit, "S-AIR MODE" cannot be - Sony DAV-HDX285 | Operating Instructions - Page 77
Share the same operations on the remote and unit. Change the function of the system. For details, refer to the operating instructions of the S-AIR receiver. Enjoying the S-AIR receiver while the unit is in standby mode For the S-AIR receiver You can enjoy the S-AIR receiver while the unit is in - Sony DAV-HDX285 | Operating Instructions - Page 78
" (page 75). • To set the ID of the S-AIR sub unit, refer to the operating instructions of the S-AIR sub unit. 3 Press SYSTEM MENU. 4 Press X/x repeatedly until "PAIRING" appears in the front panel display, then press or c. Note • When the wireless transmitter is not inserted in the unit, "PAIRING - Sony DAV-HDX285 | Operating Instructions - Page 79
channel 1 - S-AIR ID B: equivalent channel for IEEE 802.11b/g channel 6 - S-AIR ID C: equivalent channel for IEEE 802.11b/g channel 11 • The transmission may be improved by changing the transmission channel (frequency) of the other wireless system(s). For details, refer to the operating instructions - Sony DAV-HDX285 | Operating Instructions - Page 80
sound, Sony recommends that first you decide the position of the speakers. 1 Press FUNCTION +/- repeatedly until "DVD" appears in the front panel display. 2 Press DISPLAY while the system is in stop mode. The Control Menu display appears on the TV screen. 3 Press X/x to select [SETUP], then - Sony DAV-HDX285 | Operating Instructions - Page 81
. • The environment of the room in which the system is installed may affect measurements. When the measurements differ considerably from the status of the speaker installation, perform the speaker settings manually by following "Settings for the speakers" (page 64). 10 Press C/c to select [YES] or - Sony DAV-HDX285 | Operating Instructions - Page 82
the [SUBWOOFER] level in [SPEAKER SETUP] returns to the default setting when you perform [AUTO CALIBRATION]. Controlling the TV with the Supplied Remote You can control the TV (Sony only) by using the following buttons. Use these buttons (other than TV [/1, THEATER/THEATRE*, TV INPUT, and TV VOL - Sony DAV-HDX285 | Operating Instructions - Page 83
volume You can enjoy sound effects or dialogue, as you would in a movie theater, even at low volume. It is useful for watching movies at night. Press hear. When sound is not output from the center speaker, or you are using the headphones, the system optimally adjusts the volume. To turn off the - Sony DAV-HDX285 | Operating Instructions - Page 84
sound for movies. The MOVIE indicator lights up. • "MUSIC": The system provides the sound for music. The MUSIC indicator lights up. Note • When you play a Super Audio CD, this function does not work. • You cannot operate these setup items when you connect headphones to the unit or surround amplifier - Sony DAV-HDX285 | Operating Instructions - Page 85
time) changes by 10 minutes. Tip • You can select the remaining time by pressing the number buttons. In this case, you can preset the time in 1-minute increments. 4 Press . The setting is made and "SLEEP" flashes in the front panel display. 5 Press SYSTEM MENU. The system menu turns off. 85GB - Sony DAV-HDX285 | Operating Instructions - Page 86
)/DATA DVD (MP3 file) 1 Playing time and current track number 2 Track (file) name* * If an MP3 file has an ID3 tag, the system will display an album name or title name from the ID3 tag information. The system can support ID3 ver 1.0/1.1/2.2/2.3. ID3 ver 2.2/2.3 tag information display has priority - Sony DAV-HDX285 | Operating Instructions - Page 87
Other Operations x DATA CD (video file)/DATA DVD (video file) (Except for North American models) 1 Playing time of the current file 2 Current file name 3 Current album and file number Note • The system can only display the first level of the DVD/CD text, such as the disc name or title. • If a file - Sony DAV-HDX285 | Operating Instructions - Page 88
)/video file1) name 1)Except for North American models. 2)Appears when playing an MP3 file on a DATA CD/ DATA DVD. 3)If an MP3 file has the ID3 tag, the system will display an album name or title name from the ID3 tag information. The system can support ID3 ver 1.0/1.1/2.2/2.3. ID3 ver 2.2/2.3 tag - Sony DAV-HDX285 | Operating Instructions - Page 89
the unit at the same time. "COLD RESET" appears in the front panel display and the system returns to default settings. 5 Press X/x to select [SYSTEM SETUP], then press . The options for [SYSTEM SETUP] appear. 6 Press X/x to select [RESET] and press c. 7 Press C/c to select [YES]. You can also quit - Sony DAV-HDX285 | Operating Instructions - Page 90
• Do not install the system near heat sources such as radiators, or air ducts, or in a or no audio signals. If you do, the speakers may be damaged when a peak level section is suddenly have any questions or problems concerning your system, please consult your nearest Sony dealer. On cleaning discs - Sony DAV-HDX285 | Operating Instructions - Page 91
Do not expose the disc to direct sunlight or heat sources such as hot air ducts, or leave it in a car parked in direct sunlight as the temperature available cleaners, or anti-static spray intended for vinyl LPs. This system can only play back a standard circular disc. Using neither standard nor - Sony DAV-HDX285 | Operating Instructions - Page 92
while using the system, use this troubleshooting guide to help remedy the problem before requesting repairs. Should any problem persist, consult your nearest Sony dealer. Note that if service personnel changes some parts during repair, these parts may be retained. When you install the S-AIR sub unit - Sony DAV-HDX285 | Operating Instructions - Page 93
of video signal output from the HDMI OUT jack. It may solve the problem (page 35). Connect the TV and the unit using a video jack other of [VIDEO SETUP], the picture does not fill the TV screen. Color irregularity occurs on the TV screen. The system's speakers contain magnet parts, so magnetic - Sony DAV-HDX285 | Operating Instructions - Page 94
Sound Symptom Remedy There is no sound. • The speaker cord is not connected securely. • Press MUTING on the remote if "MUTING ON" is displayed in the front panel display. • The system is in pause mode or in Slow-motion Play mode. Press H to return to normal play mode. • Fast forward or fast - Sony DAV-HDX285 | Operating Instructions - Page 95
batteries in the remote are weak. The disc does not play. • There is no disc inserted. • The disc is upside down. Insert the disc with the playback side facing down. • The disc is skewed on the disc tray. • The system cannot play CD-ROMs, etc. (page 7). • The region code on the DVD does - Sony DAV-HDX285 | Operating Instructions - Page 96
• The system can only display numbers and letters of instructions supplied with the disc. Messages do not appear on the TV screen in the language you want. • In the Setup Contact your Sony dealer or local authorized Sony service facility. for North American models. The system does not work normally - Sony DAV-HDX285 | Operating Instructions - Page 97
instructions supplied SETUP] to [ON] (page 62). system and TV while using the • Make sure that the connected TV is compatible with the System Audio Control System Audio Control function. function. • For details, see "Using the Control for HDMI Function for "BRAVIA" Sync" (page 70). The S-AIR - Sony DAV-HDX285 | Operating Instructions - Page 98
together. • Avoid use of equipment that generates electromagnetic energy, such as a microwave oven. • Place so that the S-AIR main unit and S-AIR sub unit are separated from other wireless devices. • Avoid using any other wireless devices. • Change the "RF CHANGE" setting (page 78). • Change the - Sony DAV-HDX285 | Operating Instructions - Page 99
this is not a malfunction and for Sony service use only, normal system operation will not be possible. Turn off the system, and then turn on the system again to operate. VER.X.XX First 3 characters of the service number C 13 C 31 E XX (XX is a number) Cause and/or corrective action The disc - Sony DAV-HDX285 | Operating Instructions - Page 100
North American models: NTSC Other models: PAL/NTSC Tuner Section System PLL quartz-locked digital synthesizer FM tuner section Tuning range North American models: 87.5 MHz - 108.0 MHz (100 kHz step) Other models: 87.5 MHz - 108.0 MHz (50 kHz step) Antenna (aerial) FM wire antenna - Sony DAV-HDX285 | Operating Instructions - Page 101
kg (1 lb 9 oz) Surround DAV-HDX285/DAV-HDX585 (SS-TS92) Speaker system Full range Bass reflex Speaker unit 65 mm (2 5/8 in) in) (w/h/d) incl. projecting parts Mass (approx.) 5.2 kg (11 lb 8 oz) Supported file format MP3 (MPEG (Except for North American models) File format: MP4 File - Sony DAV-HDX285 | Operating Instructions - Page 102
Auto Calibration was developed by Sony to automatically measure and adjust the speaker settings to your listening theater sound format is more advanced than Dolby Surround Pro Logic. In this format, the surround speakers output stereo sound with an expanded frequency range, and a subwoofer channel - Sony DAV-HDX285 | Operating Instructions - Page 103
channel sound. Compared with the former Dolby Surround system, Dolby Surround Pro Logic reproduces left-to-right panning more naturally and localizes sounds more precisely. To take full advantage of Dolby Surround Pro Logic, you should have one pair of surround speakers and a center speaker AIR (Sony - Sony DAV-HDX285 | Operating Instructions - Page 104
CD layer consists of the 2 channel area or the multi-channel area. • 2 channel area: An area in which 2 channel stereo tracks are recorded • Multi-channel area: An area in which multichannel (up to 5.1 channels) tracks are recorded 2 channel area4) Multi-channel area4) Super Audio CD layer 1)You - Sony DAV-HDX285 | Operating Instructions - Page 105
image files with slide show [MUSIC] Video files* JPEG image files MP3 files Video files* MP3 files MP3 files MP3 files * Except for North American models. Additional Information 105GB - Sony DAV-HDX285 | Operating Instructions - Page 106
Greek 1144 English 1145 Esperanto 1149 Spanish 1150 Estonian 1151 Basque 1157 Persian 1165 Finnish 1166 Fiji 1171 Faroese 1174 French 1181 Frisian Code Language 1183 Irish 1186 Scots Gaelic 1194 Galician 1196 Guarani 1203 Gujarati 1209 Hausa 1217 Hindi 1226 Croatian 1229 Hungarian 1233 Armenian - Sony DAV-HDX285 | Operating Instructions - Page 107
Index to Parts and Control For more information, refer to the pages indicated in parentheses. Front panel A "/1 (on/standby) (33, 89) B DISC 1-5 buttons/indicators (40) C Front panel display (109) D (remote sensor) (13) E MOVIE/MUSIC indicator (84) F VOLUME control (40) G DMPORT BOOSTER (83) H - Sony DAV-HDX285 | Operating Instructions - Page 108
SUR L DMPORT DC5V 0.7A MAX EZW-T100 ANTENNA FM AM COAXIAL 75 COMPONENT VIDEO OUT VIDEO OUT TV/VIDEO Y PB/CB PR/CR R AUDIO IN L A SPEAKER jacks (25) B EZW-T100 slot (74) C COAXIAL 75Ω FM jack (31) D AM terminal (31) E TV/VIDEO (AUDIO IN R/L) jacks (28) F VIDEO OUT jack (26) G COMPONENT - Sony DAV-HDX285 | Operating Instructions - Page 109
, or track number, time information, radio frequency, playing status, decoding mode, etc. D Lights up when a station is received. (Radio only) (67) E Stereo/Monaural effect (Radio only) (68) F Lights up when the S-AIR transmitter (not supplied) is inserted in the unit and the system transmits the - Sony DAV-HDX285 | Operating Instructions - Page 110
PROG +/-1) wj (82) S-AIR MODE 4 SLEEP qj (85) SOUND MODE 5 (84) SUBTITLE ws (42) SYSTEM MENU wf (32, 37, 67, 74, 85) THEATER/THEATRE2) qk (70) TOOLS (82) 1)Except for North American models. 2)The button name differs depending on the area. 3)North American models only. 4)This button is available - Sony DAV-HDX285 | Operating Instructions - Page 111
Additional Information Guide to the Control Menu Display You can use the Control Menu display to select a function and to view related information. DISPLAY Press DISPLAY repeatedly. Each - Sony DAV-HDX285 | Operating Instructions - Page 112
Currently playing title number Currently playing chapter number Total number of titles Control Menu items Total number of chapters Playback the remaining playback time. You can play from a desired point by inputting the time code (DVD VIDEO/DVD-VR only). [MULTI/2CH] (page 44) You can select - Sony DAV-HDX285 | Operating Instructions - Page 113
the Auto Calibration. [CUSTOM] In addition to the Quick Setup setting, you can adjust various other settings. [FOLDER] for changing slides during a slide show. : North American models : Other models [MEDIA] (page 53) You can select the data type channel playback area on a Super Audio CD. 113GB - Sony DAV-HDX285 | Operating Instructions - Page 114
Rear panel 108 Region Code 9 Remote 13 Repeat Play 47 RESET 64, 89 Resume Play 45 RF CHANGE 79 RF POWER 79 S S-AIR 103 S-AIR ID 75 S-AIR MODE 76 S-AIR receiver 74 S-AIR STBY 77 SCREEN SAVER 64 SETUP 59, 89 Shuffle Play 47 SLEEP 85 Slide Show 52 SPEAKER FORMATION 63, 80 SPEAKER SETUP 64 CONNECTION 64 - Sony DAV-HDX285 | Operating Instructions - Page 115
T TEST TONE 66 TIME 49 TRACK SELECTION 63 TV TYPE 60 V VIDEO SETUP 60 VOLUME LIMIT 62 115GB - Sony DAV-HDX285 | Operating Instructions - Page 116
(1) Sony Corporation Printed in China
-
 1
1 -
 2
2 -
 3
3 -
 4
4 -
 5
5 -
 6
6 -
 7
7 -
8
-
9
-
10
-
11
-
12
-
13
-
14
-
15
-
16
-
17
-
18
-
19
-
20
-
21
-
22
-
23
-
24
-
25
-
26
-
27
-
28
-
29
-
30
-
31
-
32
-
33
-
34
-
35
-
36
-
37
-
38
-
39
-
40
-
41
-
42
-
43
-
44
-
45
-
46
-
47
-
48
-
49
-
50
-
51
-
52
-
53
-
54
-
55
-
56
-
57
-
58
-
59
-
60
-
61
-
62
-
63
-
64
-
65
-
66
-
67
-
68
-
69
-
70
-
71
-
72
-
73
-
74
-
75
-
76
-
77
-
78
-
79
-
80
-
81
-
82
-
83
-
84
-
85
-
86
-
87
-
88
-
89
-
90
-
91
-
92
-
93
-
94
-
95
-
96
-
97
-
98
-
99
-
100
-
101
-
102
-
103
-
104
-
105
-
106
-
107
-
108
-
109
-
110
-
111
-
112
-
113
-
114
-
115
-
116
 |
 |

©2009 Sony Corporation
4-122-238-
12
(1)
DVD Home Theatre
System
Operating Instructions
DAV-HDX285 / HDX585 / HDX685