Sony DCR-DVD403 Operating Guide - Page 76
Converting all the still images, on a disc to a movie file, Photomovie, Dividing a movie within
 |
UPC - 027242670075
View all Sony DCR-DVD403 manuals
Add to My Manuals
Save this manual to your list of manuals |
Page 76 highlights
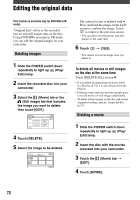
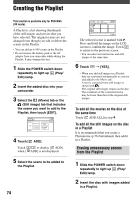
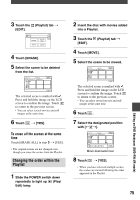
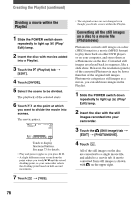
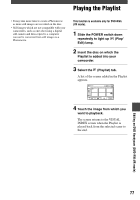
Creating the Playlist (continued) Dividing a movie within the Playlist 1 Slide the POWER switch down repeatedly to light up (Play/ Edit) lamp. 2 Insert the disc with movies added into a Playlist. 3 Touch the [EDIT]. (Playlist) tab 4 Touch [DIVIDE]. 5 Select the scene to be divided. The playback of the selected starts. 6 Touch at the point at which you want to divide the movie into scenes. The movie pauses. Touch to display functional buttons. See page 73 for details. • Play and pause toggles as you press . • A slight difference may occur from the point where you touch and the actual dividing point, as your camcorder selects the dividing point based on half-second increments. 7 Touch [YES]. • The original scenes are not changed even though you divide scenes within the Playlist. Converting all the still images on a disc to a movie file (Photomovie) Photomovie converts still images on a disc (JPEG format) to a movie (MPEG format) to play them back on other DVD players or on your computer, and stores them as a Photomovie on the disc. Converted still images are played back in sequence, like a slide show. However, the resolution (pixels) of the converted Photomovie may be lower than that of the original still images. Photomovie categorizes still images as a movie, you can add more images in the Playlist. 1 Slide the POWER switch down repeatedly to light up (Play/ Edit) lamp. 2 Insert the disc with the still images recorded into your camcorder. 3 Touch the (Still image) tab [EDIT] [PHOTOMOVIE]. 4 Touch . All of the still images on the disc are converted to a single movie file, and added to a movie tab. A movie converted from still images is shown with on the upper right. 76
-
 1
1 -
2
-
3
-
4
-
5
-
6
-
7
-
8
-
9
-
10
-
11
-
12
-
13
-
14
-
15
-
16
-
17
-
18
-
19
-
20
-
21
-
22
-
23
-
24
-
25
-
26
-
27
-
28
-
29
-
30
-
31
-
32
-
33
-
34
-
35
-
36
-
37
-
38
-
39
-
40
-
41
-
42
-
43
-
44
-
45
-
46
-
47
-
48
-
49
-
50
-
51
-
52
-
53
-
54
-
55
-
56
-
57
-
58
-
59
-
60
-
61
-
62
-
63
-
64
-
65
-
66
-
67
-
68
-
69
-
70
-
 71
71 -
 72
72 -
 73
73 -
 74
74 -
 75
75 -
 76
76 -
 77
77 -
 78
78 -
 79
79 -
 80
80 -
 81
81 -
82
-
83
-
84
-
85
-
86
-
87
-
88
-
89
-
90
-
91
-
92
-
93
-
94
-
95
-
96
-
97
-
98
-
99
-
100
-
101
-
102
-
103
-
104
-
105
-
106
-
107
-
108
-
109
-
110
-
111
-
112
-
113
-
114
-
115
-
116
-
117
-
118
-
119
-
120
 |
 |