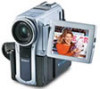
Sony DCR-PC7 Operating Instructions (English and Spanish)
Sony DCR-PC7 - Digital Video Cassette Camcorder Manual
 |
View all Sony DCR-PC7 manuals
Add to My Manuals
Save this manual to your list of manuals |
Sony DCR-PC7 manual content summary:
- Sony DCR-PC7 | Operating Instructions (English and Spanish) - Page 1
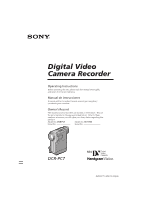
-22 (1) Digital Video Camera Recorder Operating Instructions Before operating the unit, please read this manual thoroughly, and retain it for future reference. Manual de instrucciones Antes de utilizar la unidad, lea este manual por completo y consérvelo para consultar. Owner's Record The model - Sony DCR-PC7 | Operating Instructions (English and Spanish) - Page 2
the SONY Factory Service Center nearest you call 416-499-SONY (Canada only). Caution: Do not handle damaged or leaking lithium ion batteries. For the Customers in the U.S.A. WARNING This equipment has been tested and found to comply with the limits for a Class B digital device, pursuant to Part 15 - Sony DCR-PC7 | Operating Instructions (English and Spanish) - Page 3
you begin / Antes de empezar Table of contents Before you begin Using this manual 4 Checking supplied accessories 6 Getting started Charging and installing the battery pack 7 Inserting a cassette 11 Basic operations Camera recording 12 Using the zoom feature 15 Shooting with the LCD screen 16 Hints - Sony DCR-PC7 | Operating Instructions (English and Spanish) - Page 4
. Handycam Vision está equipada con funciones avanzadas y se caracteriza por su fácil uso. Ya puede realizar videos caseros y disfrutar de ellos en años futuros. As you read through this manual, buttons and settings on the camcorder are shown in capital letters. e.g., Set the POWER switch to CAMERA - Sony DCR-PC7 | Operating Instructions (English and Spanish) - Page 5
cannot be compensated if recording or playback is not made due to a malfunction of the camcorder, video tape, etc. El contenido de la grabación no puede corregirse si no es posible grabar o reproducir debido al mal funcionamiento de la videocámara, la cinta de vídeo, etc. 5 DCR-PC7.3-858-174-22 - Sony DCR-PC7 | Operating Instructions (English and Spanish) - Page 6
camcorder. siguientes accesorios. 1 2 3 4 5 6 7 8 1 Wireless Remote Commander (1) (p. 85) 2 NP-F100 battery pack (1) (p. 7) 3 AC-V100 AC power adaptor (1) (p. 7, 25) 4 Size AA (R6) battery for Remote Commander (2) (p. 86) 5 S video connecting cable (1) (p. 46, 52) 6 A/V connecting cable - Sony DCR-PC7 | Operating Instructions (English and Spanish) - Page 7
use the supplied AC power adaptor. This camcorder operates with the NP-F100/NPF200 "InfoLITHIUM" battery pack. "InfoLITHIUM" is a trademark of Sony Corporation. Charging the battery pack (1) Connect the power cord to the AC power adaptor. (2) Fit the hooks of the battery pack to the AC power adaptor - Sony DCR-PC7 | Operating Instructions (English and Spanish) - Page 8
battery pack fully using the supplied AC power adaptor. (Full charge) (Lower temperatures require a longer charging time.) Battery life While using with viewfinder Battery pack Continuous recording time ser incorrecta según las condiciones y circunstancias de uso. DCR-PC7.3-858-174-22 (E,S) - Sony DCR-PC7 | Operating Instructions (English and Spanish) - Page 9
power cord. After about one minute, reconnect the power cord again. •You cannot charge the battery pack while operating the camcorder using the AC power adaptor. •When a fully charged battery no se ilumina, desconecte el cable de alimentación. Vuelva a conectarlo despu DCR-PC7.3-858-174-22 (E,S) - Sony DCR-PC7 | Operating Instructions (English and Spanish) - Page 10
pack is installed. Otherwise, it may drop out when you use the camcorder. To prevent malfunction In the following cases, make sure that the POWER switch is set to OFF first. •Installing and removing the battery pack. •Inserting and ejecting a cassette. Para extraer el paquete de baterías Siga el - Sony DCR-PC7 | Operating Instructions (English and Spanish) - Page 11
Getting started / Puesta en marcha Inserting a cassette Inserción de videocassettes You can use mini DV cassette with logo* only. Make sure that the power source is installed. (1) Place the grip strap away from the lid of the cassette compartment to avoid damaging the lid. (2) Open the lid - Sony DCR-PC7 | Operating Instructions (English and Spanish) - Page 12
OFF CAMERA PHOTO 20min To stop recording momentarily [a] Press START/STOP. The "STBY" indicator appears in the viewfinder (Standby mode). 12 Para detener momentáneamente la grabación [a] Pulse START/STOP. El indicador "STBY" aparecerá en el visor electrónico (modo de espera). DCR-PC7.3-858 - Sony DCR-PC7 | Operating Instructions (English and Spanish) - Page 13
Basic operations / Operaciones básicas To finish recording [b] Press START/STOP again to stop recording. Set the POWER switch to OFF. Then, eject the cassette and remove the battery pack. [a] POWER VTR OFF CAMERA PHOTO STBY 0:35:20 25min 20min Para finalizar la grabación [b] Vuelva a pulsar - Sony DCR-PC7 | Operating Instructions (English and Spanish) - Page 14
camcorder, or vice versa, mosaicpattern noise may appear. •When you record in SP and LP modes on one tape or you record some scenes in LP mode, the playback picture may be distorted or the time code may not be written properly between scenes. •We recommend to use a Sony . DCR-PC7.3-858-174-22 (E,S) - Sony DCR-PC7 | Operating Instructions (English and Spanish) - Page 15
Press the power zoom switch a little for a relatively slow zoom; press it still more for a high-speed zoom. Zooming speed while the camcorder is in the Standby mode is faster than that in the recording mode making ón de telefoto, o a 1 cm en posición de gran angular. 15 DCR-PC7.3-858-174-22 (E,S) - Sony DCR-PC7 | Operating Instructions (English and Spanish) - Page 16
OFF, la parte que se encuentra sobre la barra desaparece. • Si utiliza la función de zoom digital, la potencia del zoom será de un máximo de 120x. T W Shooting with the LCD screen You can also record the picture while looking at the LCD screen. When using the LCD screen, the viewfinder screen turns - Sony DCR-PC7 | Operating Instructions (English and Spanish) - Page 17
it vertically until it clicks [a]. •When turning the LCD panel, turn it always vertically; otherwise, the camcorder body may be damaged or the LCD panel may not close properly [b]. •Close the LCD panel completely reflejos al utilizar la videocámara en exteriores. [b] 17 DCR-PC7.3-858-174-22 (E,S) - Sony DCR-PC7 | Operating Instructions (English and Spanish) - Page 18
Camera recording Grabación con la cámara Selecting the start/stop mode : When you press START/STOP, the camcorder starts recording. When you press the button again, the camcorder stops recording. (factory setting) : As long as you keep pressing START/STOP, the camcorder records. When you release - Sony DCR-PC7 | Operating Instructions (English and Spanish) - Page 19
eyecup. •Be sure not to touch the built-in microphone. •Be sure not to touch the FOCUS button by accident. •Use the LCD panel frame or the viewfinder frame as a guide to determine the horizontal plane. •You can record in a low position to get an interesting recording 19 DCR-PC7.3-858-174-22 (E,S) - Sony DCR-PC7 | Operating Instructions (English and Spanish) - Page 20
for a still camera, you can also use it with the camcorder. When attaching a non-Sony tripod, make sure that the length of the tripod screw is less than 9/32 inches (6.5 mm). Otherwise, the screw may damage the inner parts of the camcorder. If you wear glasses You can bend back the eyecup to get - Sony DCR-PC7 | Operating Instructions (English and Spanish) - Page 21
picture on the LCD screen or in the viewfinder. (1) Insert the recorded tape with the window facing out. (2) Open the LCD panel. (3) While pressing the small green button on the POWER size AA (R6) batteries . To display the LCD screen/viewfinder screen indicators Press DCR-PC7.3-858-174-22 (E,S) - Sony DCR-PC7 | Operating Instructions (English and Spanish) - Page 22
VIDEO OUT/2 jack (p. 83). You can adjust the volume of the headphones using VOLUME +/-. To view the playback picture in the viewfinder Close the LCD panel. The viewfinder turns on automatically. When using the viewfinder Para reanudar la reproducción normal, pulse ·. 22 DCR-PC7.3-858-174-22 (E,S) - Sony DCR-PC7 | Operating Instructions (English and Spanish) - Page 23
pause mode. If you keep pressing the button, you can view the picture at 1/30 speed. To resume normal playback, press ·. To change the recording may appear in mosaic image. This is not malfunction. •When playback pause mode lasts for 5 minutes, the camcorder DV IN/ OUT. 23 DCR-PC7.3-858-174-22 (E,S) - Sony DCR-PC7 | Operating Instructions (English and Spanish) - Page 24
ón. Esta función se activa cuando el interruptor POWER está ajustado en CAMERA i VTR o PHOTO. ENDSEARCH Note on End Search The End Search function does not work once you have ejected the cassette after you recorded in the tape or if you do not record after you have inserted a tape. Nota sobre - Sony DCR-PC7 | Operating Instructions (English and Spanish) - Page 25
to use your camcorder. Place Power Accessory to be used source Indoors House Supplied AC power adaptor current Outdoors Battery Battery pack NP-F100 pack (supplied), NP-F200 In the car 12 V or Sony car battery charger DC24 V car V515 battery Note on power sources Disconnecting the power source or - Sony DCR-PC7 | Operating Instructions (English and Spanish) - Page 26
battery packs at the same time Install one battery pack in the camcorder and another one on the AC power adaptor. The CHARGE lamps on the camcorder and on the AC power , desconecte el cable de alimentación. Vuelva a conectarlo después de aproximadamente un minuto. 26 DCR-PC7.3-858-174-22 (E,S) - Sony DCR-PC7 | Operating Instructions (English and Spanish) - Page 27
Connect the car battery charger and the camcorder using the supplied DK-626 connecting cord. Note on the battery pack You cannot charge the battery pack (NP-F100, NP-F200) using the car battery charger DC-V515. This mark indicates that this product is a genuine accessory for Sony video product. When - Sony DCR-PC7 | Operating Instructions (English and Spanish) - Page 28
modo You can change the mode settings in the menu system to further enjoy the features and functions of the camcorder. (1) Press MENU to display the menu on the LCD screen. (2) Press v or V to select the OFF MENU D ZOOM ON OFF MENU PGM AE WHT BAL D ZOOM OFF 28 DCR-PC7.3-858-174-22 (E,S) - Sony DCR-PC7 | Operating Instructions (English and Spanish) - Page 29
POWER switch to VTR or CAMERA/ PHOTO. Selecting the mode setting of each item Items for both CAMERA/PHOTO and VTR modes COMMANDER •Select VTR4 when using the supplied Remote Commander for the camcorder the next page Continúa en la página siguiente 29 DCR-PC7.3-858-174-22 (E,S) - Sony DCR-PC7 | Operating Instructions (English and Spanish) - Page 30
zooming. More than 10x zoom is performed digitally. S SHOT •Normally select ON. •Select OFF when you do not have to worry about camera-shake. REC LAMP •Normally select ON. •Select OFF when you do not want the camera recording/battery lamp at the front of the unit to light up - Sony DCR-PC7 | Operating Instructions (English and Spanish) - Page 31
an asterisk are concerned, their settings return to the default 5 minutes or more after the battery is removed. When recording a close subject When REC LAMP is set to ON, the red camera recording lamp on the front of the camcorder may reflect on the subject if it is close. In this case, we recommend - Sony DCR-PC7 | Operating Instructions (English and Spanish) - Page 32
the camcorder body. Notes on mirror mode •Using the mirror mode, you can record yourself while watching yourself on the LCD screen. •The picture on the LCD screen appears as a mirror-image while recording in las funciones MENU, ZERO, SET MEMORY del mando a distancia. 32 DCR-PC7.3-858-174-22 (E,S) - Sony DCR-PC7 | Operating Instructions (English and Spanish) - Page 33
edited to make an interesting video. With 5SEC. REC (5-second recording) mode, the camcorder records for only 5 seconds and POWER VTR OFF CAMERA PHOTO REC 0:00:00 REC 0:00:04 To extend the recording time Press START/STOP again before all the dots disappear. Recording DCR-PC7.3-858-174-22 (E,S) - Sony DCR-PC7 | Operating Instructions (English and Spanish) - Page 34
recording a professional appearance. When fading in, the picture gradually fades in from black while the sound increases. When fading out, the picture gradually fades to black while the sound decreases. When fading in [a] (1) While the camcorder 2 POWER VTR OFF CAMERA PHOTO DCR-PC7.3-858-174-22 (E,S) - Sony DCR-PC7 | Operating Instructions (English and Spanish) - Page 35
indoors and there is a window behind the subject. •Bright light sources are included in the scene. •When shooting a person wearing white or shiny clothes in front of a while background, the face will be recorded too dark. Shooting in the dark We recommend you to use a video light (not supplied). To - Sony DCR-PC7 | Operating Instructions (English and Spanish) - Page 36
still picture appears on the LCD screen or in the viewfinder, the camcorder will record that still picture. However, you cannot select other still pictures by using ón del interruptor POWER o pulsar START/ STOP durante la grabación. 1,2,3 POWER VTR OFF CAMERA PHOTO 36 DCR-PC7.3-858-174-22 (E,S) - Sony DCR-PC7 | Operating Instructions (English and Spanish) - Page 37
camcorder is played back on another VCR, the picture may be blurred. This is not malfunction. Printing the still picture You can print a still picture by using the video printer (not supplied). Connect the video printer using the supplied S video connecting cable. Refer to the instruction manual - Sony DCR-PC7 | Operating Instructions (English and Spanish) - Page 38
indicator appears on the LCD screen or in the viewfinder. This indicates that the SteadyShot function is working and the camcorder compensates for camera-shake. You can release the SteadyShot function when BAL D ZOOM S SHOT OFF COMMANDER REC MODE BEEP [MENU]:END 38 DCR-PC7.3-858-174-22 (E,S) - Sony DCR-PC7 | Operating Instructions (English and Spanish) - Page 39
EXECUTE. Notes on the SteadyShot function •The SteadyShot function will not correct excessive camera-shake. •When the SteadyShot function is released, the indicator does not appear. Para SteadyShot, el indicador no aparece. Advanced operations / Operaciones avanzadas 39 DCR-PC7.3-858-174-22 (E,S) - Sony DCR-PC7 | Operating Instructions (English and Spanish) - Page 40
viewfinder. Hay tres modos PROGRAM AE (exposición automática) entre los que puede seleccionarse el que se adapte mejor Recording a landscape through a window or wire net Notes on focus setting •In the Sports lesson mode, you cannot take close-ups because the camcorder 40 DCR-PC7.3-858-174-22 (E,S) - Sony DCR-PC7 | Operating Instructions (English and Spanish) - Page 41
Advanced operations / Operaciones avanzadas Using the PROGRAM AE function (1) While the camcorder is in recording or Standby mode press MENU to display the menu. (2) Press v or V to select PGM AE, , se define de forma automática al utilizar la función PROGRAM AE. 41 DCR-PC7.3-858-174-22 (E,S) - Sony DCR-PC7 | Operating Instructions (English and Spanish) - Page 42
obtain better results by adjusting the focus manually. [a] [b] Uso del enfoque manual Deben obtenerse mejores resultados mediante el ajuste manual del enfoque en los siguientes casos: que reflejen luz •Videofilmación de objetos estacionarios al utilizar un trípode 42 DCR-PC7.3-858-174-22 (E,S) - Sony DCR-PC7 | Operating Instructions (English and Spanish) - Page 43
Focusing manually When focusing manually, first focus in telephoto before recording, and then reset the shot length. (1) Press FOCUS lightly. The f indicator appears on the LCD secreen or in the viewfinder. (2) de telefoto. Si se ilumina El sujeto está demasiado cerca. 43 DCR-PC7.3-858-174-22 (E,S) - Sony DCR-PC7 | Operating Instructions (English and Spanish) - Page 44
camera recording. Normally white balance is automatically adjusted. You can obtain better results by adjusting the white balance manually when lighting conditions change quickly or when recording artificiales [c] Modo HOLD Grabación de sujetos o fondos monocromáticos 44 DCR-PC7.3-858-174-22 (E,S) - Sony DCR-PC7 | Operating Instructions (English and Spanish) - Page 45
/ Operaciones avanzadas Setting the White Balance (1) Press MENU to display the menu on the LCD screen during recording or Standby mode. (2) Press v or V to select WHT BAL, then press EXECUTE. (3) Press blancos automático Seleccione AUTO en el paso 3 y pulse EXECUTE. 45 DCR-PC7.3-858-174-22 (E,S) - Sony DCR-PC7 | Operating Instructions (English and Spanish) - Page 46
the LCD screen or in the viewfinder. Turn down the volume of the camcorder. To get higher quality pictures in DV format, connect the camcorder to your TV using the S video connecting cable. If you are going to connect the camcorder using the supplied S video connecting cable [a], you do not need to - Sony DCR-PC7 | Operating Instructions (English and Spanish) - Page 47
para vídeo del cable de conexión A/V de la videograbadora o televisor. Conecte sólo el enchufe blanco o rojo para audio la videograbadora o el televisor. Si conecta el enchufe blanco, el sonido es la señal L (izquierda). Si conecta el rojo, el sonido es la señal R (derecha). 47 DCR-PC7.3-858-174-22 - Sony DCR-PC7 | Operating Instructions (English and Spanish) - Page 48
of the tape is being played back. •The tape was recorded by a camcorder without having date and time set. •The tape is unreadable due parte de la cinta que está en blanco. • La cinta se grabó con una videocámara sin ajustar la fecha y hora. • La cinta no es legible debido a daños o ruido. DCR-PC7 - Sony DCR-PC7 | Operating Instructions (English and Spanish) - Page 49
00" and "ZERO SET MEMORY" appears on the LCD screen or in the viewfinder. (2) Press p when you want to stop playback. (3) Press 0 to when there is a blank portion between pictures on a tape. •Zero set memory functions in recording standby mode. Nota sobre el contador de DCR-PC7.3-858-174-22 (E,S) - Sony DCR-PC7 | Operating Instructions (English and Spanish) - Page 50
MODE 1 POWER VTR OFF CAMERA PHOTO 3 To stop searching Press p STOP. When you use a recorded tape which has blank portions between pictures The camcorder may not search for the recorded picture or data fotográfica, introduce una pausa en ese momento de la reproducción. DCR-PC7.3-858-174-22 (E,S) - Sony DCR-PC7 | Operating Instructions (English and Spanish) - Page 51
editing with any other DV, mini DV, h 8 mm, H Hi8, j VHS, k S-VHS, VHSC, K S-VHSC, l Betamax or ¬ ED Beta VCR that has audio/video inputs. You can edit with little deterioration of picture and sound quality when using the DV connecting cable. Before editing Connect the camcorder to the VCR using - Sony DCR-PC7 | Operating Instructions (English and Spanish) - Page 52
VIDEO OUT AUDIO VIDEO OUT/2 Starting editing (1) Insert a blank tape (or a tape you want to record over) into the VCR, and insert your recorded tape into the camcorder. (2) Play back the recorded tape on the camcorder STOP p en la videocámara y en la videograbadora. 52 DCR-PC7.3-858-174-22 (E,S) - Sony DCR-PC7 | Operating Instructions (English and Spanish) - Page 53
may be uneven, however, these on the LCD screen, in the viewfinder or recorded pictures are not affected. •If you record playback pause picture via the DV jack, the recorded picture becomes rough. Notes on editing when using the A/V connecting cable •Press DATA CODE button to turn off the display - Sony DCR-PC7 | Operating Instructions (English and Spanish) - Page 54
DV connecting cable" on page 51. In recording and recording pause mode, DV IN/OUT jack automatically works as input jack. (1) While pressing the small green button on the POWER a new scene (picture and sound) on a tape recorded by other camcorder (including DCR-PC7), the picture and sound quality may - Sony DCR-PC7 | Operating Instructions (English and Spanish) - Page 55
VMC-LM7 (no suministrado) LINE OUT RK-G128 connecting cable (not supplied) Cable de conexión RK-G128 (no suministrado) : Signal camcorder. • A new sound cannot be recorded on a tape already recorded in the LP mode. •If you add a new sound on a tape recorded by other camcorder (including DCR-PC7 - Sony DCR-PC7 | Operating Instructions (English and Spanish) - Page 56
Adding an audio sound on a recorded tape (1) Insert your recorded tape into the camcorder. (2) While pressing the small green button on the POWER switch, set it to VTR. (3) On the camcorder, press · to set it 2) mediante la selección de AUDIO MIX en el sistema de menús. 56 DCR-PC7.3-858-174-22 (E,S) - Sony DCR-PC7 | Operating Instructions (English and Spanish) - Page 57
operation. To retain the date and time, etc., charge the battery if the battery is discharged. The following are charging methods: •Connect the camcorder to mains using the supplied AC power adaptor, and leave the camcorder with the POWER switch turned off for more than 24 hours. •Or, install - Sony DCR-PC7 | Operating Instructions (English and Spanish) - Page 58
battery installed in the camcorder will have been discharged. In this case, first charge the vanadium-lithium battery, then reset the date and time. (1) While pressing the small green button on the POWER switch, set it to CAMERA 00 AM EXECUTE 1997 JUL 4 5 00 PM EXECUTE 58 DCR-PC7.3-858-174-22 (E,S) - Sony DCR-PC7 | Operating Instructions (English and Spanish) - Page 59
changes as follows: 1996 1997 ... 2000 ... 2029 Note on the time indicator The internal clock of this camcorder operates on a 12-hour cycle. •12:00 AM stands for midnight. •12:00 PM stands for noon representa el mediodía, Additional information / Información adicional 59 DCR-PC7.3-858-174-22 (E,S) - Sony DCR-PC7 | Operating Instructions (English and Spanish) - Page 60
records. When you record You cannot use this camcorder and the DV connecting cable to copy a tape that has recorded the copyright control signals for copyright protection of software. "COPY INHIBIT" appears on the LCD screen, in the viewfinder con esta videocámara. DCR-PC7.3-858-174-22 (E,S) - Sony DCR-PC7 | Operating Instructions (English and Spanish) - Page 61
After using the mini DV cassette Rewind the tape to the beginning, put the cassette in its case, and store it in an upright position. Notas sobre el minicassette DV Para evitar borrar el cassette accidentalmente Deslice hacia fuera la lengüeta de protección del cassette para que la parte roja quede - Sony DCR-PC7 | Operating Instructions (English and Spanish) - Page 62
recording in a cold environment. To save battery power Do not leave the camcorder in Standby mode when not recording to save the battery power. A smooth transition between scenes can be made even if recording ía. Esta también se agota al insertar o expulsar una cinta. 62 DCR-PC7.3-858-174-22 (E,S) - Sony DCR-PC7 | Operating Instructions (English and Spanish) - Page 63
you are recording, set the POWER switch to OFF on the camcorder and replace the battery pack. Leave the tape in the camcorder to obtain a smooth transition between scenes after the battery pack has del paquete de baterías. No es motivo de preocupación y es normal. 63 DCR-PC7.3-858-174-22 (E,S) - Sony DCR-PC7 | Operating Instructions (English and Spanish) - Page 64
after using it, and keep it in a cool place. When the battery pack is installed to the camcorder, a small amount of current flows to the camcorder even if the POWER switch is set to OFF. This shortens battery life. •The battery pack is always discharging even when it is not in use after charging - Sony DCR-PC7 | Operating Instructions (English and Spanish) - Page 65
the battery pack before use. Notes on the terminals If the terminals (metal parts on the back) are not clean, the battery charge duration will be shortened. When the terminals are not clean or when the battery pack No exponga el paquete de baterías a golpes mecánicos. 65 DCR-PC7.3-858-174-22 (E,S) - Sony DCR-PC7 | Operating Instructions (English and Spanish) - Page 66
picture becomes dim. Turn off the power and do not use the camcorder for about 1 hour. How to prevent moisture condensation When bringing the camcorder from a cold place to a warm place, put the camcorder in a plastic bag and allow it to adapt aproximadamente 1 hora). 66 DCR-PC7.3-858-174-22 (E,S) - Sony DCR-PC7 | Operating Instructions (English and Spanish) - Page 67
or o If [a] or [b] happens, clean the video heads with the Sony DVM12CL cleaning cassette (not supplied). Check the picture and if the above problem persists, repeat the cleaning. (Do not repeat cleaning á disponible en su zona, consulte al proveedor Sony más cercano. 67 DCR-PC7.3-858-174-22 (E,S) - Sony DCR-PC7 | Operating Instructions (English and Spanish) - Page 68
Camcorder operation •Operate the camcorder on 7.2 V (battery pack) or 8.4 V (AC power adaptor). •Should any solid object or liquid get inside the casing, unplug the camcorder and have it checked by Sony . No utilice ningún tipo de disolvente que pueda dañar el acabado. 68 DCR-PC7.3-858-174-22 (E,S) - Sony DCR-PC7 | Operating Instructions (English and Spanish) - Page 69
AC power cord forcibly, or put a heavy object on it. This will damage the cord and may cause a fire or an electrical shock. •Be sure that nothing metallic comes into contact with the metal parts la unidad y póngase en contacto con el proveedor Sony más cercano. 69 DCR-PC7.3-858-174-22 (E,S) - Sony DCR-PC7 | Operating Instructions (English and Spanish) - Page 70
AC-V100 [a] [b] Difference in color systems This camcorder is an NTSC system-based camcorder. If you want to view the playback picture on a TV, it must be an NTSC systembased TV. Check the following list. NTSC , República Checa, República Eslovaca, Rusia, Ucrania, etc. DCR-PC7.3-858-174-22 (E,S) - Sony DCR-PC7 | Operating Instructions (English and Spanish) - Page 71
adicional English Trouble check If you run into any problem using the camcorder, use the following table to troubleshoot the problem. Should the difficulty persist, disconnect the power source and contact your Sony dealer or local authorized Sony service facility. Camcorder Power Symptom Cause - Sony DCR-PC7 | Operating Instructions (English and Spanish) - Page 72
LCD BRIGHT is not adjuted properly. m Press + or - to obtain the brightness you want. (p. 16) • The camcorder is not malfunctioning. • The LCD panel is open. m Close the LCD panel. • Incorporated fluorescent tube is worn out. m Please contact your nearest Sony dealer. 72 DCR-PC7.3-858-174-22 (E,S) - Sony DCR-PC7 | Operating Instructions (English and Spanish) - Page 73
the DV connecting cable, recording picture cannot be monitored. Others Symptom The camcorder becomes warm. The supplied Remote Commander does not work. The CHARGE lamp flashes after you charge the battery pack installed in the camcorder. No function works though the power is on. AC power adaptor - Sony DCR-PC7 | Operating Instructions (English and Spanish) - Page 74
with the product with the problem. * If you use a battery pack which you have just bought or which has been left unused for a long time, the CHARGE lamp may flash at the first charging. This does not indicate a problem. Repeat again to charge with same battery pack. 74 DCR-PC7.3-858-174-22 (E,S) - Sony DCR-PC7 | Operating Instructions (English and Spanish) - Page 75
con el proveedor Sony o el servicio técnico Sony local autorizado. pulse el botón RESET situado en la parte trasera de la tapa del compartimiento de videocassettes mientras se usaba en modo CAMERA. m Ajuste el interruptor POWER en OFF y después en CAMERA. (p. 13) • La DCR-PC7.3-858-174-22 (E,S) - Sony DCR-PC7 | Operating Instructions (English and Spanish) - Page 76
interruptor POWER está ajustado en CAMERA u OFF el modo manual para enfocar manualmente Sony DVM12CL de (no suministrado). (p. 67) • No ha ajustado LCD BRIGHT correctamente. m Pulse + o - para obtener el brillo que desee. (p. 16) • No se trata de un mal funcionamiento de la videocámara. 76 DCR-PC7 - Sony DCR-PC7 | Operating Instructions (English and Spanish) - Page 77
Sony más cercano. • Desconecte el cable de conexión DV parte CAMERA o CHARGE no se ilumina. El indicador CHARGE parpadea. Medidas correctivas • Desconecte el cable de alimentación. Vuelva a conectarlo al cabo de aproximadamente 1 minuto. (p. 7) • Consulte la tabla de la página siguiente. 77 DCR-PC7 - Sony DCR-PC7 | Operating Instructions (English and Spanish) - Page 78
problema se encuentra en el paquete de baterías instalado en primer lugar. Póngase en contacto con el proveedor Sony más cercano en relación al problema con el producto. * Si utiliza un paquete de baterías recién la operación para cargar el mismo paquete de baterías. 78 DCR-PC7.3-858-174-22 (E,S) - Sony DCR-PC7 | Operating Instructions (English and Spanish) - Page 79
information / Información adicional English Specifications Video camera recorder System Video recording system Two rotary heads, Helical scanning system Audio recording system Rotary heads, PCM system Video signal NTSC color, EIA standards Usable cassette Mini DV cassette with logo printed Tape - Sony DCR-PC7 | Operating Instructions (English and Spanish) - Page 80
NTSC, normas EIA Videocassette utilizable Videocassette mini DV zoom de potencia combinada, 120x (digital) 10x (óptico) Distancia focal DC OUT: 8,4 V, 1,8 A en modo de funcionamiento Terminal de carga de pila: 8,4 V, 1,4 A en modo de carga Aplicación Paquetes de baterías Sony DCR-PC7.3-858-174-22 (E,S) - Sony DCR-PC7 | Operating Instructions (English and Spanish) - Page 81
terminal cover (p. 10) Remove the cover to install the battery pack. 6 AE LOCK button (p. 35) 7 FADER button (p. 34) 8 Built-in microphone 9 Accessory shoe (p. 18) 0 Eyecup (p. 20) !¡ Viewfinder (p. 89) !™ POWER switch (p. 12, 21) !£ Tape transport buttons (p. 21) p STOP (stop) 0 REW (rewind) · PLAY - Sony DCR-PC7 | Operating Instructions (English and Spanish) - Page 82
!¶ !¢ Cassette compartment (p. 11) !∞ 6 EJECT button (p. 11) !§ Cassette compartment lid (p. 11) !¶ RESET button (p. 71) !¢ Compartimiento del videocassette (p. 11) !∞ Botón 6 EJECT (p. 11) !§ Tapa del compartimiento del videocassette (p. 11) !¶ Botón RESET (p. 75) 82 DCR-PC7.3-858-174-22 (E,S) - Sony DCR-PC7 | Operating Instructions (English and Spanish) - Page 83
) @¢ Toma de AUDIO VIDEO OUT/2 (auriculares) (p. 22, 46, 52) @∞ Botón END SEARCH (p. 24) @§ Botón MENU (p. 28) @¶ Botones v/V (p. 28) @• Botón START/STOP (p. 12) @ª Botón EXECUTE (p. 28) #º Interruptor BATT (batería) LOCK/RELEASE (p. 10) #¡ Receptáculo para trípode (p. 20) 83 DCR-PC7.3-858-174-22 - Sony DCR-PC7 | Operating Instructions (English and Spanish) - Page 84
parts #™ #£ #¢ Identificación de componentes #∞ #§ #¶ #• #ª $º #™ Viewfinder lens adjustment dial (p. 13) #£ Zoom switch (p. 15) #¢ Grip strap (p. 19) #∞ FOCUS/(INFINITY) button (p. 43) #§ Focus ring (p. 43) #¶ Lens #• Recording remoto. $º Toma DV IN/OUT (p. 51) 84 DCR-PC7.3-858-174-22 (E,S) - Sony DCR-PC7 | Operating Instructions (English and Spanish) - Page 85
Recording buttons (p. 54) 7 AUDIO DUB button (p.56) 8 DATA CODE button (p. 48) 9 Power zoom button (p. 15) 0 ZERO SET MEMORY button (p. 49) !¡ Transmitter Point toward the remote sensor to control the camcorder after turning on the camcorder !£ Botón START/STOP (p. 12) 85 DCR-PC7.3-858-174-22 (E,S) - Sony DCR-PC7 | Operating Instructions (English and Spanish) - Page 86
the Parts Identificación de los componentes To prepare the Remote Commander To use the Remote Commander, you must insert two size AA (R6) batteries. Use the supplied size AA (R6) batteries. (1) Remove the battery cover from the Remote Commander. (2) Insert both of the size AA (R6) batteries with - Sony DCR-PC7 | Operating Instructions (English and Spanish) - Page 87
(5) Set the VTR4/ID/VTR2 selector on the Remote Commander to ID. (6) Point the Remote Commander at the camcorder and press p STOP on the Remote Commander. After the beep sound, the ID of the Remote Commander is de menús El pitido no se escucha en el paso 6. 87 DCR-PC7.3-858-174-22 (E,S) - Sony DCR-PC7 | Operating Instructions (English and Spanish) - Page 88
used to distinguish this camcorder from other Sony VCRs to avoid remote control misoperation. If you use another Sony VCR at commander ID is not erased even if the builtin rechageable vanadium-lithium battery gets discharged. Dirección del control remoto Oriente el mando a DCR-PC7.3-858-174-22 (E,S) - Sony DCR-PC7 | Operating Instructions (English and Spanish) - Page 89
funcionamiento !º !¡ !™ !£ STBY 0:13:46:05 !¢ 50min 16BIT !∞ PHOTO !§ DV IN !¶ 20min !• 1 Manual focus/Infinity indicator (p. 43) 2 PROGRAM AE indicator (p. 40) 3 White balance indicator 32) Continued to the next page Continúa en la página siguiente 89 DCR-PC7.3-858-174-22 (E,S) - Sony DCR-PC7 | Operating Instructions (English and Spanish) - Page 90
the parts !¡ Recording mode indicator (p. 14) !™ Recording standby mode indicator (p. 12)/ Tape transport mode indicator !£ Time code indicator (p. 14) !¢ Remaining tape indicator (p. 14) !∞ Audio mode indicator (p. 60) !§ Photo recording indicator (p. 36)/Electronic flash indicator !¶ DV IN - Sony DCR-PC7 | Operating Instructions (English and Spanish) - Page 91
66) 7 The video heads may be contaminated. (p. 67) 8 The clock is not set. If the clock is not set when you press START/ STOP button in the CAMERA mode, the message appears for 5 seconds. 9 Some other trouble has occurred. Disconnect the power source and contact your Sony dealer or local authorized - Sony DCR-PC7 | Operating Instructions (English and Spanish) - Page 92
, 29 C Camera recording 12 Car battery 27 Charging battery pack 7 Charging vanadium-lithium battery 57 Cleaning video heads 67 Clock set 58 Color TV system 4, 70 Connection 46, 51 COPY INHIBIT 60 D, E Data Code 48 DISPLAY 21 Digital zoom 16 DV connecting cable 51 DV format 46 DV IN/OUT
-
 1
1 -
 2
2 -
 3
3 -
 4
4 -
 5
5 -
 6
6 -
 7
7 -
8
-
9
-
10
-
11
-
12
-
13
-
14
-
15
-
16
-
17
-
18
-
19
-
20
-
21
-
22
-
23
-
24
-
25
-
26
-
27
-
28
-
29
-
30
-
31
-
32
-
33
-
34
-
35
-
36
-
37
-
38
-
39
-
40
-
41
-
42
-
43
-
44
-
45
-
46
-
47
-
48
-
49
-
50
-
51
-
52
-
53
-
54
-
55
-
56
-
57
-
58
-
59
-
60
-
61
-
62
-
63
-
64
-
65
-
66
-
67
-
68
-
69
-
70
-
71
-
72
-
73
-
74
-
75
-
76
-
77
-
78
-
79
-
80
-
81
-
82
-
83
-
84
-
85
-
86
-
87
-
88
-
89
-
90
-
91
-
92
 |
 |
DCR-PC7.3-858-174-22(E,S)
3-858-174-
22
(1)
©1996 by Sony Corporation
DCR-PC7
Digital Video
Camera Recorder
Operating Instructions
Before operating the unit, please read this manual thoroughly,
and retain it for future reference.
Manual de instrucciones
Antes de utilizar la unidad, lea este manual por completo y
consérvelo para consultar.
Owner’s Record
The model and serial numbers are located on the bottom.
Record
the serial number in the space provided below.
Refer to these
numbers whenever you call upon your Sony dealer regarding this
product.
Model No.
DCR-PC7
Model No.
AC-V100
Serial No.
Serial No.