Sony FWD-32LX1R Operating Instructions
Sony FWD-32LX1R Manual
 |
View all Sony FWD-32LX1R manuals
Add to My Manuals
Save this manual to your list of manuals |
Sony FWD-32LX1R manual content summary:
- Sony FWD-32LX1R | Operating Instructions - Page 1
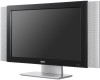
2-633-187-01 (3) FWD-40LX1/32LX1R Flat Panel Display JP Operating Instructions GB Mode d'emploi FR Bedienungsanleitung DE Manual de instrucciones ES Istruzioni per l'uso IT ɹ CS FWD-40LX1/32LX1R 2005 Sony Corporation - Sony FWD-32LX1R | Operating Instructions - Page 2
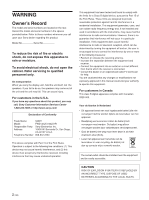
Sony Customer Information Services Center 1-800-222-7669 or http://www.sony.com/ Declaration of Conformity Trade Name: SONY Model: FWD-40LX1/32LX1R Responsible Party: Sony radio/TV technician for help. You are cautioned that any changes or modifications not expressly approved in this manual - Sony FWD-32LX1R | Operating Instructions - Page 3
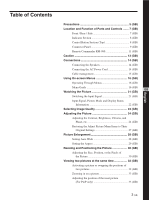
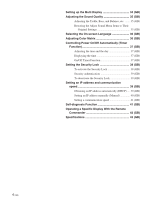
Section 8 (GB) Control Button Section (Top 8 (GB) Connector Panel 9 (GB) Remote Commander RM-980 11 (GB) Caution 13 (GB) Connections 14 ( (GB) Viewing two pictures at the same time 32 (GB) Activating a picture or swapping the positions of two pictures 32 (GB) Zooming in on a picture 33 ( - Sony FWD-32LX1R | Operating Instructions - Page 4
Security Lock 39 (GB) Setting an IP address and communication speed 39 (GB) Obtaining an IP address automatically (DHCP) .... 39 (GB) Setting an IP address manually (Manual 40 (GB) Setting a communication speed 41 (GB) Self-diagnosis Function 41 (GB) Operating a Specific Display With the - Sony FWD-32LX1R | Operating Instructions - Page 5
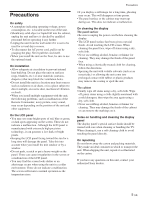
the unit on the floor, be sure to use the optional stand. On installation • Allow adequate air circulation to prevent internal heat problems, such as malfunction of the Remote Commander, noisy picture, noisy sound, may occur depending on the position of the unit and other equipment. On the LCD panel - Sony FWD-32LX1R | Operating Instructions - Page 6
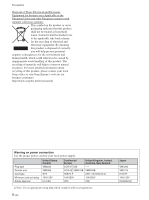
of materials will help to conserve natural resources. For more detailed information about recycling of this product, please contact your local Sony office or visit Sony Europe's web site for business customers: http://www.sonybiz.net/environment Warning on power connection Use the proper power cord - Sony FWD-32LX1R | Operating Instructions - Page 7
Control Button Section (Top)" on page 8 (GB). 3 Stand installation hooks Use these hooks to install the stand (not supplied). 4 SPEAKER Socket Connects the speakers (not page 14 (GB). 6 Connector panel For details on the connector panel, see "Connector Panel" on page 9 (GB). 45 6 Side 6 7 (GB) - Sony FWD-32LX1R | Operating Instructions - Page 8
blinks red, see "Self-diagnosis Function" on page 41 (GB). 1 INPUT button Press to select a signal to be input from the INPUT or OPTION connector. The signal to be input switches as follows each time you press the INPUT button. INPUT1 INPUT2 OPTION1 OPTION2 (only for the FWD-40LX1 the panel, a - Sony FWD-32LX1R | Operating Instructions - Page 9
IN CONTROL S OUT REMOTE Connector Panel 1 2 3 4 5 DVI-HDCP INPUT 1 AUDIO RGB/COMPONENT INPUT 2 AUDIO L AUDIO OUT R S VIDEO IN OUT VIDEO IN 6 7 OPTION1 Slot (VIDEO/COM ) VIDEO INPUT ADAPTOR OUT AUDIO IN L R 8 OPTION2 Slot (VIDEO) (Only for the FWD-40LX1) Location and - Sony FWD-32LX1R | Operating Instructions - Page 10
VIDEO port) (Only for the FWD-40LX1) This slot supports video signals. A blank panel is attached to this slot for FWD40LX1. For details on installation, consult your Sony dealers. VIDEO/S VIDEO input/output adaptor BKMFW10 instruction manual. AUDIO IN OUT IN RGB/COMPONENT ACTIVE THROUGH 10 (GB) - Sony FWD-32LX1R | Operating Instructions - Page 11
Each press toggles between Vivid, Standard, and User 1 to 3. 8 ASPECT button Press to index numbers, see "Operating a Specific Display With the Remote Commander" on page 42 (GB). qd VOLUME +/- . Note You cannot operate this button for the FWD-32LX1R that does not have the OPTION2 slot. qg OPTION1 - Sony FWD-32LX1R | Operating Instructions - Page 12
operation, batteries will last up to half a year. If the Remote Commander does not operate properly, the batteries might be exhausted sooner. in the standby mode. • The Control Mode in the Remote menu is set to "Display + Remote" or "Remote Only." For details on the Control Mode, see "Control Mode - Sony FWD-32LX1R | Operating Instructions - Page 13
This will allow for proper ventilation. • The ambient temperature must be 0 °C to +35 °C (32 °F to 95 °F). • When installing the display horizontally, use the display stand SU-42FW/32FW (not supplied) as a stand. • Regarding the installation of hardware such as brackets, screws, or bolts, we cannot - Sony FWD-32LX1R | Operating Instructions - Page 14
may cause hum and other noise. • To disconnect the cable, pull it out by grasping the plug. Never pull the cable itself. • Refer to the instruction manual of the equipment to be connected. • Insert the plug securely into the AC IN socket. • Use one of the two AC plug holders (supplied) that - Sony FWD-32LX1R | Operating Instructions - Page 15
bundle the cables with the supplied cable holders (×6 for the FWD-40LX1 and ×4 for the FWD32LX1R). Choose three successive blank parts of the air vents for the cable holder on the FWD-40LX1. Choose six out of eight holes on the FWD-32LX1R. Attach the cable holders in the illustration below. When - Sony FWD-32LX1R | Operating Instructions - Page 16
in these operating instructions for the case of operation using the Remote Commander. The M/m and ENTER buttons on the Remote Commander have the menu level, press M/m to move the cursor to and press ENTER or - Sony FWD-32LX1R | Operating Instructions - Page 17
) PAP: Off Active Picture Picture Size Picture Position Select Set ENTER Exit MENU For details, see "Viewing two pictures at the same time" on page 32 (GB). 17 (GB) - Sony FWD-32LX1R | Operating Instructions - Page 18
: Display: Color Matrix HD Mode: RGB Mode Sync Mode: Illumination: Remote Standard Off Off Off 1080i H/Comp High Select Set ENTER Exit MENU Power not be displayed. • Signals of the synchronous mode can be supported only with INPUT2. • Sync Mode settings cannot be carried out for the input through the - Sony FWD-32LX1R | Operating Instructions - Page 19
the brightness of the "SONY" logo on the front of the display unit. Remote This menu is used for remote control settings. Index Number the 1POWER switch on the display unit or the POWER ON button on the Remote Commander to switch the display unit on. The display unit automatically enters the power - Sony FWD-32LX1R | Operating Instructions - Page 20
FW32 or BKM-FW50 is installed into the OPTION1 slot. Model Name Indicates the model name. Serial Number Indicates the serial number. Operation Time FW32 or BKM-FW50. DHCP: Automatic configuration to set an IP address. Manual: Manual configuration to set an IP address. For details, see "Setting an - Sony FWD-32LX1R | Operating Instructions - Page 21
the equipment connected to the connectors of the option 1 or 2 slot. Watching the Picture Press INPUT1, INPUT2, OPTION1 or OPTION2 button on the Remote Commander to switch the input signal. When multiple formats of signals can be input to the selected input connector, the indication changes every - Sony FWD-32LX1R | Operating Instructions - Page 22
menu appears on the screen. CUSTOM SETUP Power Saving: Speaker Out: Closed Caption: Display: Color Matrix: HD Mode: RGB Mode: Sync Mode: Illumination: Remote Standard Off Off Off YO/nPB/PR 1080i DTV H/Comp High Select Set ENTER Exit MENU 2 Press M/m to set "Display" to "Off," then press - Sony FWD-32LX1R | Operating Instructions - Page 23
input signal is computer RGB. 480 / 60I (e.g.) The selected input signal is component video. NTSC (e.g.) The selected input signal is NTSC. Not Supported Signal The selected input signal is nonsupported signal. No Sync There is no input signal. INPUT1 DVI The signal mode of INPUT1 is set to - Sony FWD-32LX1R | Operating Instructions - Page 24
Selecting Image Quality / Adjusting the Picture Selecting Image Quality You can set an image quality suitable for the type of picture or the brightness of the location where the unit is installed. 1 Press MENU. The main menu appears on the screen. PICTURE/SOUND CONTROL Picture Mode: Vivid - Sony FWD-32LX1R | Operating Instructions - Page 25
characteristics of the original. While showing two pictures, only the active picture will be adjusted. Dynamic Picture Enhances contrast by making white brighter and black darker. 1 Select "Dynamic Picture" with M/m and press ENTER. The following menu appears on the screen. PICTURE/SOUND CONTROL - Sony FWD-32LX1R | Operating Instructions - Page 26
Adjusting the Picture 3 Press ENTER to return to the Adjust Picture menu. While showing two pictures, both pictures will be adjusted. Color Temp. You can set color temperature. Either select one from "Cool," "Neutral," or "Warm," or set values for each gain separately. 1 Select "Color Temp." with - Sony FWD-32LX1R | Operating Instructions - Page 27
Restoring the Adjust Picture Menu Items to Their Original Settings 1 In the Adjust Picture menu, press M/m to move the cursor (yellow) to "Reset" and press ENTER. The following menu appears on the screen. PICTURE/SOUND CONTROL Adjust Picture Color Correct.: Gamma Correct.: Reset Off Mid Cancel OK - Sony FWD-32LX1R | Operating Instructions - Page 28
Picture Enlargement Picture Enlargement You can enlarge pictures to suite your taste. For Wide Mode, the following choices are available. Original Picture (Picture Type) Enlarged Picture Wide Zoom Ordinary pictures with a 4:3 aspect ratio (screen aspect ratio: 4:3). Images are enlarged - Sony FWD-32LX1R | Operating Instructions - Page 29
3 Press M/m to move the cursor (yellow) to "Wide Setup" and press ENTER. The following menu appears on the screen. SCREEN CONTROL Wide Setup Auto Wide: 4:3 Mode: On Wide Zoom Select Set ENTER Exit MENU 4 Press M/m to move the cursor (yellow) to "Auto Wide" and press ENTER. The following menu - Sony FWD-32LX1R | Operating Instructions - Page 30
image, there may be times when noise continues to occur even after you have used Auto Adjust. In such cases, adjust the dot phase manually. Adjusting manually (1) Select the item you want to adjust and press ENTER. The following appears on the screen. (When you select "Dot Phase") Dot Phase: 15 - Sony FWD-32LX1R | Operating Instructions - Page 31
H Size Select "H Size" with M/m and press ENTER. Adjust the horizontal size of the picture with M/m/ - Sony FWD-32LX1R | Operating Instructions - Page 32
on the main picture. 5 Press ENTER to return to the previous screen. 32 (GB) Select Set ENTER Exit MENU 2 Select the Active Picture mode with you press < on the Remote Commander, and the picture on the right will be activated when you press , on the Remote Commander. When PinP is selected - Sony FWD-32LX1R | Operating Instructions - Page 33
will be activated when you press < on the Remote Commander, and the inset picture will be activated when you press , on the Remote Commander. Zooming in on a picture When P&P is FW12. • 2 motion pictures of different TV systems may not be displayed properly due to difference in the signal format. 33 - Sony FWD-32LX1R | Operating Instructions - Page 34
Setting up the Multi Display Setting up the Multi Display You can make settings for connecting multiple display units to form a video wall. 1 Press MENU. The main menu appears on the screen. PICTURE/SOUND CONTROL Picture Mode: Vivid Adjust Picture Adjust Sound Select Set ENTER Exit MENU - Sony FWD-32LX1R | Operating Instructions - Page 35
Adjusting the Sound Quality When a speaker SS-SP40FW/32FW (not supplied) installed, you can adjust sound treble level, bass level, or balance of the speaker (left and right) volume. The surround mode can also be set. Adjusting the Treble, Bass, and Balance, etc. Press MENU to show the main menu and - Sony FWD-32LX1R | Operating Instructions - Page 36
Closed Caption: Display: Color Matrix: HD Mode: RGB Mode: Sync Mode: Illumination: Remote Standard Off Off Off Y/PB/PR 1080i DTV H/Comp High Select Set ENTER Exit 1080I or 720P. Refer to the operating instructions of each device for details on the settings. 5 Press ENTER to return to the - Sony FWD-32LX1R | Operating Instructions - Page 37
time, the internal battery may be exhausted. Please contact your authorized Sony dealer to have the battery replaced. Controlling Power On/Off Automatically corner of the screen. When you press the DISPLAY button on the Remote Commander, the signal currently input and the Picture Mode appear. If - Sony FWD-32LX1R | Operating Instructions - Page 38
unit. Once the Security Lock is set, the user is prompted to enter a password when the display . If you forget the password, consult with qualified Sony personnel. TIMER/CLOCK Every Day Every day: On menu. 2 Enter a password. Enter a four digit password with MENU, M/m, ENTER. ("ENTER, ENTER, - Sony FWD-32LX1R | Operating Instructions - Page 39
Setting the Security Lock / Setting an IP address and communication speed 3 Enter the password again for re-confirmation. Re-enter new password key. Setting an IP address and communication speed Be sure to remember this password. Use : MENU ENTER Cancel : Other key The setting is finished - Sony FWD-32LX1R | Operating Instructions - Page 40
or numeric keys on the remote commander and press ENTER or ,. The cursor moves to the next box. INITIAL SETUP/INFORMATION Manual IP Address: Subnet Mask ) for each of the four boxes and press ENTER. The following menu appears on the screen. INITIAL SETUP/INFORMATION Manual IP Address: Subnet Mask: - Sony FWD-32LX1R | Operating Instructions - Page 41
pattern informs you of the display's current condition. If the POWER/STANDBY indicator flashes, check the number of flashes and contact your authorized Sony dealer. 1 Check the flashing pattern of the POWER/ STANDBY indicator. The indicator flashes (with an image showing on the display) or flashes - Sony FWD-32LX1R | Operating Instructions - Page 42
: Vivid Adjust Picture Adjust Sound Index Number 117 . . . 2 Input the index number of the display you want to operate using the 0 - 9 buttons on the Remote Commander. The input number appears right next to the index number of each display. Input Number 123 456 789 0 ON SET OFF Index Number - Sony FWD-32LX1R | Operating Instructions - Page 43
LCD Panel Display resolution 1366 dots (horizontal) × 768 lines (vertical) FWD-40LX1: Pixel pitch 0.648 (horizontal) × 0.648 (vertical) mm (1⁄32 × 1⁄32 inches) Picture size 885 (horizontal) × 498 (vertical) mm (34 7⁄8 × 19 5⁄8 inches) Panel size 40-inch (diagonal 1016 mm) FWD-32LX1R - Sony FWD-32LX1R | Operating Instructions - Page 44
holder FWD-40LX1: (4) FWD-32LX1R: (6) Digital RGB (DVI-D) Signal Cable (Single Link) (1) Component video signal cable (D-sub 15-pin - RCA×3) (1) BNC-RCA adaptor (1) Remote Commander RM-980 (1) Size AAA (R03) batteries (2) Operating instructions (1) Optional accessories Display stand SU - Sony FWD-32LX1R | Operating Instructions - Page 45
Printed on 100% recycled paper. Sony Corporation Printed in Japan
-
 1
1 -
 2
2 -
 3
3 -
 4
4 -
 5
5 -
 6
6 -
 7
7 -
8
-
9
-
10
-
11
-
12
-
13
-
14
-
15
-
16
-
17
-
18
-
19
-
20
-
21
-
22
-
23
-
24
-
25
-
26
-
27
-
28
-
29
-
30
-
31
-
32
-
33
-
34
-
35
-
36
-
37
-
38
-
39
-
40
-
41
-
42
-
43
-
44
-
45
 |
 |
FWD-40LX1/32LX1R
2-633-187-
01
(3)
2005 Sony Corporation
Operating Instructions
Mode d’emploi
Bedienungsanleitung
Manual de instrucciones
Istruzioni per l’uso
GB
FR
DE
ES
IT
取扱説明書
FWD-40LX1/32LX1R
Flat Panel Display
JP
この取扱説明書には、事故を防ぐための重要な注意事項と製品の取り扱
いかたを示してあります。
この取扱説明書をよくお読みのうえ、
製品を
安全にお使いください。お読みになったあとは、いつでも見られるとこ
ろに必ず保管してください。
お買い上げいただきありがとうございます。
電気製品は安全のための注意事項を守らないと、
火災や人身事故になることがあります。
CS