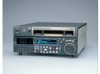
Sony HDWM2000/20 Operation Manual - Page 16
CHANNEL CONDITION indicator, Menu control buttons, REC recording controls, PB playback controls, Green
 |
View all Sony HDWM2000/20 manuals
Add to My Manuals
Save this manual to your list of manuals |
Page 16 highlights
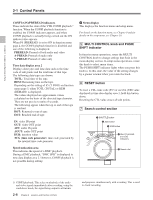
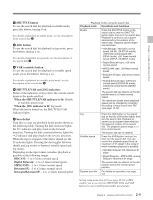
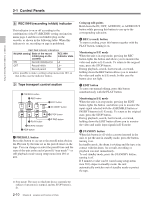
Chapter 2 Location and Function of Parts 2-1 Control Panels 5 REC (recording) controls These individually adjust the recording levels on channels 1 to 4, and cue audio. To set the recording level, put the unit into E-E mode, press to protrude the control knobs and adjust the level while watching the level meters. When the control knobs are pushed in, the recording levels return to the preset levels and cannot be adjusted. For details about selecting the E-E mode, see the description of the REC button in the tape transport control section (see page 2-10) and function menu HOME page (see page 9-3). 6 PB (playback) controls These adjust individually the playback levels on channels 1 to 4, and cue audio. During playback, press to protrude the control knobs and adjust the level while monitoring the audio level indication on the level meters in the audio setting display section. When the control knobs are pushed in, the playback levels return to the preset levels, and cannot be adjusted. 2 CHANNEL CONDITION indicator A three-color indicator shows the state of the playback signal. Green: The state of the playback signal is good. Yellow: The playback signal is somewhat deteriorated, but playback is possible. Red: The playback signal is deteriorated. When this indicator remains on, head cleaning or an internal inspection is necessary. 3 Menu control buttons These buttons are used for function menu (see the following section "Overview of the function menu") and setup menu (see Chapter 10) operations. The page buttons (V, v, and HOME) select menu pages, and the function buttons (F1 to F6) make function settings. V: Selects the next page in the order HOME t 1 t 2 t 3 t 4 t HOME. v: Selects the next page in the order HOME t 4 t 3 t 2 t 1 t HOME. HOME: Selects the function menu HOME page. When at least one user-defined function key is set in the HOME2 page, pressing the HOME button toggles the menu page display between HOME and HOME2. F1 to F6: Make settings for the items displayed in the upper line of the menu display (the menu item display line). Pressing one of these buttons changes the setting for the corresponding item and displays the setting in the lower line of the menu display. If there is no setting displayed in the lower line of the menu display, even though a menu item is displayed in the upper line, pressing the corresponding function button moves to a lower menu level. Overview of the function menu The function menu provides convenient access to frequently used function settings, such as input video signal selection and time code settings. For details on the function menu, see Chapter 9. 2-6 Chapter 2 Location and Function of Parts
-
 1
1 -
2
-
3
-
4
-
5
-
6
-
7
-
8
-
9
-
10
-
 11
11 -
 12
12 -
 13
13 -
 14
14 -
 15
15 -
 16
16 -
 17
17 -
 18
18 -
 19
19 -
 20
20 -
 21
21 -
22
-
23
-
24
-
25
-
26
-
27
-
28
-
29
-
30
-
31
-
32
-
33
-
34
-
35
-
36
-
37
-
38
-
39
-
40
-
41
-
42
-
43
-
44
-
45
-
46
-
47
-
48
-
49
-
50
-
51
-
52
-
53
-
54
-
55
-
56
-
57
-
58
-
59
-
60
-
61
-
62
-
63
-
64
-
65
-
66
-
67
-
68
-
69
-
70
-
71
-
72
-
73
-
74
-
75
-
76
-
77
-
78
-
79
-
80
-
81
-
82
-
83
-
84
-
85
-
86
-
87
-
88
-
89
-
90
-
91
-
92
-
93
-
94
-
95
-
96
-
97
-
98
-
99
-
100
-
101
-
102
-
103
-
104
-
105
-
106
-
107
-
108
-
109
-
110
-
111
-
112
-
113
-
114
-
115
-
116
-
117
-
118
-
119
-
120
-
121
-
122
-
123
-
124
-
125
-
126
-
127
-
128
-
129
-
130
-
131
-
132
-
133
-
134
-
135
-
136
-
137
-
138
-
139
-
140
-
141
-
142
-
143
-
144
-
145
-
146
-
147
-
148
-
149
-
150
-
151
-
152
-
153
-
154
-
155
-
156
 |
 |
