Sony PEG-NZ90 Intellisync User Guide - Page 25
Conflict Resolution Dialog Buttons, Update, Conflict Resolution Notes
 |
View all Sony PEG-NZ90 manuals
Add to My Manuals
Save this manual to your list of manuals |
Page 25 highlights
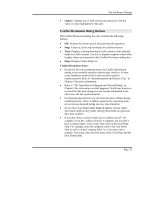
The Intellisync Dialogs • Update: Updates one or both records (as necessary) with the value or values highlighted in the grid. Conflict Resolution Dialog Buttons The Conflict Resolution dialog box also contains the following buttons: • OK: Initiates the chosen action and continues the operation. • Stop: Takes no action and terminates the synchronization. • View: Displays a dialog showing the full contents of the selected field(s) for both systems. Use this to display complete values when lengthy values are truncated in the Conflict Resolution dialog box. • Help: Displays Online Help text. Conflict Resolution Notes: • Except for first run synchronizations, the Conflict Resolution setting is not normally needed to resolve data conflicts. In most cases, Intellisync knows how to edit records to achieve synchronization. Refer to "Synchronization and History Files" in Chapter 4 for more information. • Refer to "The Same Record Changed and Deleted Dialog" in Chapter 4 for information on what happens if Intellisync discovers a record that has been changed in one system and deleted in the other since the last synchronization. • Overlapping appointments are not treated as data conflicts during synchronizations. (Note: Conflicts generated by repeating items are not always detected during one-way data transfers.) • Do not leave Last Name fields blank in address records. Since Last Name fields are key fields, leaving them blank can generate false data conflicts. • If you don't have a name to enter into an address record-for example, if you have address data for a company, but you don't have a contact name-place some other value in the Last Name field. For example, enter the company name in the Last Name field as well as in the Company field. Or, if you have only a contact's first name, place the first name in the Last Name and the First Name fields. Page 25
-
 1
1 -
2
-
3
-
4
-
5
-
6
-
7
-
8
-
9
-
10
-
11
-
12
-
13
-
14
-
15
-
16
-
17
-
18
-
19
-
 20
20 -
 21
21 -
 22
22 -
 23
23 -
 24
24 -
 25
25 -
 26
26 -
 27
27 -
 28
28 -
 29
29 -
 30
30 -
31
-
32
-
33
-
34
-
35
-
36
-
37
-
38
-
39
-
40
-
41
-
42
-
43
-
44
-
45
-
46
-
47
-
48
-
49
-
50
-
51
-
52
-
53
 |
 |
