TEAC W-1200 Owners Manual English Francais Espanol - Page 14
Connections, Complete all other connections before turning, the unit on.
 |
View all TEAC W-1200 manuals
Add to My Manuals
Save this manual to your list of manuals |
Page 14 highlights
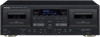
Connections VV Complete all other connections before turning the unit on. A oo Carefully read the manuals of the devices that you are connect- ing and follow their instructions when making connections. oo Do not bundle connecting cables with power cords. Doing so could cause noise. oo Connect all plugs completely. Audio cables (RCA) B W-1200 (rear) Amplifier REC PLAY (OUT) (IN) TAPE/MD/CD-R tuner, etc. Speakers Connection example C Wall outlet A Analog audio input/output (LINE IN/OUT) connectors LINE IN (line inputs) Connect these to the line output connectors of the amplifier or the output connectors of the CD player or other device. LINE OUT (line outputs) Connect these to the tape/MD/CD-R, AUX or other input connectors of the amplifier. Refer to the connection diagram to the left. B Voltage selector Use to switch the voltage to either 230 V or 120 V. ATTENTION The voltage selector is only available on units for specific markets. IN USA/CANADA, USE ONLY ON 120V SUPPLY. C Power cord After completing all other connections, plug the power plug into a power outlet. oo Unplug the cord from the outlet when not using the unit for a long time. VV CAUTION oo Be sure to connect the power cord to an AC outlet that supplies the correct voltage. Connection to an outlet that supplies incorrect voltage could cause fire or electric shock. oo Hold the power plug when plugging it into an outlet or unplugging it. Never pull or yank on the power cord. 14
-
 1
1 -
2
-
3
-
4
-
5
-
6
-
7
-
8
-
 9
9 -
 10
10 -
 11
11 -
 12
12 -
 13
13 -
 14
14 -
 15
15 -
 16
16 -
 17
17 -
 18
18 -
 19
19 -
20
-
21
-
22
-
23
-
24
-
25
-
26
-
27
-
28
-
29
-
30
-
31
-
32
-
33
-
34
-
35
-
36
-
37
-
38
-
39
-
40
-
41
-
42
-
43
-
44
-
45
-
46
-
47
-
48
-
49
-
50
-
51
-
52
-
53
-
54
-
55
-
56
-
57
-
58
-
59
-
60
-
61
-
62
-
63
-
64
-
65
-
66
-
67
-
68
-
69
-
70
-
71
-
72
-
73
-
74
-
75
-
76
-
77
-
78
-
79
-
80
-
81
-
82
-
83
-
84
-
85
-
86
-
87
-
88
-
89
-
90
-
91
-
92
-
93
-
94
-
95
-
96
 |
 |
