TEAC W-1200 Owners Manual English Francais Espanol - Page 23
Dubbing, TAPE 1 compartment and a cassette tape
 |
View all TEAC W-1200 manuals
Add to My Manuals
Save this manual to your list of manuals |
Page 23 highlights
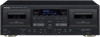
ENGLISH Dubbing TAPE 1 can be dubbed to TAPE 2. 1 Load a cassette tape for playback into the TAPE 1 compartment and a cassette tape for recording into the TAPE 2 compartment. 2 Press the DUB START (dubbing start) button to start dubbing. oo The TAPE 2 REC MUTE (record muting) can be used to record silences (page 20) even while dubbing. (The TAPE 1 REC MUTE (record muting) button cannot be used.) Erasing unnecessary parts and creating spaces between songs is possible while dubbing. oo The pitch control function is disabled while dubbing. oo The recording level cannot be adjusted while dubbing. oo Use the same procedures to dub the other side of the tape as necessary. oo To disable mic mixing, do not connect a mic to the MIC connector on the front of the unit. Dubbing when a mic is connected will result in a slightly lower recording level. This will start dubbing at normal speed. During dubbing, the dubbing (NORM DUB) indicator lights on the display. oo To start dubbing using the remote control, press both DUB START (dubbing start) buttons on it at the same time. oo The DUB START (dubbing start) button does not work immediately after the tape is fast-forwarded or rewound to the end. Wait for 5 seconds or more before pressing the button. When TAPE 1 playback stops, dubbing also stops automatically. Pausing dubbing Press the TAPE 2 PAUSE button to pause dubbing. When paused, TAPE 1 will continue playing, but TAPE 2 will not record. Press it again to resume dubbing. Stopping dubbing before playback ends Press the TAPE 1 or TAPE 2 stop (8) button. 23
-
 1
1 -
2
-
3
-
4
-
5
-
6
-
7
-
8
-
9
-
10
-
11
-
12
-
13
-
14
-
15
-
16
-
17
-
 18
18 -
 19
19 -
 20
20 -
 21
21 -
 22
22 -
 23
23 -
 24
24 -
 25
25 -
 26
26 -
 27
27 -
 28
28 -
29
-
30
-
31
-
32
-
33
-
34
-
35
-
36
-
37
-
38
-
39
-
40
-
41
-
42
-
43
-
44
-
45
-
46
-
47
-
48
-
49
-
50
-
51
-
52
-
53
-
54
-
55
-
56
-
57
-
58
-
59
-
60
-
61
-
62
-
63
-
64
-
65
-
66
-
67
-
68
-
69
-
70
-
71
-
72
-
73
-
74
-
75
-
76
-
77
-
78
-
79
-
80
-
81
-
82
-
83
-
84
-
85
-
86
-
87
-
88
-
89
-
90
-
91
-
92
-
93
-
94
-
95
-
96
 |
 |
