Vivitar DVR 830XHD Camera Manual - Page 44
Audio Mode
 |
View all Vivitar DVR 830XHD manuals
Add to My Manuals
Save this manual to your list of manuals |
Page 44 highlights
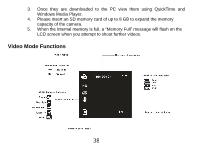
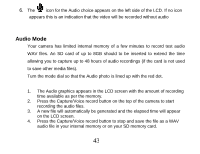
6. The icon for the Audio choice appears on the left side of the LCD. If no icon appears this is an indication that the video will be recorded without audio Audio Mode Your camera has limited internal memory of a few minutes to record test audio WAV files. An SD card of up to 8GB should to be inserted to extend the time allowing you to capture up to 48 hours of audio recordings (if the card is not used to save other media files). Turn the mode dial so that the Audio photo is lined up with the red dot. 1. The Audio graphics appears in the LCD screen with the amount of recording time available as per the memory. 2. Press the Capture/Voice record button on the top of the camera to start recording the audio files. 3. A new file will automatically be generated and the elapsed time will appear on the LCD screen. 4. Press the Capture/Voice record button to stop and save the file as a WAV audio file in your internal memory or on your SD memory card. 43
-
 1
1 -
2
-
3
-
4
-
5
-
6
-
7
-
8
-
9
-
10
-
11
-
12
-
13
-
14
-
15
-
16
-
17
-
18
-
19
-
20
-
21
-
22
-
23
-
24
-
25
-
26
-
27
-
28
-
29
-
30
-
31
-
32
-
33
-
34
-
35
-
36
-
37
-
38
-
 39
39 -
 40
40 -
 41
41 -
 42
42 -
 43
43 -
 44
44 -
 45
45 -
 46
46 -
 47
47 -
 48
48 -
 49
49 -
50
-
51
-
52
-
53
-
54
-
55
-
56
-
57
-
58
-
59
-
60
-
61
-
62
-
63
-
64
-
65
-
66
-
67
-
68
-
69
-
70
-
71
-
72
-
73
-
74
-
75
-
76
-
77
-
78
-
79
-
80
-
81
-
82
-
83
-
84
 |
 |